Wednesday, October 9, 2019

Halloween Scenes with Creative PaperClay

Hello again!  This month I bring you Halloween scenes from my Middle School polymer clay after-school program.  I offer clay sessions 4 times a year.  This is the first, running from September-October, with 6 one hour classes in the session.  I never know how many students will take advantage of the after-school program.  This time around I have 4, which is a joy when you consider I normally have a classroom full (20-30 students) during my "normal" class times.

I introduced the students to foil armatures and Creative PaperClay to start the session.  With a variety of ability levels, I was pleased to see all of them take to the project so easily.  We began with sketches of what each envisioned for individual scenes.  After that, it was time to get to work!

I handed them each a large piece of foil.  I demoed how to scrunch the foil (carefully) into the basic tree trunk shape.
The top was then torn into a few sections and scrunched (yes, that is the technical term) into branches.
 

I encouraged them to create the shape slowly.  Foil can be compacted more as the desired shape emerges.  They excited got to work on their trees.


Now the fun part: Covering the armature in Creative PaperClay.  I showed them how easy it is to use, flattening pieces with my fingers or a rolling pin. 
I also showed them how areas can be smoothed out by dipping a finger into water and rubbing over the spot that needs a tweak. 
They all got to work.


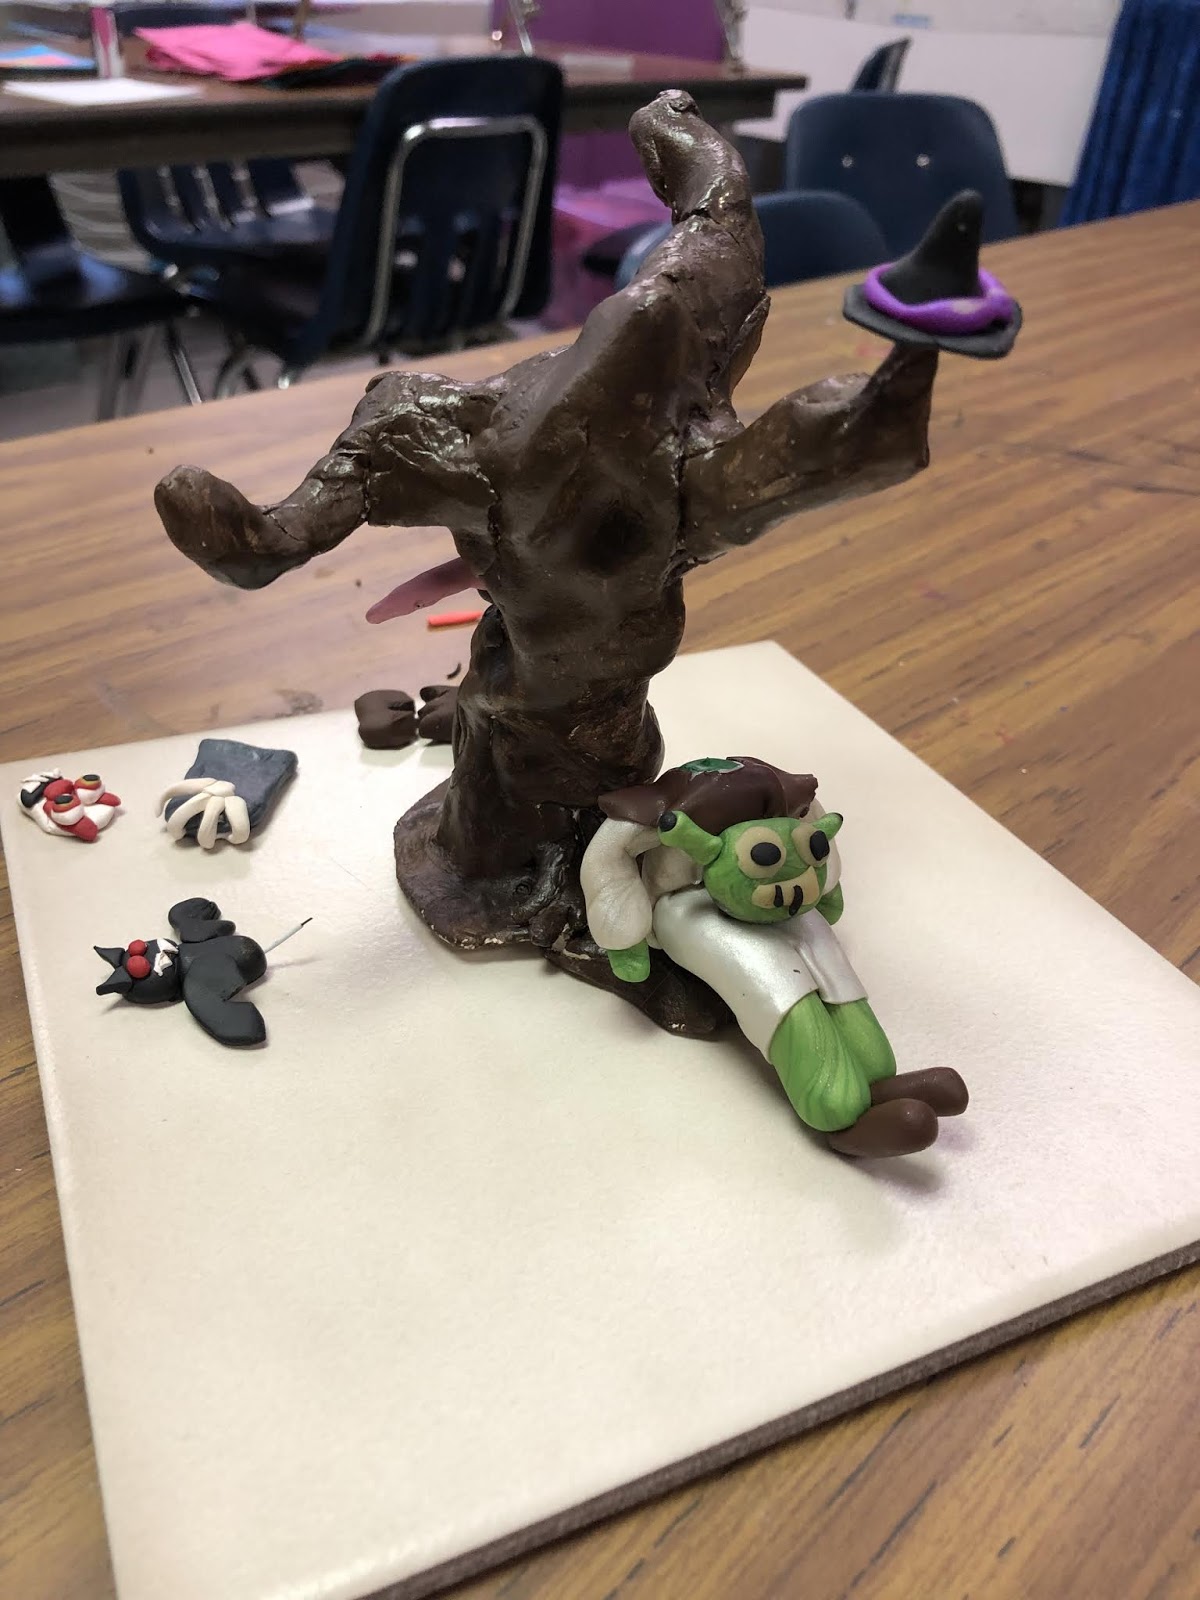
  Soon we had 4 amazing haunted trees!  A couple of the students also created accessories for their scenes from the PaperClay: a tombstone, a creepy hand coming out of the tree, a tiny mouse friend.  All were set aside to dry until the next class.  

The plan was to paint the trees and then start on accessories for the scene, but all decided to work on polymer pieces before painting.  I have to admit it was a great decision on their parts, because when we finally painted the trees and glued them to ceramic tile bases the scenes were able to come to life! 
Let the painting commence...


Once the trees and accessories were painted it was time to begin to put scenes together (goodie!!).
Pieces were positioned and glued.  Some (notice the swing) were hung in place. 
Do you see Hannah's mouse?  Such teeny tiny details created from the Paperclay!

  Check out the swirly detail in Nia's tree!  She designed many of the swirls with open centers to hang pieces.
Isabelle had to have a swing (one of our engineering challenges).  I think it worked out great!  
Peter still wants to add a few touches.  His tombstone needs to be glued in place, but first, he wanted to create a hill type base for it (back to the Creative PaperClay).  I hope you can see the creepy hand reaching out of the tree towards Shrek!


I was so excited to watch the excitement as the original sketches came to life!  All but one looked and decided a few more touches are needed.   I am super excited about what they accomplished.  I can hardly wait to see what these talented students come up with next!


Monday, October 7, 2019

Storing your Creative Paperclay® and Delight Clay™

Hello everyone, have you seen my new show called Clay Talk? It airs on Facebook Live the first Thursday of every month on the Creative Paperclay page. Just in case you missed it, I am going to post the videos here on the blog each month along with a summary of what we discussed.


For our first show we discussed different ways of storing your clay once you have opened it. As you know, air dry clays will begin to dry when they come in contact with air so we need to take care both when working with them and storing them. Below are a list of methods for storing your clay, each of which are discussed in the video below.


  1. Ziploc bags or storage bags with a seal at the top
  2. air tight food storage containers
  3. Glad Press & Seal
  4. heat sealer


I hope this was helpful. If you have any questions just ask away in the comment section below. You can also learn a lot on the Creative Paperclay Q & A Group on Facebook. Don't forget to to join the live show the 1st Thursday of every month.

Thanks for stopping by!

Suzette


Friday, October 4, 2019

October 2019 First Friday Fan Day


Need some inspiration for your next Creative Paperclay® project? Check out what folks are making with Creative Paperclay™.


Colorful Mobile
Paperclay Coasters
Paperclay Beads
Incense Holder
Wall Clock

How to Make a Porcelain-like Rose
Halloween Coffin
Creepy Kirk the Ghost

HELP US FIND YOU!!
  1. Use the hashtag #CreativePaperclay on all your social networks.
  2. When using Facebook, be sure the your posts and images using the #Creative Paperclay hashtag are set to public, otherwise we won't be able to find you.
  3. Share your projects on the Creative PaperClay® Facebook page.
I'm always trolling the web, looking for great Creative Paperclay® projects. If you find something, post it on our Facebook page.

GOT QUESTIONS???

Find the answers to your paperclay questions. See what other folks are creating. Stop by our Facebook group and say, "Hi!" Creative Paperclay Q&A
Carole

Thursday, October 3, 2019

Architectural Queen Bee Amulet


Architectural Queen Bee Amulet 


This pendant makes a statement.  The architectural elements are very shrine like and reminiscent of old world buildings.

Supplies:

Creative Paperclay 
Black Gesso
Acrylic paint (I used DecoArt Metallics)
Composition Metal Leaf
Pewter Beads - TierraCast
Accent Beads
5 Eye Pins 
Fine Wire (30-36 ga.)
3 Headpins
Rubber Stamps and Texture sheets (by: Victoria James Real Textures)
Cotton Cording or Other Stringing Materials 


Start by rolling out a piece of Creative Paperclay.  About 1/4 of an inch is good.  


Be sure to work on a non stick surface.  
If you don't have an acrylic rod or brayer, use a glass or jar.


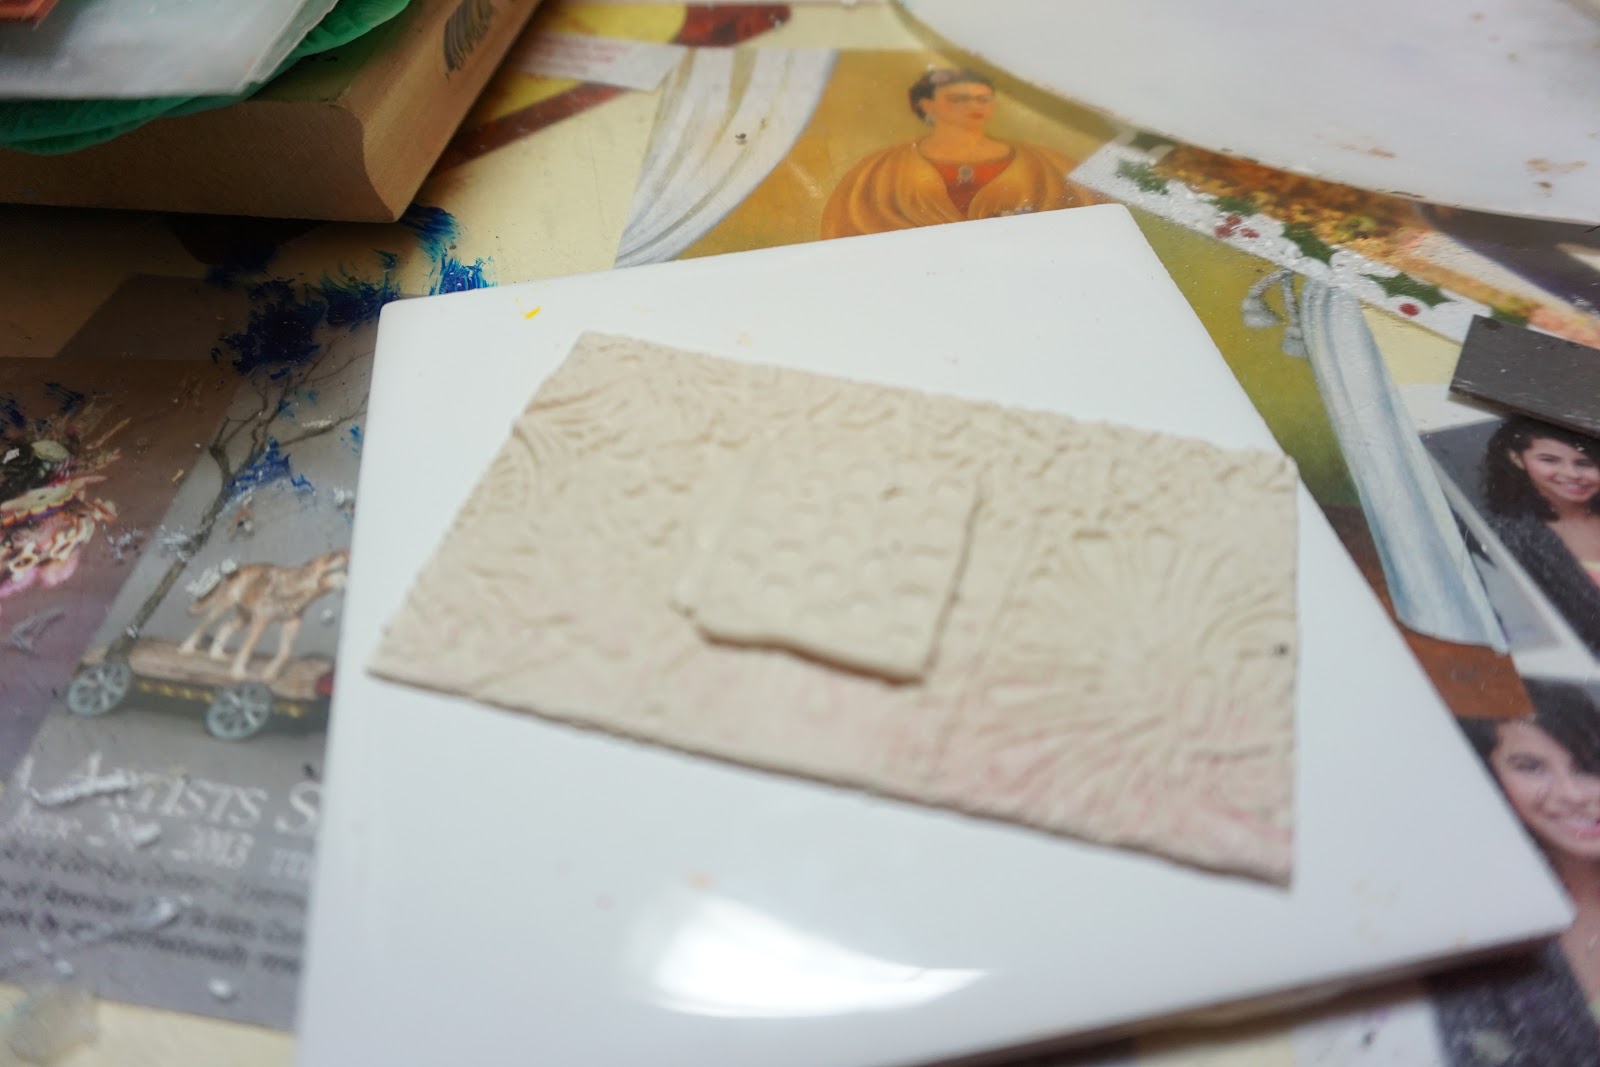
Texture your Creative Paperclay with a variety of rubber stamps and texture sheets.  
Use a bit of oil or WD40 as a release agent.


Keep texturing until the full sheet is covered.


Cut out a rectangle or any shape you like.
I chose to us a standard business card.  I like this size and shape.
That;s my cute little abulelita chillin' on her hammock.


Roll out an texture another piece of Creative Paperclay.  I used a honeycomb pattern. 
This will be your centerpiece.  Cut out a square that frames your focal bead nicely.  


Decide on the placement of your focal tile.


Put a blob of Creative Paperclay and water made into a paste. 


Place Focal center in desired place on background sheet.


Frame out the focal tile with more textured pieces.


Add eyepins and wired bead accents wherever you ant a bit of bling.


I added a flat back crystal.  I should have added more.  Attach your focal bead with wire.  Like a staple.  You just want the holes at this point.  We will add it after painting the piece.


Decide on your final embellishments.  Cut any loose wires and inset them into the wet clay.
Make holes for your stringing materials.

Let it dry thoroughly.  


Coat with black gesso.  Paint with acrylic paints.  
I chose purple and gold metallic because it's regal!
Add focal bead with wire staple.
Add dangly bits and cording.

 If you decide to make your own please be sure to share a few photos with me!

I hope that you have enjoyed this project as much as I have!  I'll be back with more "What's On My Workbench Wednesday" fun on the first Wednesday of each month.


Until then, stay cool and don’t forget the sun screen!


Fin - The End


Friday, September 27, 2019

September Last Friday- How to fix a crack with Creative Paperclay®


How to Patch a Crack Using Creative Paperclay®


Today, I am going to talk about patching cracks that may form as the clay dries. I thought that it would be nice or beginners and perhaps Polymer Artists trying something new.  Are you frustrated with cracks after the clay dries?

It was a real problem for me in the beginning, but lucky for me, Creative Paperclay® is so  forgiving it will accept alterations that are added even after it is dry!  Even after it is painted and varnished!!!  So, I'm going to show you how I mended the crack above my Gypsy doll's right eye.  

Supplies

You
Creative Paperclay®
small container of water
Small paint brush
pointy sculpting tool
Air


Pics 1 & 2- Just shows an unfinished head with a good sized crack above the right eye. It is a real problem crack as it is also recessed under the brow and is curved. 


Pics 3, 4, & 5- I took a tiny piece of paper clay ( an amount of which is determined by the size of the defect).  Roll it into a noodle about the width and length of the defect.  A small tipped hand tool can make placement easier, so have one on hand.


Pics 6 - Dip the noodle into the water. Use the small tipped tool to tease the noodle into place. Then take a small, soft paint brush and dip it in the water. It needs to be wet, but not 
drippy wet.


Pic 7, 8, 9, &10-  Take the wet noodle and beat your spouse with it!  Just kidding!  LOL!  Place the wet noodle over the crack using your finger or the small tipped tool, as mentioned above, and use the paint brush (wet) to press and smooth the patch in place.  Work any edges very thin using the paint brush.  This helps give a smooth transition for sanding and painting when thoroughly dry.


Let dry completely.  I usually put mine in front of the fan to speed up drying time.I hope this helps anyone, new Artists and others making the switch to Creative Paperclay®! 

Just for kicks, would you like to see my Gypsy finished?  I'm just guessing you said yes...now look what you can do with Creative Paperclay®!!!


Thank you so much for coming to the Creative Paperclay® log!

Until the last Friday in Oct.  I will be here working on Creative Paperclay® projects just for you!

My best always.

Carly Smith

BTW-  I have full pound (16 0z) packages of Creative Paperclay® in my Etsy store.

They are 18.99 with FREE SHIPPING!!!  Please visit:  https://www.etsy.com/shop/CarlySmithFolkArt?ref=simple-shop-header-name&listing_id=653498009