Saturday, October 28, 2023

Making Molds and Milagros

I love to add dimensional details to my art with Creative Paperclay®. These little items are the sweet part of my paintings that add POP to the piece like the heart in this piece of art.

This lesson shows how to make a mold with Creative Paperclay® and then use the clay to make multiples. You get two tricks for the price of one

SUPPLIES

Milagros or dimensional objects
Creative Paperclay®
PAM no-stick cooking spray or talcum powder
Polymer Medium
Black acrylic paint
Krylon's foil metallic spray (in silver)

After rolling out the clay, I impress a vintage milagro into the clay before letting it dry. When dry, I seal it with polymer medium to seal the surface.

To use this as a mold, I either spray PAM on it as a mold release or apply talcum powder to it. Then I apply my clay to the mold and pull it out immediately.

The cast object is cleaned up with an exacto knife and edges are smoothed with water.

I am a happy accident kind of person so when this heart came out of the mold with a crack through the center, I was thrilled. This will go into a piece about a broken heart.

I use sandpaper or Sand-Its to clean up the edges. Sometimes, I like a raw, aged look.


Now it's time to paint. For my milagros, I spray Krylon's silver foil metallic spray paint. When that has dried, I apply a black acrylic paint that I wipe off while wet. This sticks in the crevices and gives it an aged look.

Of, course, Creative Paperclay® can be painted any color, gold leafed and more.

Dream in Color!

DarleneOliviaMcElroy.com


Saturday, October 14, 2023

Can we be Friends?


 If you don't like clowns, turn back now!


I had the opportunity to submit art for a Stephen King project in a local gallery.  I have loved Stephen King novels for years, much more than the movies.  I decided to use the image of one of his craziest characters and mix it with a one of his sweetest characters.  

If you are not a fan of clowns, especially Pennywise, click away and I'll be posting another cuter Halloween project soon.  


It all started with the idea of a sculpture, but I wanted it to hang on the gallery walls.  So I joined the sculpture with the canvas and I really enjoyed the process.  


1. cutting cardboard in the shape and size of the sculpture and making sure it fits within the size of the canvas

I layed tracing paper on the cardboard so I could draw out where the hands would be holding the paper boat.  

Originally I was going to have the boat covering some of the face.  That idea changed a lot.

building up the armatures for arms and face by using wire and masking tape.  

Putting on the first layers of Creative Paperclay

I downloaded some photos of gloves and started creating the hands.  

//

Here I'm playing with the size of the boat and making a hood for the raincoat he'll be wearing.  


I lost so many of my face sculpting photos.  I have to say I was getting frustrated with him.  

This face went through so many changes.  I made the eyes by using molds and resin.  They turned out pretty creepy and seem to follow you around.

Silly clown shoes coming up

Added some waxed thread to create the shoe laces.  

creepy eyes

accessories 

The hardest part is waiting for the paint to dry so I could add the textiles and put him all together.

Wanna be friends?

Starting to add the lace of the clown suit and then creating the raincoat out of a plastic table cloth.  

 
This video is a quick slide show of the process.  Unfortunately I lost all my still photos.  


Materials that I used:
18" X 46" Canvas
Large piece of cardboard
masking tape
Heavy wire for armature
Creative Paperclay ( 2 large bricks)
acrylic paints
eyes / or create your own resin eyes or paint your eyes in.
glue
card stock for the boat
Lace for collar, pant and wrist ruffles
yellow plastic party table cloth
red balloon
red ribbon
red hair or yarn
waxed thread for shoe laces

Saturday, September 30, 2023

Making Faces!


I love people and painting them. This is my first attempt at a dimensional character and it was enjoyable experimenting and adding the humor in creating this piece. And, what a great way to gift your friends with a crazy portrait of themselves.

SUPPLIES
Creative Paperclay®
Delight®
Acrylic paint
Chartpak colorless blender
Laser print
Scissors
Brayer

I started by laying Creative Paperclay® into my basic shape on a panel I had laying around the studio. I could have smoothed it out with a little water but I wanted it be remain clay-like. It was left to dry overnight.


Wet clay was added to the dry clay shape to give dimension to my character and texture was added to the bow tie and eye. When this was dry, I applied gesso to my character. This sealed the clay and prepared it for painting.


I always sit with a piece before I decide if it is finished or not. After painting it with acrylics, I felt it needed more elements to tell the story of this crazy guy.

I brought out Delight® and rolled out a thin sheet. Next, came a laser print and a Chartpak colorless marker so that I could make an image transfer. The laser print was placed face down and the blender was applied to the back of the print several times. This was then cut into a shape and added to the painting. I have shown this to you previously but it is my latest favorite technique.

Here is the finished piece, Flowery Words. You never know what you will discover when you experiments with your art tools.

Dream in Color!

DarleneOliviaMcElroy.com

Saturday, August 26, 2023

I love image transfers so much that I wrote a book about them. The texture and whiteness of Delight® is the perfect substrate to use a colorless blender pen and toner image transfer on.

SUPPLIES
Colorless Blender Pen
Delight®
Substrate (masonite panel shown here)
Scissors & mark making tools
Polymer medium
Toner Image

After rolling the Delight® into a thin sheet, I placed the toner image face down. The image will be in reverse which was fine with me. I then applying the colorless blender pen on the back of the toner image. As I did this, the image starts to appear on the back of the paper. Lift the paper to see how well it is transferring. If it looks light, apply the blender pen some more. Save the toner image to put in a collage. Nothing goes to waste in my world.


After cutting my transfer into a loose shape, I added curtains to give the feel of a stage and used my tracing wheel to add texture to them. To make sure that the Delight® adhered tightly to the background, the surface was coated with polymer medium before laying down the pieces. I love the opera so I am naming this Sweetheart of the Opera.

After painting the piece, dimensional letters were added. What else can you do with this technique besides using it in art? Gift tags, holiday banners, etc.

For other transfer techniques, see www.amazon.com/Image-Transfer-Workshop-Mixed-Media-Techniques/dp/1600611605

Dream in Color!

Darlene Olivia McElroy
darleneoliviamcelroy.com


Saturday, July 29, 2023

Delightful Hand Wall Art


I  am loving playing with Delight® and have made some very cool discoveries. Gather your supplies and join me on this art adventure.

SUPPLIES
Delight®
Hand shape (cut out of cardboard or a sheet of Delight®)
Acrylic paint
Texture tools (stamps
pattern tracer, etc.)
Vintage elements

I had these hand shapes die cut for another project but thought I would try it with Delight. You can use a shaped panel or you can cut your hand shape out of cardboard or a sheet of Delight®.
I started by applying Delight® to my hand shape then brayering it flat. Then I embossed the surface with different stamps to give it texture. 

Next I brayered (rolled flat) the clay and made sheets of Delight® which I was able to cut into shapes. 


I cast a heart in a silicone mold that I was actually just using for the border and shape. Next leaf shapes were cut out of the sheet and applied them to the surface. I took my tracing wheel to make the dotted center of the leaves. It indented the leaf shape and poofed out the edges. I will definitely be doing more projects using the Delight® paper. 

After adding more leaves, a new center for the heart shape, I painted the hand shape. Then I applied vintage millinery flowers and some pearls to add more depth. With a hanger on the back, it can be hung in small places like the kitchen, bathroom or by your entry.

I will be trying this again but with different colors.

Dream in Color!

Darlene Olivia McElroy
www.darleneoliviamcelroy.com

Saturday, July 1, 2023

"No Place Like Home "


 "No Place Like Home"

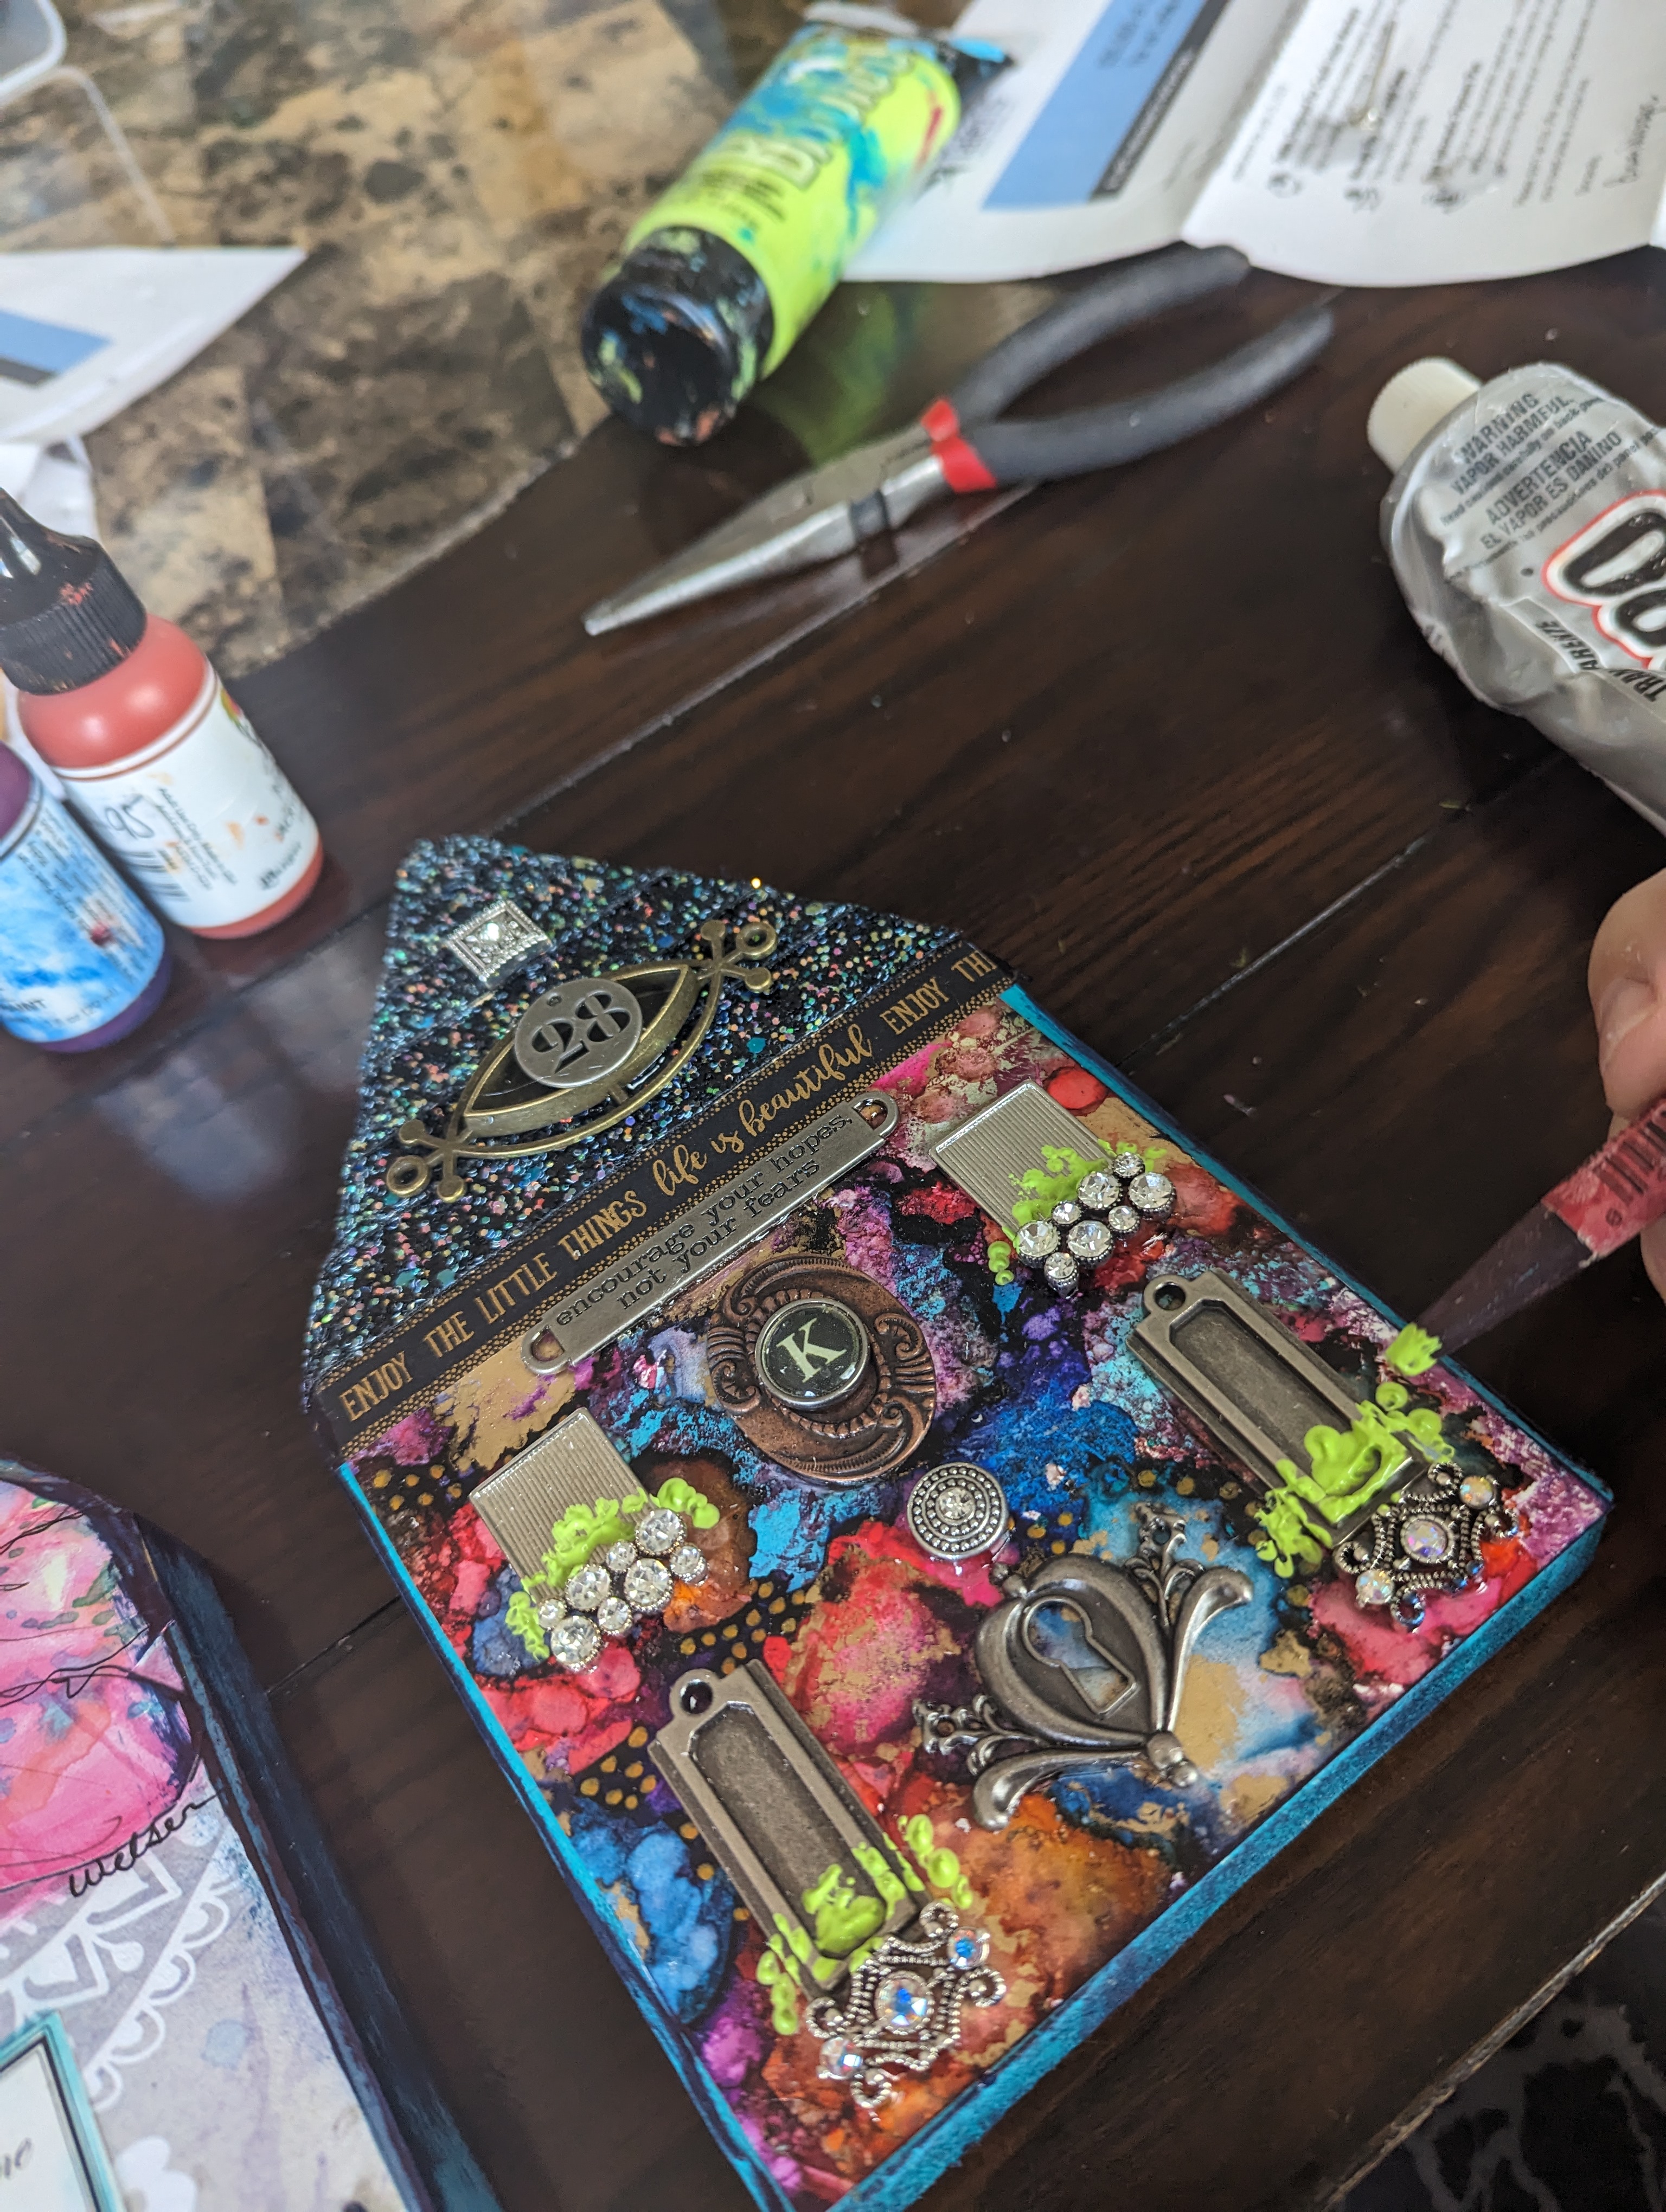
I always have loved creating houses.. adding fun embellishments really custom makes your own ! Adding sweet quotes, metal embellishments, jewelry components ,papers and paints all helps to make them feel personal ! 

Supplies

  • Wooden houses .. I had mine cut out with a scroll saw and then used Proxxon belt sander to smooth the rough edges
  • Collage papers
  • Metal embellishments
  • Jewelry components
  • Washi tape in black with glitter and one with a saying
  • Paint
  • Ink pad in deep blue 
  • Paint
  • Paper quotes 
  • E6000 glue
  • Gel medium 
Now that you have your supplies grab you wooden house and sand down the rough edges with the belt sander till smooth . Adhere the collage papers/ paper quotes where you would like with the gel medium. Let dry  and paint the the other house and let dry. You can now start building the house with all of your supplies ! Use your imagination and come up with fun and unique supplies and uses !


Enjoy creating your home sweet home using Proxxon Tools ! 


Saturday, June 24, 2023

Stranger Things with Delight® and Creative Paperclay®

Stranger Things artI have created a Stranger Things series (https://www.darleneoliviamcelroy.com/stranger-things) where I reach into my inner child and come up with strange creatures and happy little monsters. There is a simplicity to them but things don't have to be complex to have beauty to them. The art piece will use both Delight® and Creative Paperclay® but in a simple manner that is fun and creative. Plus I will also show you how to fix a ornate vintage frame.

SUPPLY LIST
Creative Paperclay® & Delight®
Mark Making Tools
Modern Masters 2 part Rusting Kit
Glue
Found Objects
Scissors
Brayer
Amazing Molding Putty
Acrylic Paint

Delight®
I love the fact that you can roll out Delight® into a thick paper and then cut it with scissors or an exacto knife. I already have ideas for some future projects using the Delight® paper (as I call it). 


Found objects and cut/textured Delight®


When working on my Stranger Things series, I start blocking in my design with objects I would like to use. I cut out my Delight® paper with both regular scissors and pinking shears prior to giving it texture with my tracing wheel. The left shape at the bottom is a paint skin that I made. 

The Delight® shape I made in the last step is now painted with a base color that will eventually be rusted. I made a circle of Creative Paperclay® that I added an eye to and which I will glue down when the clay dries. Texture was added with a rubber shaper. The found metal object will be rusted and embellished. This is the first in my Stranger Things series where I have added these two air drying clays and I am really enjoying it.
All Dressed Up
I finished my cute little monster with painting, rusting, adding found elements and hair made with Delight®. The rusting was done using the Modern Masters 2 part Rusting Kit. 


An ornate frame plays off the contemporary minimalist art but it is hard to find one that is in mint condition however they are fixable with Creative Paperclay®.
two part Amazing Molding Putty
I used two part Amazing Molding Putty to make a mold of part of the frame that was in good condition. Once both parts of the putty are blended together, I laid it on the frame. It sets up in approximately 15 minutes.


Creative Paperclay® was applied to the frame in the areas that needed to be fixed then I laid the silicone mold matching it up to the good areas of the frame. When I am happy with how it looks and it is thoroughly dry, I coat it with polymer gloss medium to seal it and then decide whether to spray gold or black.

Dream in Color!

Darlene Olivia McElroy
NARRATIVE MIXED MEDIA ARTIST
www.darleneoliviamcelroy.com