Showing posts with label Card. Show all posts

Monday, July 24, 2017

Parisian Dream Cameo Card Featuring Delight™ Compound

Hi Friends:  I love to use Delight™ air dry modeling compound on my mixed media cards because the items that I make are so lightweight and easy to add to the cards.  You can use Delight™ with fondant molds to make some really beautiful embellishments.  For this project, I used some molds to create a Parisian-based card with a lovely cameo focal point.  I saw these Eiffel Tower inspired favor boxes on clearance in one of the big box stores and I just knew they would be great on cards.  And I knew that I had the ideal cameo and frame molds on hand to create the focal point to go with it.


Detail images:


Directions: Please see my video tutorial for full instructions for this project:


Supply List:
Delight™ air dry modeling compound
Prima Salvage District 6X6 Paper Pad (Amazon)
Ranger Adirondack Metallics Acrylic Paint Dabbers, Silver (Amazon)
Tim Holtz Ideology Quote Chips (Amazon)
Yunko Oval Lady Mirror Frames Silicone Mold (Amazon)
SK Frame Sugarcraft Oval Mirror Frames Silicone Mold (Amazon)
Prima Distress Tool (SSS)
Prima Chalk Fluid Edger - Black Coal (Amazon)
Aleene's Tacky Glue (Amazon)
Beacon 3-In-1 Advanced Craft Glue (Amazon)
Prima Marketing Memory Hardware Artisan Powder - Vausseroux (Amazon) Want 2 Scrap Couture Swirls - White Pearls
Scotch Advanced Tape Glider (Amazon)
Art Anthology Stone Effects Paint - Lava
Jolee's Boutique Favor Boxes - Parisian Collection
Other:  A7 Card Base, tulle, sewing machine/thread

I hope you enjoyed my project and learned some new ways to use Delight™ Modeling Compound on your mixed media cards. Thank you so much for stopping by the blog today. Have a great, creative day! -Patti


Monday, June 26, 2017

Take Time To Dream Card featuring Delight™ Modeling Compound

Hi Friends:  Have you ever wondered what to use to add gorgeous, lightweight embellishments to your cards?  Delight™ air dry modeling compound is very lightweight and easy to mold and is perfect for mixed media cards because it doesn't add much weight.  In this project, I've used Delight™ in some Prima IOD Moulds to create some beautiful faux metal accents on my card - and the card is much lighter than using metal or resin products.


Detail photos:


Directions:  Please see my video tutorial for full instructions to create this card:


Supply List:
Delight™ air dry modeling compound
Prima Chalk Fluid Edger Pad-Branch Bark (Amazon)
Imagine Crafts Iridescent Creative Medium - Turquoise (Amazon)
Lindy's Stamp Gang Sprays (Amazon):  Tibetan Poppy Teal, Buccaneer Bay Blue
Prima Marketing Memory Hardware Artisan Powder - Vausseroux (Amazon)
Prima Marketing Art Alchemy-Metallique Wax-Aged Brass (Amazon)Prima Marketing Art Alchemy-Antique Brilliance Mystic Turquoise (Amazon)
Prima Marketing Art Alchemy Acrylic Paint, Metallique Steampunk Copper (Amazon)
Prima IOD Moulds - Baroque No. 6 (Amazon)
Prima IOD Moulds - Baroque No. 3 (Amazon)
Tim Holtz Chit Chat Stickers (SSS)
Recollections Sweetwater Rose - Mint (Michael's)
Bo Bunny Somewhere in Time 6X6 Paper Pad (Amazon)
Tim Holtz Layering Stencil CLOCKWORK (SSS)
Tim Holtz Ideology Philosophy Tags (Amazon)
Tim Holtz Sizzix Bigz Die - Weathered Clock (Amazon)
Tim Holtz Edge Distresser (SSS)
Liquitex Gesso - White (Amazon)
Liquitex Professional Matte Gel Medium (Amazon)
Beacon 3-In-1 Advanced Craft Glue(Amazon)
Scotch Advanced Tape Glider (Amazon)
Other:  Lace, cheesecloth, charms, A7 card base, kraft cardstock


I hope you enjoyed my project and learned some new ways to incorporate Delight™ modeling compound into your cards. Thank you so much for stopping by the blog today. Have a great, creative day! -Patti


Sunday, July 12, 2015

One of a Kind Card for a One of a Kind Person by Linda Hess

Along life's path you will encounter many people: some good, some "challenging"...all weave the cloth that is our journey on Earth.  One of the special people in my journey is a girl named Annie.  I have known her since she was small, watched her grow from an adorable redhead with spunk and musical talent into a beautiful woman.  Now I watch as she enters her next chapter in life as a Catholic nun!  To say I feel blessed to have watched her grow and develop would be an understatement. 

Tomorrow I will go to a shower for her as she prepares to enter the convent.  Her wishes and needs are simple: yarn, instruction booklets, oboe & piano music...I lucked into a couple of crochet books from "Annie's Crochet" (I thought that so appropriate!).  I want to create a special card for her to go with the gift and you get to be a part of the design process.

For the base of my card I start with a white "linen" piece of 12"x12" from Recollections®.  I cut it to 9"x12", folded it in half, and used a corner punch to curve the corners.  The edges were rubbed along a black stamp pad to add an extra touch (NOTE: Be carefully when rubbing...less is more in this case).

For Annie's love of music I chose another Recollections® paper "Music Notes".  I cut it down to 6"x6" and then carefully tore the edges. It is glued in place on top of the white...perfect so far.

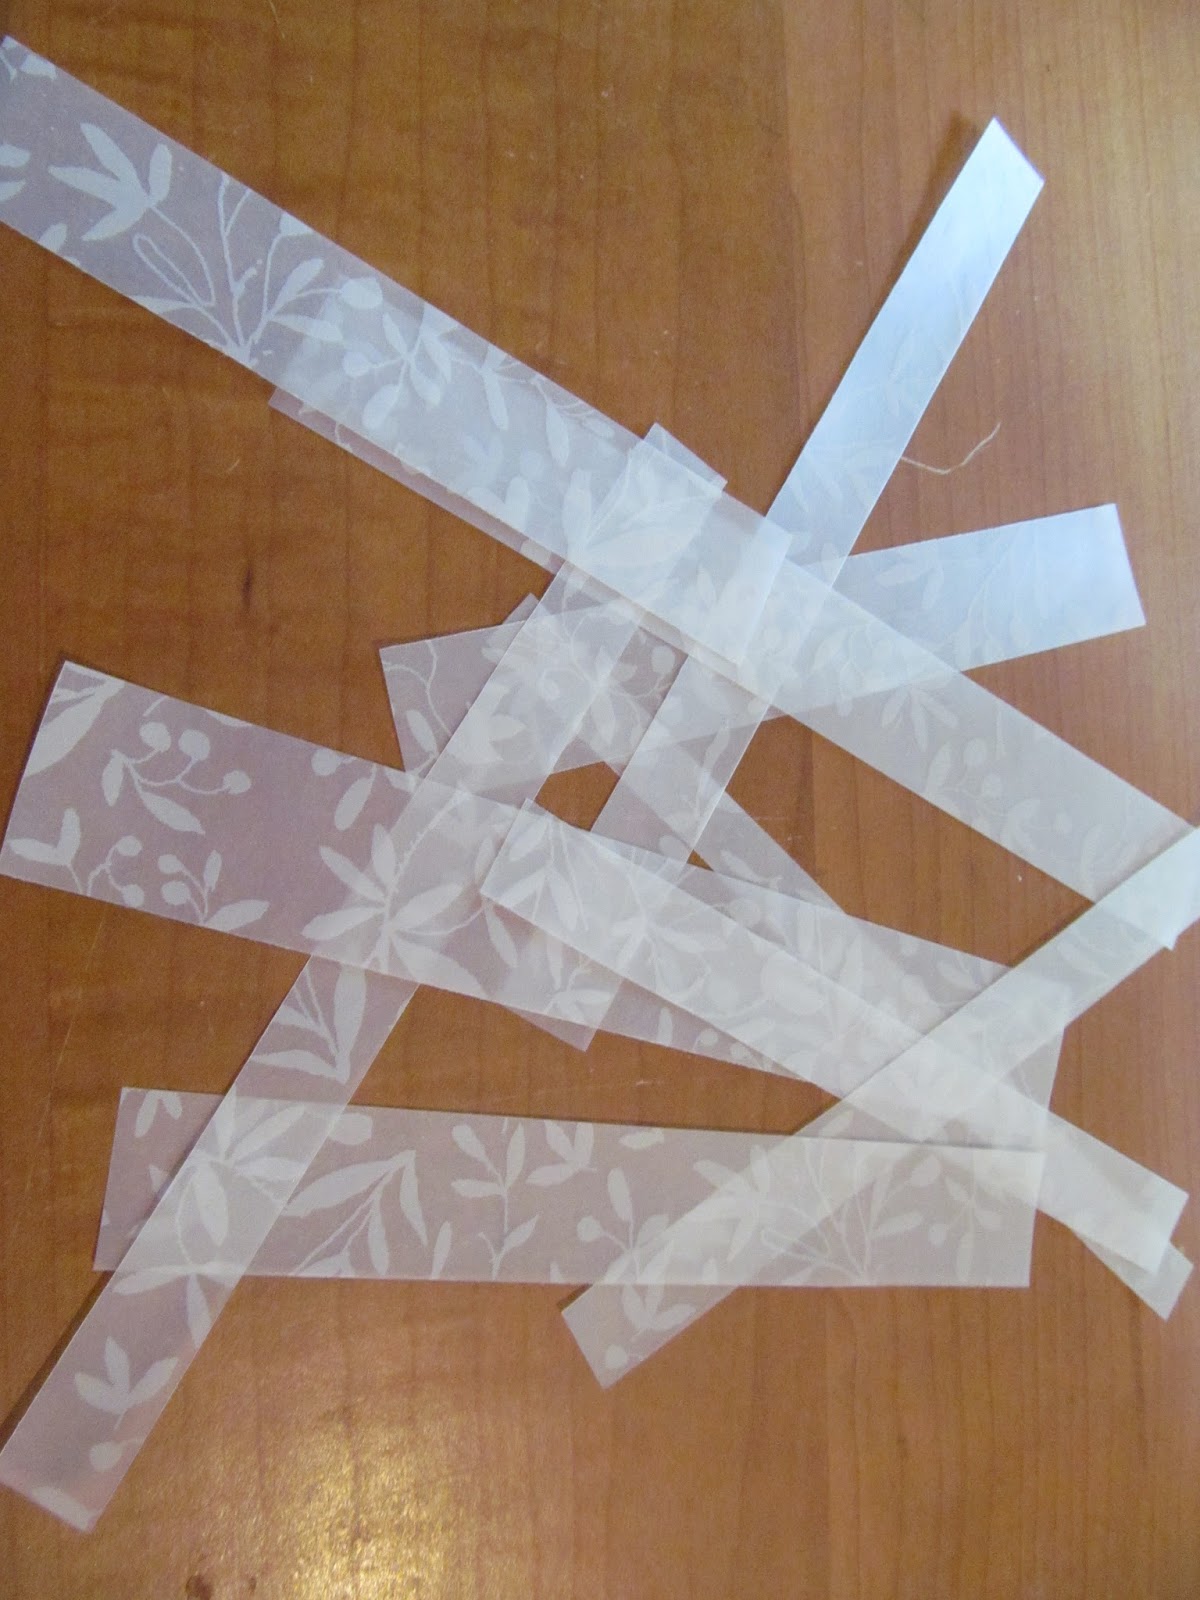
I found vellum paper strips on my table from a previous project.  I wove them together ("Our lives are forever woven together")...nice.

But when I placed the woven pieces on top of the music it basically disappeared :-(  Bummer

Not to be deterred, I went to my stash of paints and pulled out a few Twinkling H2Os (Pretty Peridot, African Jade, Sapphire on Ice, & Boysenberry) from ColourArte (http://www.colourarte.com/).  I quickly learned that Vellum doesn't like water and curls,
but I was able to lightly paint the back of each strip. As the strips dried, they magically opened back up. 
A few minutes under a book flattened them enough to re-weave for the card front.

Time to pull out the Creative Paperclay®.  I worked a bit in my hands, then rolled it through my pasta machine to flatten it (NOTE: clay can also be flattened with a rolling pin or acrylic roller).  I like rough edges rather than clean cut straight edges, so I tore the edges (towards me).  I am not patient enough to wait for the clay to air dry, so into the oven it goes (275* for 15-20 min.) with a piece of glass on top to keep it flat.

Once cooled, the piece is stamped with a beautiful scrolled cross (Rubber Stampede© #0403)
and then painted using Twinkling H2Os. 
Pearl dots complete the cross details. 
It is glued in place with The Ultimate! glue from Crafter's Pick™ (http://crafterspick.com/)

It needs a little something else.  I found this saying in my stamp box.  PERFECT for the occasion!   Stamped on a piece of the leftover white cardstock, edges torn, and rubbed over the ink pad.  Glued in place...exactly what it needed! 

One final touch.  A shimmery ribbon and a couple of appropriate charms (Bead Landing™)


Friday, June 6, 2014

First Friday Fan Day with Rachel Whetzel

WELCOME!!
It's time for First Friday Fan Day on the Creative PaperClay® blog! Rachel Whetzel here, and I have been browsing the web today, looking for things that YOU have shared on line using Creative PaperClay®
I hope you hop over to the links I'm sharing with you today, and let your fellow Creative PaperClay® lovers know you saw what they shared too!
FACEBOOK
On Facebook this month,
Rogene Manas shared THIS flower project! 
David Everett shared HIS CLASS with us! 
 
PINTEREST
There was SO MUCH fun on Pinterest this month!! Check these pins out!! 
Virginia Twedell shared THIS adorable glittered snowman by Linda Silverthorne.
Lerryn Meza pinned THESE cool mini masks.
K Moonshadow shared this adorable KNITTING CHICKEN.
Aimee Villalobos shared her NEST HEAD creation.
A {tiny} Cottage In The Woods shared these WHITE SHEEP.
Gini Cagle shared her paper creations in CARD form.
Karen Griffith pinned her adorable SNOWMAN that will make you wish it were Winter already! 

HELP ME FIND YOU!!
Use the hashtag #CreativePaperclay on all your social networks. Be sure, when using Facebook, that you make your posts and images using the Creative PaperClay® hashtag are set to public, otherwise, I won't be able to find them. You can also share your projects to the Creative PaperClay® FACEBOOK PAGE. Each month, I'll browse the interwebs looking for projects from YOU, that I can share here! Be featured next month! START SHARING NOW!!

Thanks for reading! If you'd like to keep up with me, and see more of what I'm up to, I'd also love it if you'd visit MY BLOG and Subscribe! You can also find me on FACEBOOK!

Friday, April 18, 2014

Welcome, Baby Card by Rachel Whetzel

Welcome!! This month, I wanted to share a card I made for my soon to be grandbaby! She is my second, and knowing what I already know about how special these babies of the grandest are, I decided to make her a card to let her know just how special she is already.
WHAT YOU'LL NEED to make your own Card:
  • A card that you can repurpose, or a new card to layer onto
  • Creative Paperclay®
  • Paints. I use Folk Art acrylic craft paints.
  • Paint brushes and toothpick
  • Scissors
  • Large circle punch (I used Fiskars) 
  • Washi Tape (I got mine at Gauche Alchemy) 
  • Ribbon and RicRack (Thrifted) 
  • Patterned papers (October Afternoon) 
  • Glue. I use Crafter's Pick : The Ultimate
  • Typewriter or computer connected to a printer
To begin, I placed a ball of Creative Paperclay® onto a piece of paper, and rolled it flat. I put the clay onto paper, so that I could pick it up and manipulate it while it was still wet without trouble. Next, I made teeny footprints on the clay using two different sized paint brush ends, and a toothpick with the very end broken off, and sanded down.
Next, I cut a heart shape out of paper, and laid it over my Creative Paperclay® as a template for cutting the clay into the same shape.

While the clay was drying, I got to work repurposing an old card that I would not be using as it was. (This is one of my favorite things to do. Create new cards using old cards as the base.)
I painted the heart, and used my Pebbles Inc. pastels to shade the feet. then I layered some patterned paper over the heart, with a hole punched out so the feet would show through. Then I layered the heart over the patterned papers, and washi. I used some ric rack and ribbon to add more layers to the card.
I added the sentiment 'precious one...' on the outside of the card by typing the words using a vintage typewriter, and cutting the words into strips to be glued down.
On the inside of the card, I wrote 'we have only just met, and already you have left prints on my heart.' I had so much fun designing this custom card for my newest grand baby! She is already loved, and it makes me happy to have created something so special so easily with my trusty Creative Paperclay®!
Thanks for reading! If you'd like to keep up with me, (see new grandbaby pics!!) and more of what I'm up to, I'd also love it if you'd visit MY BLOG and Subscribe! You can also find me on FACEBOOK!

Friday, January 17, 2014

Sculpting Creative Paperclay® to Mold with Rachel Whetzel

Earlier this month, I shared a tip that stamping on Creative Paperclay® was easy, and simple to do! This week, I'm sharing a little twist on that same idea. Molding and stamping Creative Paperclay® to use in making a mold! I had the idea that I could make some Valentine's Day decorations using  and resin, so I got to work trying it out.
WHAT YOU'LL NEED:
  • Creative Paperclay®
  • Stamps
  • Molding Material (I used Amazing Mold Putty) 
  • Resin (I used Amazing Casting Resin with Alumilite Red Dye) 
  • Acrylic Paints (I use Folk Art) 
  • Hole Punch
  • String and Needle
Start your project by shaping your Creative Paperclay® into the shape you'd like. Make your surface as even as possible, and don't make your clay so thin that stamping would cut through the clay to your counter top.  I used some sculpting tools to write LOVE on my heart, and a Tim Holtz clock stamp. I had 'love endures forever' running through my mind while I was working. Set your clay out to dry. 
Once the clay is dry, sand your edges, and fine tune any bits that you need to. I used a carving pick, and evened out the word LOVE. I also used a bit of water to smooth out that area. 
Once your surfaces are smooth, and ready, mold your piece, and then pour your resin!! 
When I pulled out my cured resin, some edges needed trimming. I did that while the resin was still a bit soft, and then used my hole punch to create holes where I planned to put stitches later.
Before I put my stitches in, I used craft paint to fill in all the indents that my stamps made, and wiped off the excess. Then I put the stitching in! Such a simple, easy thing to do, and now that I have created the mold, I can replicate my original Creative Paperclay® piece with ease!! I can also pour my resin a bit thinner than the clay, making it easy to use the pieces on cards or a scrapbook page! 

What custom pieces can you imagine making over and over? 
Leave me a comment and let me know what you think! CLICK HERE to visit me at my "house" too!! Thank you so much for reading!! ~rachel

Don't MISS IT!! We're hosting a Valentine Link Party on Feb 8th!! 

Tuesday, February 5, 2013

Composimold Review and Honeycomb ATC

Hey Everybody, It's Edie, Do you ever buy random things because you just KNOW you’re going to make great things with it… someday??? That was the case with the neon green, silicone pot holder I bought several months ago. It looked like a honeycomb and I just KNEW I could make something super cool with it. I wanted to use it as a stamp, put it in a painting and at least five other projects came to mind just by holding and squishing that piece of random inspiration. The problem was, I didn’t want to USE the potholder because I only had one. I thought it was impossible to mold because it is so flexible and thin that is, until I discovered Compisimold! Compisimold is a pourable, food safe silicone mold that you can melt and remold over and over again and it was exactly what I needed for this project.

You can view BOTH full video tutorials below. I don’t own a microwave, so I melted my Composimold on the stove and poured it over the potholder. Once it was completely cooled, I removed the original and I had a reusable mold that looked just like my potholder! The Composimold did have a lot of bubbles which would ruin most molds but it actually enhanced this particular project, so I didn’t mind too much in the end. The Composimold instructions recommend stirring often, but I think that is what caused all of the bubbles. If I had just let it sit and melt, I don’t think I would have had near as many bubbles. Once the mold was ready, I broke out my Creative Paperclay® and started playing. I rolled out my Paperclay over the top of the mold which gave me an absolutely fantastic honeycomb texture, and then I cut my ATC out of the textured Creative Paperclay®. I let the ATC dry completely and then I painted it, glitterfied it and added the honeybee embellishment. I wrote out my quote, painted the paper and glued it to the ATC and then I covered the text with Glosssy Accents to make it shine.

Overall I was pretty happy with the Composimold and I plan on making more projects with it. If you have something that is an awkward shape or just too soft to mold, you may want to give Composimold a try. It worked great with the Creative Paperclay® and I am really happy with the way this ATC turned out. I hope you enjoyed this project and I hope you have a Valentine’s Day that is filled with love! BIG HUGS!
Visit my blog.


Tuesday, March 27, 2012

Creative Paperclay Butterfly Tile


Using Creative Paperclay with rubber stamps lets you create very cool embellishments for your paper projects. I used a stamp from Hampton Arts to stamp into a slab of Creative Paperclay to make this tile. After it was dry, I covered the entire piece with black Distress Stain, to get into the details. In the recessed butterfly area, I used Wow Embossing Powder in Bay Area Blue (which is a transparent powder). This gave kind of an enameled look. Finally, I rubbed Viva Gold Decor over the raised areas.

Thursday, December 15, 2011

Steampunk Christmas with Viva Las Vegas Stamps


I'm really not much of a stamp user so this month's tutorial was a bit of a challenge for me. I decided to create a Christmas card with a bit of a Steampunk look. I love just about anything Steampunk and Viva Las Vegas Stamps has Steampunk stamps that are fantastic! I'm using  Item 16006 Plate 1273 and Creative Paperclay®.

(Note - This card was painted with metallics and metallic paint is impossible to take pictures of. The background color is a light gold, not brown. The ornaments are copper, silver and gold.)

Materials:
Viva Las Vegas Stamps Item 16006 Plate 1273
Creative Paperclay®.
Acrylic paints
Water color paper cut to size 5" x 7"

1. I first rolled out my paperclay to about 1/4" thick. I then used my stamps and pressed them into the clay to make tiny gear ornaments for my card. Then I cut out each stamped clay piece with an exacto knife. Let these "ornaments" dry.
2. While the clay was drying I painted a Christmas tree on my water color paper using thinned out acrylic paints. You can paint whatever you want using colors you like. I wanted to stay with a metal look so I first washed the paper with a very thinned out light gold. While the paper was still damp I painted the tree using 3 shades of green. (Actually, I just jabbed and splashed the brush around on the paper till I got a tree shape I liked)
3. I wanted to use the stamps to actually stamp gears onto the tree so I painted the surface of the stamps with my metalic paints and stamped them onto the paper. The gold was a bit light but the copper worked nicely.
4. Once the clay ornaments were dry I painted them and then glued them onto the tree.

I hope you enjoyed this quick little crafting idea using Viva Las Vegas Stamps in a little bit different way.

Tuesday, September 20, 2011

stamping on Creative Paperclay

Terri Sproul here, I am having so much fun with this Design Team for Creative Paperclay.  Are they not just amazing or what?
Anyways, today I just want you to see how you can using paperclay in another way,
how about with Stamps?
  Add this to a card or a scrapbook page....  Super easy....


Supplies:
Stamp:  “Italian Sonnet Background” #16210 by Viva Las Vegastamps!
Black Ink:  “India Ink” – Stewart Superior
Glaze: “Patina Green”:  Golden Artist colors
Cardstock:  White to make cardbase 5” ½ x 4” ¼” finished size
Pattern Paper:  Die Cuts with a View:  World Traveler Stack
Brown Ribbon
Rolling Pin, cutting tools if need

Here is a video to help you out....  i have more of my video at http://www.youtube.com/terrisproul


Directions
         Roll out Delight clay to about 1/8”  – ¼” thick.  Ink Stamp with India Ink and Press stamp into clay – see video for help.
2)      Let clay dry and paint with Patina Green Glaze.  Add color lightly and add more as needed… 
3)      Adhere the Pattern Paper to cardbase with Miracle tape….
4)      Adhere the Ribbon to my card with Miracle tape
5)      Adhere my Delight stamped image to my card with my Miracle tape….


Super easy to add some new dimension to your cards/scrapbook/mixed media project.  Pick up a package of Creative Paperclay or Delight soon and start playing.
hope you stop by my blog and visit...  here is the LINK  

Thanks...
Terri Sproul