
I molded multiple pieces for experimenting and let them dry thoroughly (side note: LOVE how the Creative Paperclay picks up the details of any mold!).

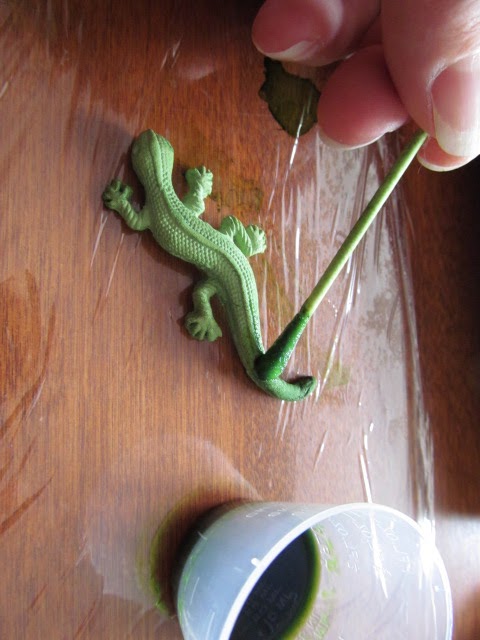
First thing...cover the work space with plastic wrap just in case you have any spills (no sense ruining the table for arts sake)! Mixing small amounts of ink and alcohol will also help ward off any possible catastrophes. Green is my first color of choice as I wanted to paint a gecko. a sponge brush would be a bit of overkill as far as the amount of ink applied, so I chose to use a cotton swab instead. The paperclay gecko soaked up the ink instantly as I applied it...quickly enough that when I turned the gecko and held the just painted tail, I didn't get any ink on my fingers! VERY COOL! Progressive applications took the gecko from a pale green to a deeper green.
What happens if the ink is applied straight from the bottle? The color is very dark and soaks in quickly in the spot where it was applied. It is difficult to get the colors to soften when applied in this manner (notice the gecko tail is much darker than the rest of him). I have already decided this is NOT my favorite way to apply the inks!
One of my favorite things to do with the alcohol inks on polymer clay is a tie dye effect. Is this possible on the paperclay?? I had to find out. Instead of using a cotton swab I want to really saturate the clay surface to see if I can get additional colors to spread. I figured I would need to work quickly so with a sponge brush in one hand and a ink bottle in the other I proceeded to paint. One sweep of the sponge brush dipped into the ink/alcohol mixture was enough to cover each face. Before the yellow ink had a chance to dry I dripped red ink straight from the bottle onto it. To my delight (hmmmm, maybe I should rethink NOT liking this application) the color began to spread in fingers, but the fingers soon bled together and a patch formed.


If you buy a set of Pinata inks, it comes with white/blanco. I was surprised to find this particular color in the set does not seem to spread and/or soak in like the others! Instead it seems to stay where ever it is put. I colored a mask with yellow and then dripped white into the mouth and eyes where it pooled.


3 comments:
Great tips, Linda. TFS
Nice job!
You are awesome & I enjoyed That you shared this fun and interesting project. I would like to try this on a butterfly mold I have.
Post a Comment