Self-Portrait Collage by Becky Conley
Every few years, I like to create an art piece from a self-portrait. Creating this piece was therapeutic, while reflecting on life events, I was able to just play. Play with colors, textures and composition.
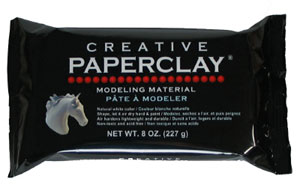
SUPPLIES: Creative Paper Clay
Acrylic Paint: Golden rod, Brown, White
Watercolor paper: 11x14 Bonjour Studios
Variety of Silicone Molds: Butterfly, (After Midnight) Leaves, Fern (Artists Own)
Gold Pigment Powder, Stream Color Mist: Ranger Ink
Chipboard Letters 2": Maya Road
Self Adhesive Bling Flourishes, Amber: Zva Creative
Liquid Glue: Aleen's Tacky Glue
Other: small scissors, photo/PC/printer, Bowl of water and a few drops of liquid dish soap, straw, paint brushes and large tweezers.
INSTRUCTIONS:
1. I created a myriad of molded shapes, rolled and cut shapes with texture added from a rubber stamp. I wanted a variety to choose from, but I did not use them all. Allow ample time for your pieces to dry.
3. Dry brush the background with all three acrylic paint colors: brown, golden rod and white using random strokes vertically and horizontally, mixing in some areas and overlapping others.
4. Select dried clay pieces and placement on your background. Adhere them with liquid glue.
5. Spritz blots of color mist over the clay pieces and a few areas on the background. Let dry, or heat set.
6. Dry brush the clay pieces with any or all three acrylic paint colors. Add any touch ups to the background as desired.
*as you can see by the butterfly piece near my chin, the spray mist can be quite dark. I lightened those areas with white and goldenrod acrylic paint as well as step 7.
7. Highlight the clay molded pieces and some background areas with gold pigment powder by brushing or dabbing.
8. Paint the chipboard letters with white acrylic paint, let dry.
9. To guarantee a more subtle application of the Stream color wash to the letters, put a few drops of dish soap into a small bowl of water. Blow bubbles with a straw, then spritz with color wash. Use long tweezers to dip the letters into the colored bubbles. Let dry. Apply the chipboard letters to the background with liquid glue and brush a few small areas with gold pigment powder.
10. Cut the bling flourishes to fit areas of your project and apply them to the background.
Dream and Create.
-Becky


2 comments:
Nice combination of materials!
I love how you did the embellishments - I am absolutely going to have to try this "Lynda" style!!! On my list of MUST do's!!!
Post a Comment