
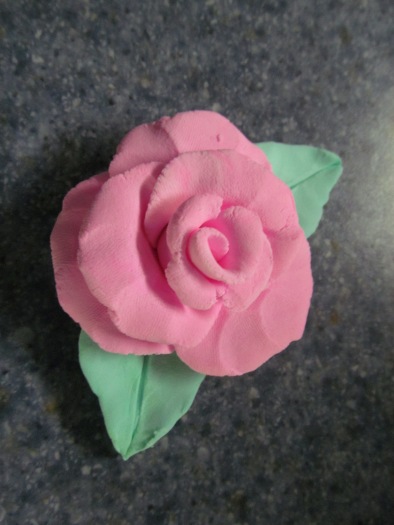
Mother’s Day Rose
With Mother’s Day approaching my crafting bug is itching. I teach art to students K-8th grade during the day and run a polymer clay after school program in the afternoon.. My clay kids have created hands holding flowers for their moms (turned into pins and magnets). Some of my art classes have created cards and dimensional flowers. So of course flowers are at the forefront of my mind.
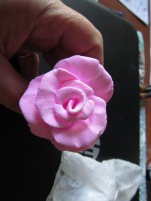
When I received my Creative PaperClay™ and Delight™ ari dry modeling compound I immediately thought of roses! Ooooooooooo, super simple amazing roses. Could be a pin, could be a magnet…a forever rose for Mom ♥

Materials:
Delight™ air dry modeling compound
Crayola® washable markers
damp paper towel
Optional: scissors or knife, pinback or magnet, superglue
Step 1: Open a package of Delight™ clay and pull off a small amount. Place on top of damp paper towel and fold towel over the top to keep clay moist. 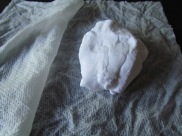
Rewrap the remaining clay in a ziploc baggie and press out the air.
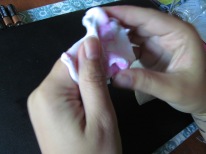
Step 2: Remove clay from paper towel and pull off about half (place remainder back in damp paper towel) Flatten in your hand. Choose a color for your flower and begin to dab clay.

Step 3: Mix the color into the clay by kneading. Add more color if the color is too light (I repeated the process three times to get a deep pink). NOTE: Color will darken as the clay dries
.
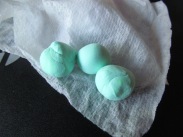
Step 4: Divide into 6 balls. Place them on top of the damp paper towel until you are ready to shape them. 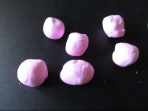
Step 5: Roll one of the balls into a short log. 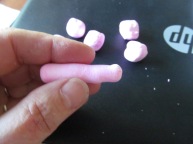
Flatten the log to about 1/8″ thick. 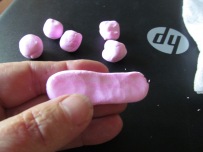
Pinch the entire top edge from end to end between your thumb and forefinger.
This is to create a natural edge for your flower (a rose). 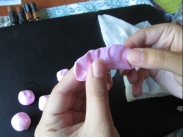
Step 6: Roll the flattened log from one end to the other. Make sure your fingers are rolling at the bottom (the thicker edge). This will help the thin edge to flare out as you roll. 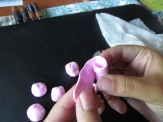 This becomes the center of your rose.
This becomes the center of your rose.
Using a finger, gently flare out/ruffle the top edge. Set aside (on top of damp paper towel to keep it from drying). 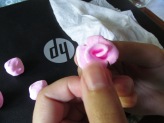
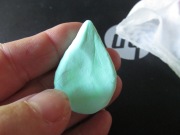
Step 7: Take two more of the balls. Shape each into a teardrop shape by flattening into a round and then pinching one end. Adjust the thickness as you go so the teardrops end up about 1/8″ thick. 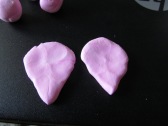 Pinch the top edge of each teardrop between your thumb and forefinger (just like you did for the center of the flower) to give it a natural edge. These are your first 2 petals.
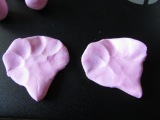
Pinch the top edge of each teardrop between your thumb and forefinger (just like you did for the center of the flower) to give it a natural edge. These are your first 2 petals.
Step 8: Pick up the center of the flower. Wrap one petal around one side and the other petal around the other side. The petals will overplap just as a natural flower would do. Be sure to focus all the pressure on the bottom part of the flower (thicker part). Once you are happy with the look, gently flare out the top edge to create a natural looking petal. 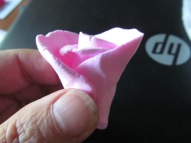
Repeat process with remaining 3 balls. 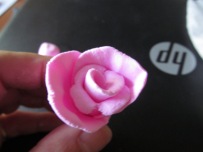
Step 9: Cup your hand and gently turn the rose over in it. Use scissors to cut the bottom off flat. 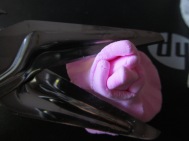
Place excess clay (that you cut off) back under the damp paper towel to keep it moist. Place the “cut” rose on top of damp paper towel while you create a couple of leaves.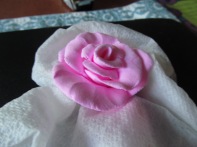
Step 10: Remove uncolored Delight™ clay from damp paper towel. Repeat coloring process (steps 2-3) with chosen leaf color (as you can see I chose bright green). Roll clay into balls. One at a time flatten the balls, then pinch into teardrop shape.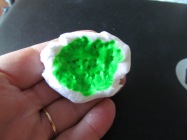
Pinch the edges flat to create a more natural look. Leave the bottom of the teardrop thick. NOTE: The back edge of the scissors can be used to impress a line down the center
Step 11: Turn the rose over in your hand one more time. Position the leaves and then gently press into place. Do not use too much pressure or the rose petals can flatten. 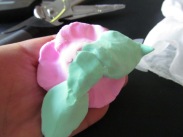
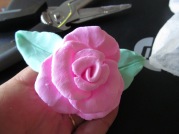
Set the completed rose on your work surface. Make sure the bottom is somewhat level. If not, pick it back up and gently press the bottom to flatten. Petals and leaves can be adjusted if necessary. Set the rose aside to dry (overnight should do it) and then add a pinback or magnet if desired.
 s
s
3 comments:
Very cool!
thank you :-D
Beautiful rose! I like your tutorial for it.
Post a Comment