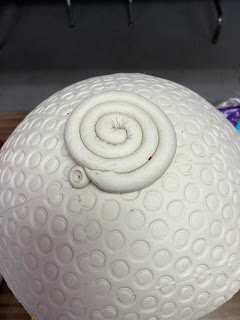
First off, check out my last blog post (http://creativepaperclay.blogspot.com/2018/11/challenge-bowl-from-creative-paperclay.html) for instructions to create the bowl out of Creative Paperclay Modeling Material.
Once you have a completely dry bowl gather the following materials to complete a gorgeous, eye catching Holiday table decoration:
1) 2 colors PLAID Folk Art Multi-surface metallic paint (I used Antique Gold #658 and Tanzanite #6313)
2) Dremel or other hand drill with multiple sizes of drill bits
3) tools: a paint brush, a sponge brush, & a pencil
4) 2 types of yarn (I used Lush Alpaca (amethyst) and eyelash yarn (aqua)
5) a thin wire to use as a needle and/or a plastic embroidery needle
First, use the pencil to mark hole placement all the way around your bowl. I made my marks about 1/2" apart and about 1/4" down from the top of the bowl. Keep in mind you will be drilling at these marks so give yourself enough space between marks and edge.
Begin to drill using a small drill bit to make the pilot hole. Work carefully all the way around the bowl. Once pilot holes are complete, gradually increase the size of the drill bit and holes, one step at a time. I changed the drill bit 3 times before I was happy with the size of the hole. NOTE: The size of finished holes will be tied to the size yarn you choose. Obviously thicker yarn will need a larger hole.
Once the holes were completed, I wiped out the bowl with a damp paper towel to remove all Creative PaperClay dust. Now, time to paint!
I painted the entire bowl with Antique Gold paint using the paint brush. The brush helps to get paint into textured areas. I applied 2 coats.
Once the gold paint dried, I used the sponge brush to careful brush Tanzanite paint over the textured bottom. For this step, little bits of paint on the edge of the sponge brush will allow paint to remain on top of the texture rather than sinking into the crevices.
2 coats were applied. The "foot" of the bowl can be left gold or have tanzanite brushed across as well.
I do love texture and detail. For that reason I chose a fluffy yarn to stitch. The thickness of this yarn filled in gaps between holes. For this yarn, I cut a thin piece of wire to use as my needle. I cut a piece of yarn long enough to wrap around the bowl edge plus some. The yarn was folded in half and then the "needle" added. Leave a little tail of yarn loose after the first stitch. This will be knotted with the other end once stitching is completed. (NOTE: Because of the hole size, I could not use a plastic needle for this step. The thickness of the yarn plus the size of the needle eye was too large for the holes)
So this looks pretty enough and I could probably stop. But as I said, I do love texture and detail. Bring on the eyelash yarn!!
The eyelash yarn takes a bit of time and patience. I used the plastic needle so it could be woven into the Amethyst yarn. To start, place the needle under 2 loops along the edge. Double back over one of the loops and then under 2 again. Repeat the process a few times before trying to pull out the loose eyelash threads. NOTE: If this is done too soon, all of the stitching will pull out. TAKE YOUR TIME!
Continue until you have gone completely around the bowl. To complete, weave the end under a few loops and trim the excess.
For your holiday table, think about displaying your beautiful bowl on a mirror in the center of the table!
I hope you have enjoyed this project. I am lucky enough to be back creating with the Design Team for another 6 months! Keep watch for more projects using Creative PaperClay as well as Delight Air Dry Compound.
Have a Blessed Christmas...Happy Hanukkah...Happy Kwanzaa...merry Festivus to all ❤


No comments:
Post a Comment