

Sooshie Sea Star is ready for the party in her best hair bow in her seaweed hair

I was given one of these blank vinyl dolls and challenged to create a monster for a local gallery, Art of Toys in Midtown Sacramento's annual monster show in July.

This is a quick collage that shows the transformations she went through. I will explain all of the steps in the process below.
Supplies:
Vinyl Blank - mine was a Munnyworld by KidRobot brand but, any brand will do.
Creative Paperclay®
Gesso (I used Black Golden brand. )
Acrylic Paint (I used Liquitex and Golden. )
Paint Brushes (Gesso can be hard on brushes. Use cheap foam brushes.)
Sandpaper (I use 320-420 grits)
Sculpting Tools are optional. I use manicurists tools and knitting needles. My friend Christi Friesen also makes some great tools.
Shop Rag – To smooth over clay.
Krylon Crystal Clear Gloss Sealer
Krylon Glitter Spray
Ribbon or other embellishments
Stick pins and cyanoacrylate glue to attach

First I removed the parts that did not fit into my design. The arms and ears are to big and bubbly for my tastes. You can leave them if you like.
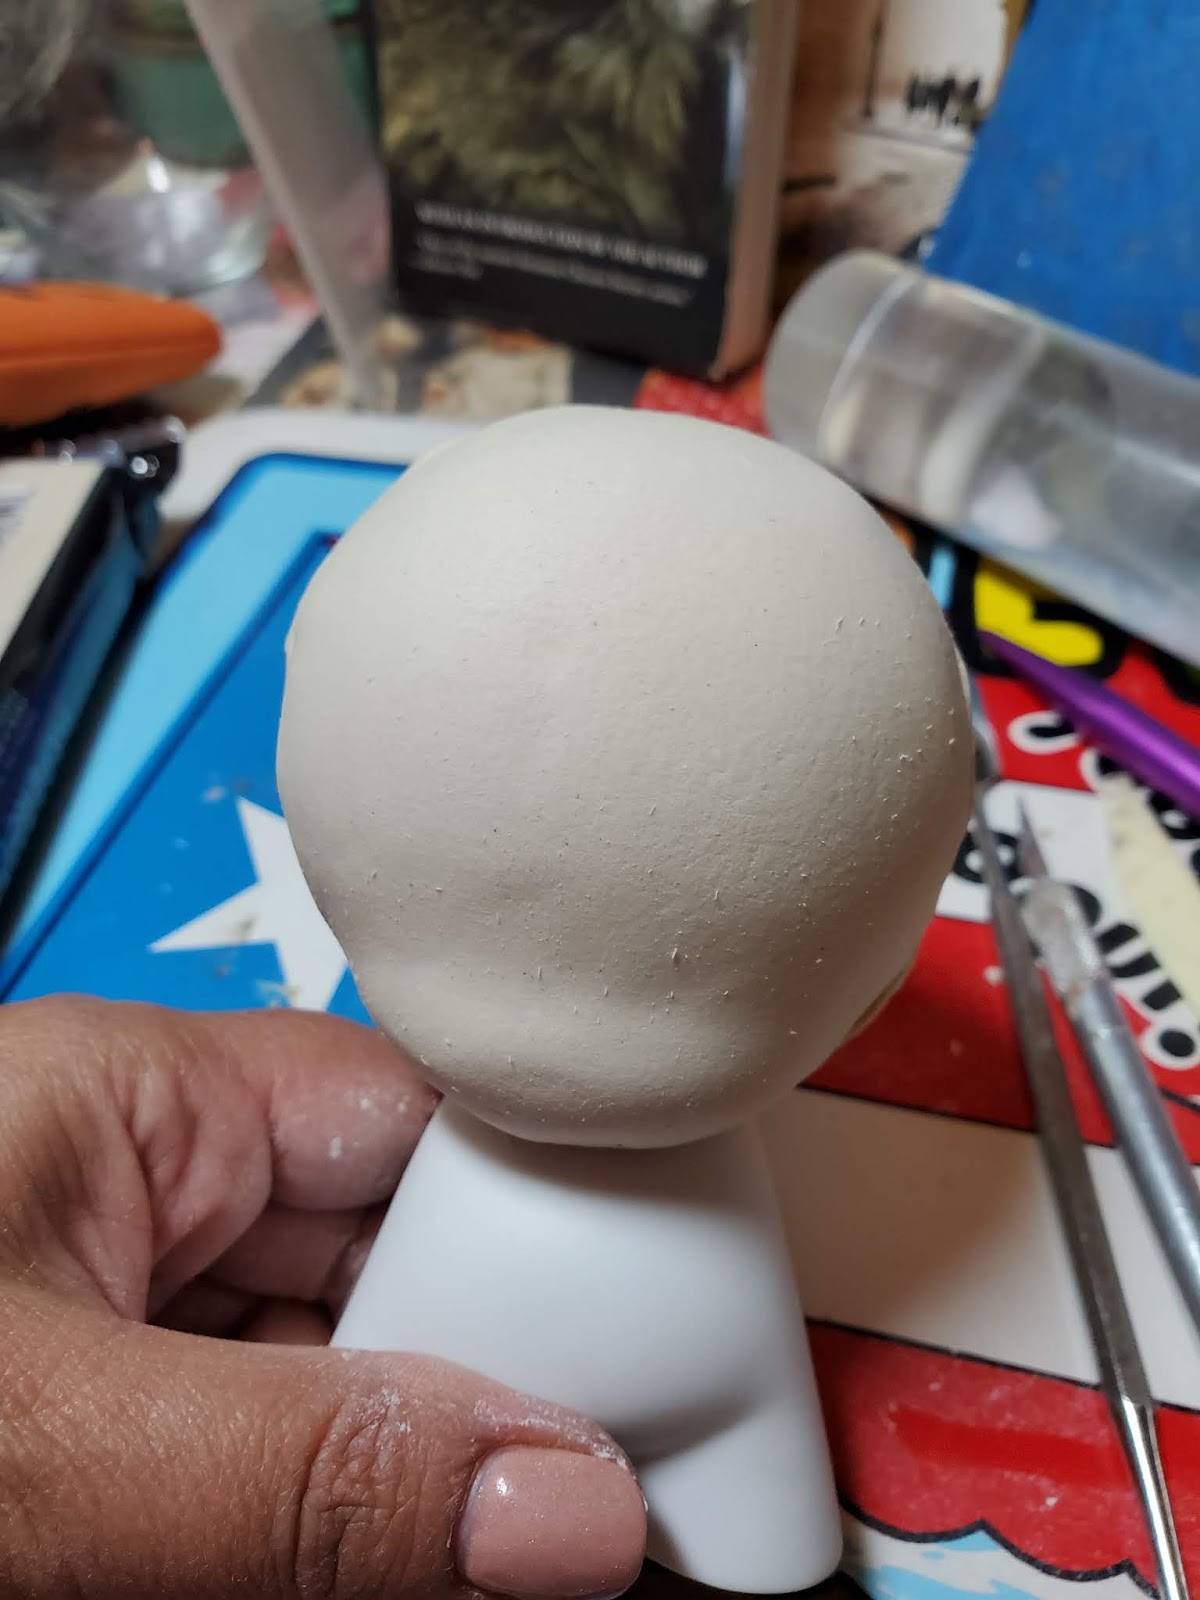
Next I begin covering the figure with Creative Paperclay. I use flat sheets of Creative Paperclay to the head first. I am doing my best to keep the face nice and smooth. No dents from finger prints or fingernails.

I'm not so concerned about the back of her head because I plan on giving her hair. I wrapped a single sheet around her head and patched it up in the back. I did the same with the lower body.

Here she is covered in Creative Paperclay. Now she ready to evolve into a little monster!

I start her transformation by creating 5 little star spokes. They are about 1.5 inches long.

I attach the star spokes evenly around the base of her body.

I secure them well by blending with a tool and my thumbs.

I shape them with my fingers. I am pinching and pulling to create a ridge and to elongate her star spokes.

Here she is all sculpted out. I gave each sea star spoke some curls, curves, and movement. I made her front spoke curled enough to be able to hold something like a balloon or lollipop at the party.

Next step.......
Mapping out the facial features. I love this part. This is where she comes to life. I see you little sea star! When you use one of these vinyl blanks the placement of features just falls right into place. I still draw lines to get the features evened up. Creative Paperclay is so easy to draw on. I just use a regular pencil. You can also scratch the features in with a tool but, removing pencil is easier than sanding out scratches later.

This is what I decided to go with for her features. At this point I could just paint her and be done with sculpting. If you like yours at this point, feel free to just paint the features on.

I'm looking for her personality. A girl can't have too many accessories. She really likes this gingham ribbon. Doesn't she look pleased? Up until this point I really didn't know whether she'd be a sweet or salty sea star!
(After taking this photo I noticed a blemish on her left cheek. Probably a scratch from a tool or a fingernail)

I sanded her down using 400 grit sandpaper. I paid special attention to her face. I wanted to keep the facial features but erase the grid lines and any scratches or blemishes on her face. I also sanded the body and sea star spokes. I did not send the back part of the head because she will have hair.

Here she is all sanded down. At this point was was at a deciding point.....
Do I want to paint her facial features or do I want to sculpt them. I really love this sweet expression.
Do I want to sculpt her hair or give her fibers or fur hair. I have some wonderful mohair, green yarn, and faux fur that would be so cute.

So, I am a sculptor so, I decided to sculpt. Just know that you can decide not to. There are so many options with this project.
These are her eyes. Just two little pebbles. These are just like 2 little beans. Make them a bit smaller than the eyes you've drawn on the face.

Make a 3rd bean for her lips. I create a heart shape using a tool.

This is the perfect shape for her lips. The shape will change when you apply it to her face.

Here you see I have added the pebbles to her face. I have added some details with my tool. This part is just like drawing. Do you see how the heart shape turns into lips?
I did not add on separate eyelids. Those were just drawn into the tiny pebbles. I use very gentle stokes to coax out the eye shapes.

Last chance to make a decision about her hair. Does she even need it? Do sea stars have hair?

It is decided, this one has hair! Just as I did with the face, I draw on her hairline. She will have a cute short, curly, seaweed, hairdo.

I start by adding pancakes of hair. Her head is dry so I use a spray bottle of water to help adhere the wet to dry Creative Paperclay. One of the great benefits of working with Creative Paperclay is that you can always add and subtract material from your sculptures. It is such a forgiving medium!

Next I add texture to the hair using a tool. A knitting needle is great for this technique. I love creating wild, wavy hair with Creative Paperclay.

Now to finish her off. She would look incomplete without her bottom covered up. I roll out a sheet of Creative Paperclay and place the figure on top. I cut around the figure with a blade.

I flip her over and smooth out the edges.
At this point a let her dry over night. I left her right side up for about 10 hours. Then I flipped her over and let her bottom dry for 4 or 5 hours in the sunlight.

Next I gave her a couple of coats of black geese. I allowed her to dry well in between coats.

You can send the gesso layers for a very smooth finished piece. Sometimes I do. This time I did not. Once the gesso dries you can paint her however you like or not at all. The solid black looks kinda cool.

I painted my girl with acrylic paints and set her out in the sun to dry. Acrylic paint and Creative Paperclay go so well together. I love the vintage look I get with these two mediums.

After painting I sprayed her with glitter. She's going to a party after all!

Finally, I gave her 2 coats of spray sealer. This will protect her from moisture and make cleaning her off a lot easier.
I left her to dry in the sun for a couple of hours.

I put on her pretty hair bow. I secured it with a pin and a drop if glue.

And she's off to the party!

Here she is at the party with all of her little monster friends!
I hope you love her as much as I do! If you decide to make your own please be sure to share a few photos with me!
I hope that you have enjoyed this project as much as I have! I'll be back with more "What's On My Workbench Wednesday" fun on the first Wednesday of each month.
Until then, stay cool and don’t forget the sun screen!
Fin - The End
I hope that you have enjoyed this project as much as I have! I'll be back with more "What's On My Workbench Wednesday" fun on the first Wednesday of each month.
Until then, stay cool and don’t forget the sun screen!
Fin - The End

Chau!
LaLa
Instagram: https://www.instagram.com/redwoodcoastcreativearts/
Pinterest:
YouTube: https://www.youtube.com/user/babylalamermaid1
No comments:
Post a Comment