Showing posts with label cards. Show all posts

Tuesday, November 1, 2016

Tori's Tip - Embellish with Delight™


3" x 3" package tag - layered paper, rubber stamps, Delight™ cut outs, watercolor

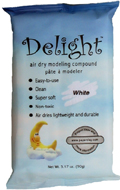
My tip for this month is to keep some rolled out, dry sheets of Delight™ Air Dry Modeling Compound on hand for when you need to embellish a card, art project, package, etc.  The dry clay cuts easily with scissors.  Punches can also be used to shape the clay.  Color to you heart's desire with markers, paints, or whatever you have on hand.   The clay can also be cut and put under sayings to lift them from the page and add dimension.  Shapes can be cut and punched and hung from ribbon, layered over one another, used to make a frame around a photo....the possibilities are unlimited.


Thanks for joining me here again!  As always, play, experiment, and have fun!

Tori
Find me on Facebook, or peruse & ponder pics with me on Pinterest

Tuesday, May 21, 2013

Lynda's Flower Cards

Hello everyone,
My name is Lynda Jeffs, and I am one of the newbies here!!! I am so excited to bring you my very first project for you guys - I hope to bring you a lot of different inspiration for your scrapbooks and cards!  I love to alter things - using clay as a great 3 dimensional embellishment versus purchasing my own!  With this clay - I love how I can paint on it, and with my Radiant Pearls paint (no longer on the market) I can emboss on it as well!  
With the cards I create, I use scraps left over from other paper crafting projects that I have done, making them way more cost effective than purchasing them at the store.  I used left over papers from this project to complete the red card using the other side of the papers!   I rounded the corners on the top mat - and embossed the saying on the front of the paper!  For the flower I started with the Creative Paperclay product and a mold I had for the flower.  I used Radiant Pearls paint to create the look I wanted, and though the scan does not show it as well, it has a bit of a gold shimmer to it that matches the flowers in the paper.  I added a simple red bow and I was done!  
For this next card, I wanted to use the clay flowers in the middle of the card but also wanted more dimension for my flowers.  For the clay flowers, they were painted again with Radiant Pearls paint and added to the middle of the flowers and then I turned up the edges of each of the petals to create that dimension I was talking about!!!   For embellishments on cards, layouts - or altered projects...Creative Paperclay is the best! 
Lynda Jeffs
Creative Paperclay Design Team 


Thursday, January 17, 2013

Jess B's - Valentine's Delight Day Cards

Hello and Happy Thursday

Finally had an opportunity to use
DelightTM 
and it works great!

Valentine's Day Cards
Mixed my acrylic paints red, light pink and black  (not shown)
with DelightTM and lled out a very thin layer
used a heart cookie cutter 

let dry (read instructions)
 DelightTM  it super light and feels like foam!

I had more fun by using stamps and stencils

Hero Arts Zig Zag Cling Stamp
with Tim Holtz Antiqued Bronze Distress Stain
 Creative Workshop - Branches Stencil

Masculine Card


 Feminine Card


Friday's is our family night
I will let them have fun using DelightTM 

 Thanks for 
stopping by