Showing posts with label embellishment. Show all posts

Tuesday, February 7, 2017

Tori's Tip - Stencils Aren't Just for Painting


I was recently looking through some of the stencils in my file and found this old and well-used heart stencil that I cut from card stock.  With Valentine's Day coming up, I thought it might be fun to try it with Creative Paperclay and one of my favorite texturing tools - scrunched up aluminum foil!
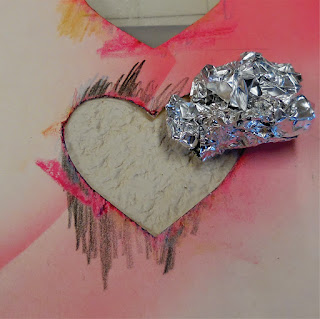


and since I saved the cut-out, I can try it in reverse!


I might use these for card embellishments or a special project for my sweetheart!

This fun technique can be used with just about any stencil and texture tool or texture sheets.


Thanks for joining me here again!  As always, play, experiment, and have fun!

Tori
Find me on Facebook, or peruse & ponder pics with me on Pinterest

Tuesday, November 1, 2016

Tori's Tip - Embellish with Delight™


3" x 3" package tag - layered paper, rubber stamps, Delight™ cut outs, watercolor

My tip for this month is to keep some rolled out, dry sheets of Delight™ Air Dry Modeling Compound on hand for when you need to embellish a card, art project, package, etc.  The dry clay cuts easily with scissors.  Punches can also be used to shape the clay.  Color to you heart's desire with markers, paints, or whatever you have on hand.   The clay can also be cut and put under sayings to lift them from the page and add dimension.  Shapes can be cut and punched and hung from ribbon, layered over one another, used to make a frame around a photo....the possibilities are unlimited.


Thanks for joining me here again!  As always, play, experiment, and have fun!

Tori
Find me on Facebook, or peruse & ponder pics with me on Pinterest

Friday, December 26, 2014

Gilded Valentine Embellishment

Christmas 2014 is now just a memory, and we're moving on to the next holiday—Valentine's Day.

We started with Creative Paperclay® and a clay mold. Molds are a great way for young ones to complete successful projects.

Next, we roughly rolled out three large clay logs.


We pressed the logs into the heart-shaped mold.


To get a flat back on our piece, we turned the mold and clay over onto our Teflon mat and pressed to flatten it.


The next step is always the hardest—waiting for the clay to dry. After it was dry, I trimmed the excess away and sanded the edges.


The last step was gilding the embellishment. First, we sealed the piece with an acrylic medium. When that was dry, we coated it with Duo Adhesive. When dry, the Duo is a tacky, sticky adhesive, perfect for applying gilding. 

This is our finished piece after the gilding was burnished and polished.


We're not sure how this Valentine embellishment will be used, but we have some ideas. Perhaps on the cover of a special journal or photo album. Embellishment on a greeting card. Part of a Valentine wall decoration. However it is used, Chloe and I are ready for Valentine's Day.

Carole

Chloe

Table Cell Table Cell