Tuesday, June 10, 2014

Lady Of The Lake Creative Paperclay Art Doll Diorama By Gloriann Irizarry


Hello it is Gloriann Irizarry here to show you how I completed this Lady Of The Lake Diorama made with Creative Paperclay®. This is a nice paperclay art doll piece. I sculpted her out of Creative Paperclay®  Material and she will be also featured at EVeRy WiTcH WaY LaNe. for group for a challenge .This group is managed by Patrick Gill and it is full of wonderful mix media and paperclay artists. It is a great wonderful artist oriented group. Everyone there is very helpful so feel free to visit us there for more Creative Paperclay® Material inspiration and Ideas.


Materials used
Metal wires
Aluminum foil
Creative Paperclay®
Plastic water bottle
Genesis Artist Colors Paints
Mineral Oils 
Paint brushes
Red Swarovski flatbacks crystals
Dry pink flowers
Eucalyptus silver dollar leaves
Weft Golden mohair
Fabric-tac Glue
Acrylic bubbles decoration
Acrylic clear flower 
Threaded glass beads
Butterfly decorations
1 square Satin fabric
1 Square Lace fabric 
Cotton tread and needle
X-acto or hobby Knife
Sponge Sanders
Wood plaque


I search online for nice anatomy skeleton reference and printed to the desired finish size.
Cut the wires to the correct size by following the printed reference.


Bend them to the correct shape and start covering them with the aluminum foil.


Add the first layer of clay to the armature and let it dry over night.


Once dry add another layer of clay. Start bending the armature to the desired final pose.


Following the anatomy references add more clay to the armature to create female figure


Make sure you add the enough wire to support Excalibur Sword. 


Once the clay dry start adding more to create the Sword shape.


 And let it completely dry.


Once the clay dry lets shape it an X-acto or hobby knife


Sand the piece a little to take anything extra off and give her a smooth figure. 


If you see that it needs more muscle just add more clay to the figure to correct the problem area.


I created the face also in layers.


I created her face in layers and always waiting for the clay to dry in between. 
Start with a egg shape ball and add the base for the face let to dry.
To create the lips for best results create the upper lip and let it completely
 dry before you work the lower lip in place. 


Sand the details with your favorite sponge sanding.


I work the sword details by using the X-acto or hobby knife and carve the details off or adding more clay and let it to dry completely.


I sanded the blade shape and carve any excess out.


Sand her face smooth to get her ready for paint. I did not make any ears because
 I'm intending for her to wear lose long hair.


Now let ahve fun with some paint. I used for this project the Genesis Heat Set Paints.
I like how nice they are to use and easy to apply in layers to create more details.


Now sometimes after the paint is heat set in the oven cracks can show up. Not to worry all you have to do is use you X-acto or hobby knife to remove the crack and cover it with new clay. 
Once it dry sand it smooth and cover the repair with new paint.


I used my favorite detail product the Sakura 3D Crystal Lacquer in Pearls colors. 
I used the Gold for her sandals and Excalibur details and Bronze in the Sword.
While the paint was wet I place some of the Red Swarovski Elements on the sandals and the Sword handle. 


To create the base start by painting the whole piece in the lightest color and add each darker tone in a circle shape to create the ripple effect.


Drill a hole on the corner of the base and I cut the Silver dollars eucalyptus to used them for the side decorations and  lily pads. I use Sakura 3D Crystal lacquer to hold the Eucalyptus leaves in place.


To make the splash is a simple an easy . 
I free cut the water but I wanted to show you so I use a Sharpie to show you the cuts.


Cut the top off. I like to use the Poland Spring water bottles because they are made out of a thinner plastic.
This will help you to be able to cut the shapes off with scissor.  


Cut the drinking cap off too.


Now your ready to start pouring the Thick Sakura Crystal Lacquer. 
Pour slowly and upside down so the drips will look like splashes when it dry. 


Add thick 3D Crystal Lacquer holding it upside down so it drips and give it a cool natural effect once it dry.


Wait for the Crystal Lacquer to be all dry before you place it in the board. Use the regular Sakura 3D Crystal lacquer to secure it to the board.
Add the butterflies the same way.


For the hair I used weft golden mohair. 
It is a lot easier to use and I like the final result because i can brush it and know the hair will not fall off. 


For the dress I did the first layer by cutting a little of the sating and cover her up. Use the needle and adjust the fabric to cover her entirely.

Repeat the same process with the lace fabric.
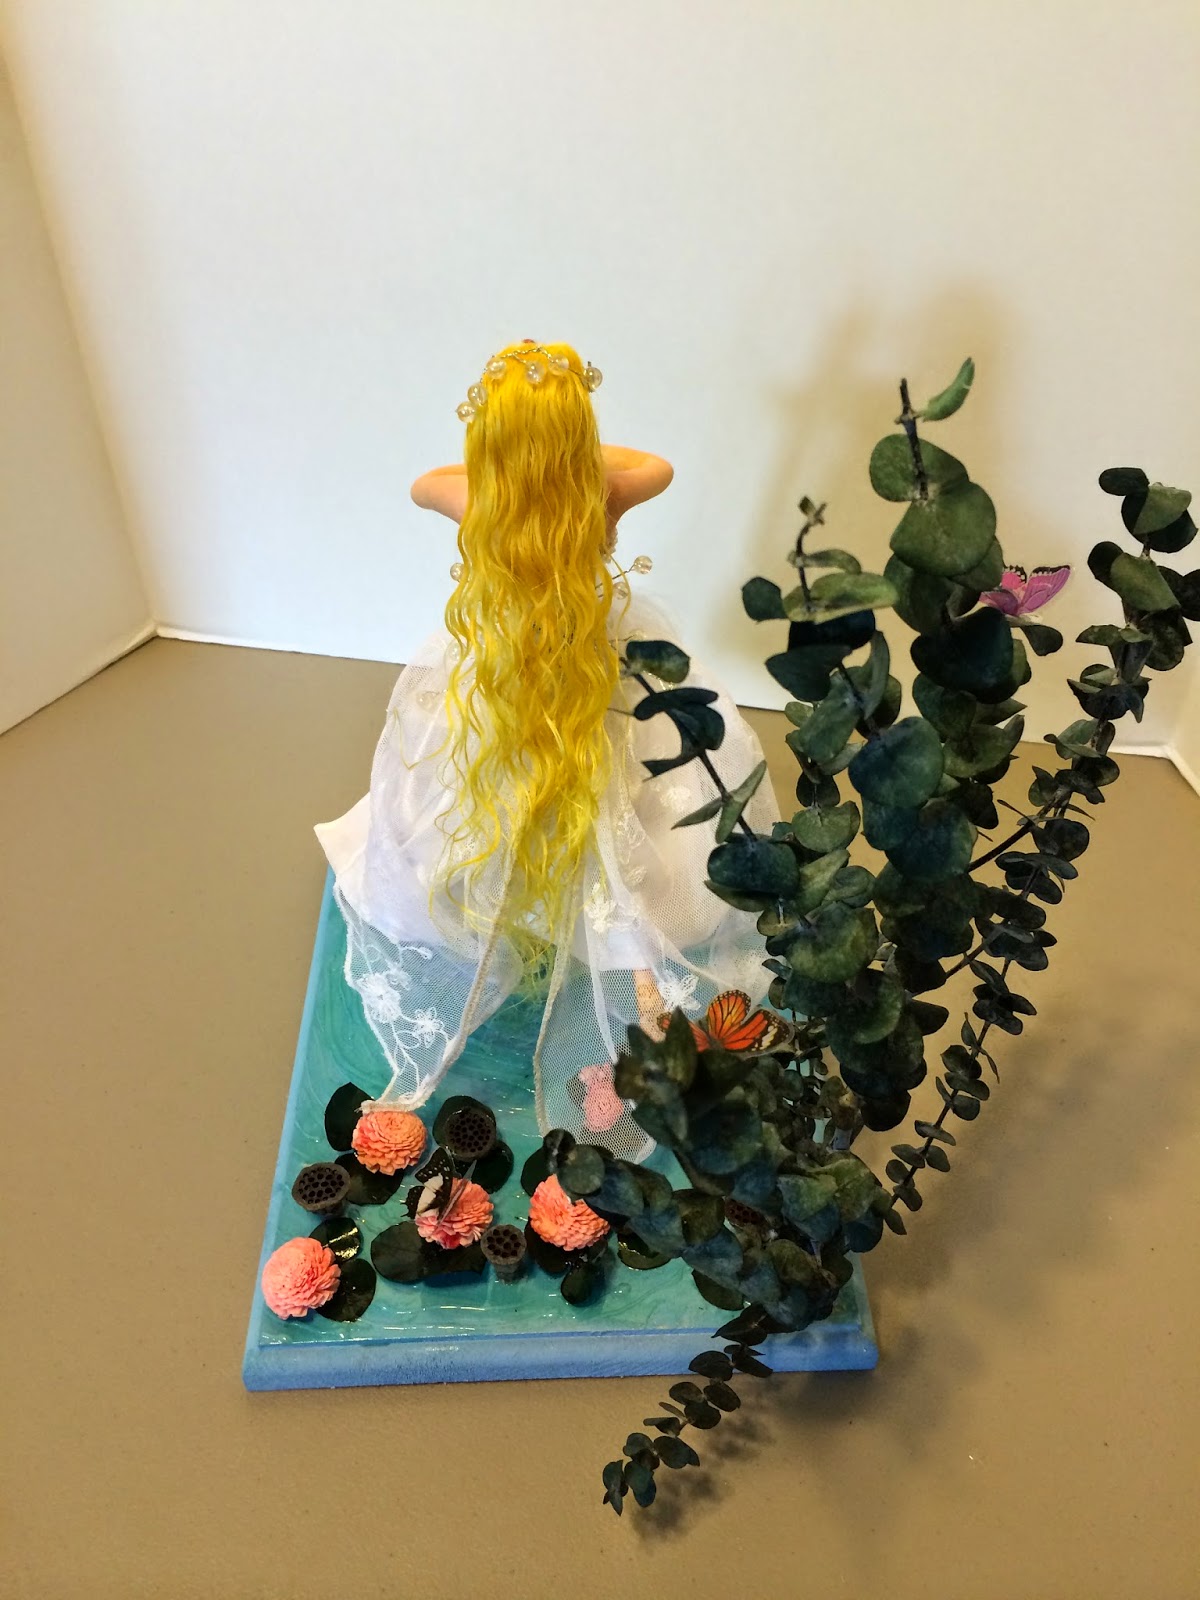

To give the wet hair look I used some hairspray to hold the curls in place.


For her crown I added the nice Acrylic bubbles to give her a nice watery look and the glass beads for the neck to create a nice choker top with a red Swarovski Crystals.


To give her the lip gloss effect i used the 3D crystal lacquer to make her shine.


I love the effect this crystal Lacquer it looks so natural once the ripples dry.


I had so much fun creating this Diorama it was a great challenge and the final piece looks so good.

Feel free to comment or email me if you have any questions
Let now have fun with some photos of the final  Creative Paperclay Sculpt.

Enjoy the pieces have a bless day and happy crafting my friends!


Sincerely Gloriann Irizarry 


Friday, June 6, 2014

First Friday Fan Day with Rachel Whetzel

WELCOME!!
It's time for First Friday Fan Day on the Creative PaperClay® blog! Rachel Whetzel here, and I have been browsing the web today, looking for things that YOU have shared on line using Creative PaperClay®
I hope you hop over to the links I'm sharing with you today, and let your fellow Creative PaperClay® lovers know you saw what they shared too!
FACEBOOK
On Facebook this month,
Rogene Manas shared THIS flower project! 
David Everett shared HIS CLASS with us! 
 
PINTEREST
There was SO MUCH fun on Pinterest this month!! Check these pins out!! 
Virginia Twedell shared THIS adorable glittered snowman by Linda Silverthorne.
Lerryn Meza pinned THESE cool mini masks.
K Moonshadow shared this adorable KNITTING CHICKEN.
Aimee Villalobos shared her NEST HEAD creation.
A {tiny} Cottage In The Woods shared these WHITE SHEEP.
Gini Cagle shared her paper creations in CARD form.
Karen Griffith pinned her adorable SNOWMAN that will make you wish it were Winter already! 

HELP ME FIND YOU!!
Use the hashtag #CreativePaperclay on all your social networks. Be sure, when using Facebook, that you make your posts and images using the Creative PaperClay® hashtag are set to public, otherwise, I won't be able to find them. You can also share your projects to the Creative PaperClay® FACEBOOK PAGE. Each month, I'll browse the interwebs looking for projects from YOU, that I can share here! Be featured next month! START SHARING NOW!!

Thanks for reading! If you'd like to keep up with me, and see more of what I'm up to, I'd also love it if you'd visit MY BLOG and Subscribe! You can also find me on FACEBOOK!

Thursday, June 5, 2014

Wood Peg People and Creative PaperClay® by LuLu Lancaster


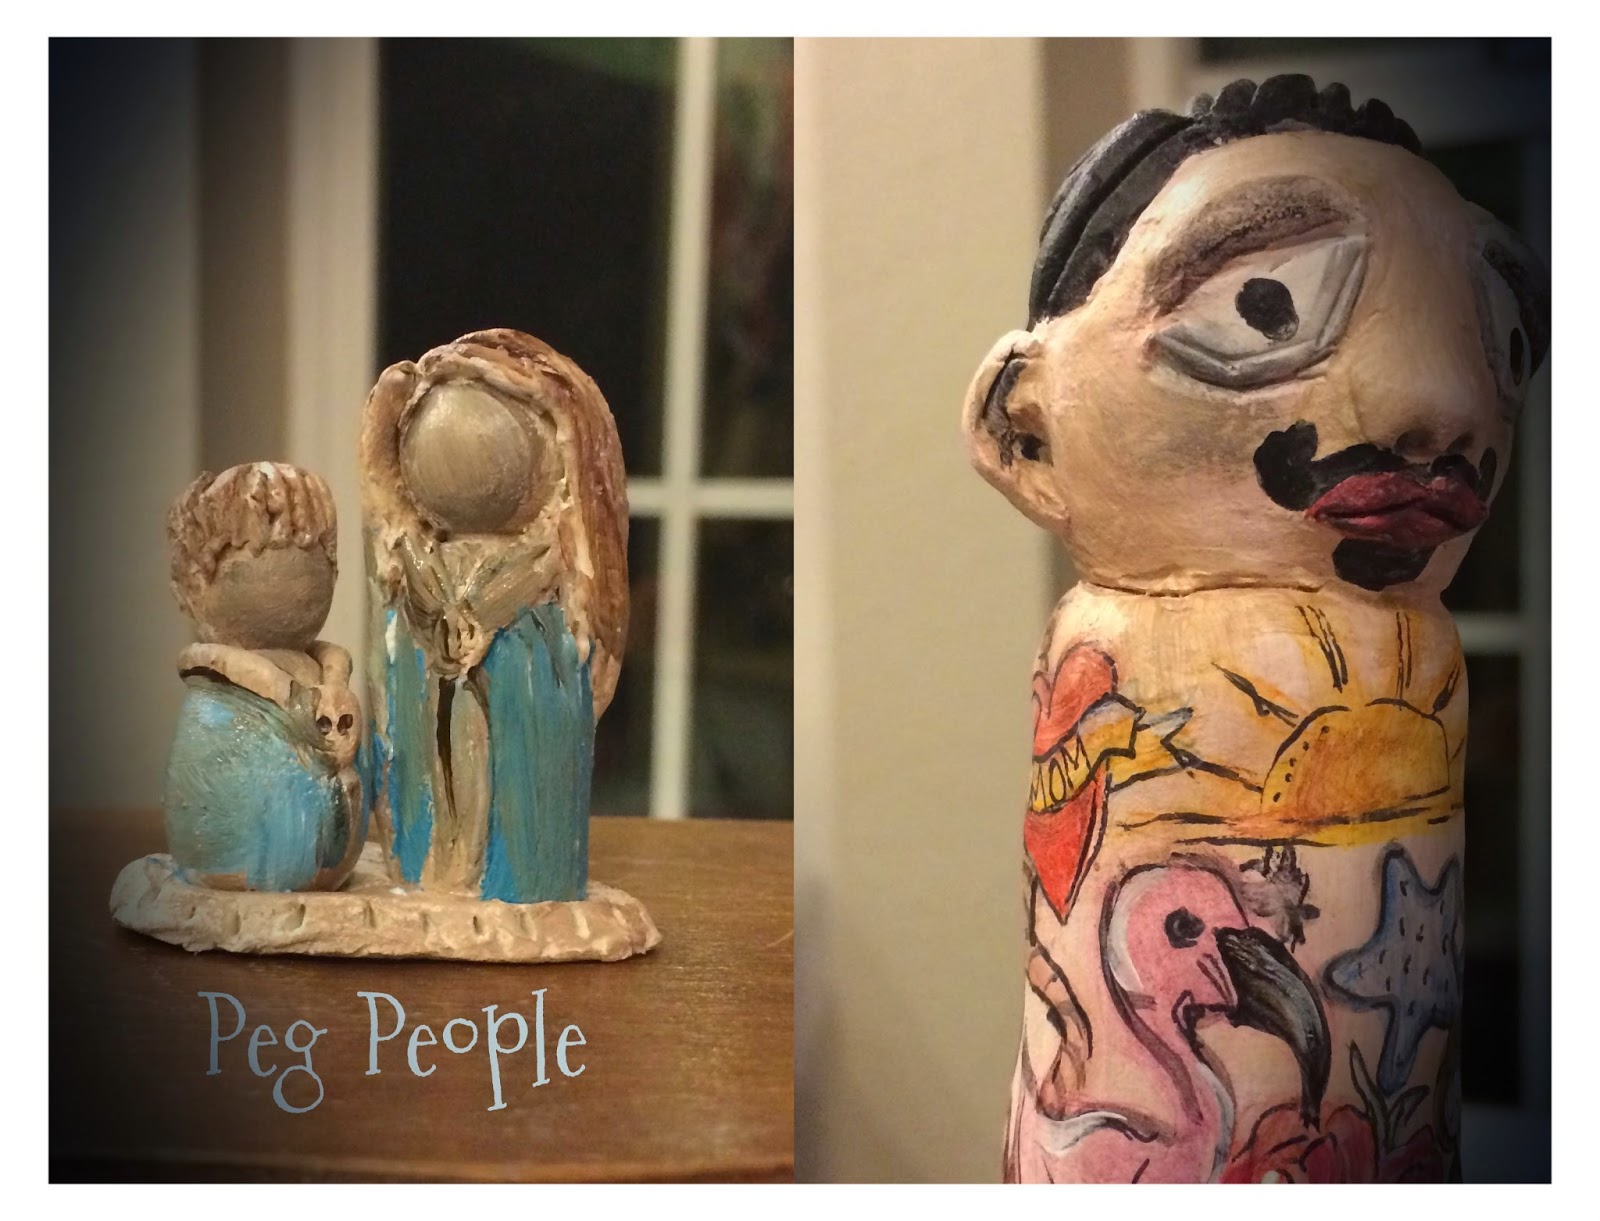
Hello there this is LuLu Lancaster and I have a little project Using Creative PaperClay® over wood peg people to make unique characters. 

I am an Art Doll artist so anything that creates a doll is a big interest to me. The per doll on the left I created several years ago using this technique. Today I will show you how :)

You will need wood peg dolls.
Creative PaperClay® 
water
acrylic paint 
and a small sculpting tool.
Thats it :)


These are small peg people about 1"-1.5" height


start with a small clump of clay and a little water on the wood. 
With some squishing around the clay will stick ;)
next you will use your sculpting tool to make the hair. This is just a series of "drags" through the clay.
Use your clay to create a collar, buttons, you will be creating the illusion of clothes ;)

You can put them on a little base of clay or leave them individual :)

Let dry and then paint ;)


Thank you for following along :) I hope I have inspired you to go out get some Creative PaperClay and create your own little Peg Dolls :)
LuLu


Tuesday, June 3, 2014

Lynda's Creative Paperclay Tips

So, let me be honest with you...not each and every one of your projects are going to come out perfect - each and every time you create something...  Don't stress out... and by starting smaller - with smaller projects...will help you to create the perfect thing - more often than not, while getting experience to tackle larger projects!  I had this whole big plan to make a "box", something to put all my stuff in on my scrapbooking desk, and went to town...  Only I didn't think about the whole project before I got started on it to finish it the right way - looking perfect!  Lesson learned - your gain!  
  • If something is not turning out the way you want it to - simply start over using the same clay - just don't wait too long to decide you don't like it.  
  • If you need to do a larger piece - make sure you have extra clay...more often than not - you will end up needing it!  
  • The thicker the piece - the longer it takes to dry...take that into account as you are planning out your piece!  
  • Keep your clay in an air tight container such as a Ziploc type bag.  This way you are able to use your clay at another time!  
  • A bit of water can go a long way to making sure your piece is perfect.  Take your time when creating, and use a bit of water to take care of any type of imperfections!  
Sometimes, the best part about "boo boo" projects, is finding out how "to" and "not to" do something!  This project - was one of those!  Check back in a couple of weeks for the "perfect" box!!!
Lynda Jeffs
Creative Paperclay Design Team 
    

Sunday, June 1, 2014

Tips by Memes Art Place!

Hello................. Creative Paperclay® followers!
It's me, Donna from Memes Art Place.

Today I have some tips for you!
I get asked all the time "How do I start?"-"What should I use as a base?"


I always say "Just try it and see if it works" - No harm can be done! Using Creative Paperclay® is really easy and fun! You can use Creative Paperclay® in so MANY ways!

Here is a $2 find! It is a compact mirror.
Pop off the top and you have a great base. 

How easy is that? You create a circle plate with the piece you just popped off. Then you can make impressions in the Creative Paperclay® or maybe make a pair of lips on it. (that would be fun and cute!)


We all see these paper mache' ornaments. Most of the time after Christmas you can pick these up for 25¢!
You can use this as a ornament for any season not just Christmas, think outside the box.


 I see a cute fairy body. Add some legs and arms and of course a head. How about those wings we just saw in yesterdays post by Gloriann Irizarry! You can see them here!

I see a Bumble Bee!
And some awesome wings! Oh, and a great big stinger!


This base could be a Basket! Add some handles. 


How fun would this be to add Creative Paperclay® to this paper mache' dress form. You could then dress her in her new gown using Creative Paperclay® to design it. Want tips on how to do that? Again, our Design Team member Gloriann Irizarry has tips to do that! You can see that here!

 My niece found this and thought I could do something with it. Hmmmm? I thought about it and thought how cool this would be if I build a top to go on it and use it to put plants under. Or even build scenes under it for different seasons or holidays! This is going to be a fun one!

  • So you don't always have to start with tin foil or wire armatures. You don't have to be intimidated by having to build that armature. Start easy and have fun trying new things. Keep your eyes open for many different items you could use!
Thanks for stopping by!

Let me know if you have some ideas for me! I would love to hear your great suggestions! Leave me a message and let me know if you have something for me to try!

If you would like to see what I am up to, visit me at Memes Art Place!