Hi, I'm Diana and I LOVE jewelry, don't you?
Today, I'm going to show you how to make this fabulous looking bib style necklace. It's super easy!
Start out by rolling a quarter sized lump of clay into a long snake.
Start rolling it up into a spiral. You can wet the side of your "snake" so that the clay sticks together a bit better.
Keep rolling it up until it's as large as you want it, then break off the rest, pinching your spiral closed.
You'll have something like this. Now, the next step is to use your paint spray, or shimmer mist, to add color.
Once you do that, you can go to town!
I glued my pieces together, then added bails at the left and right. I was left with something like this:
Beautiful, right?
Diana Gonzalez
Thursday, August 8, 2013
Wednesday, August 7, 2013
Creative Paperclay Art Dolls with a Twist
Hi all! I have been busy at my clay table this week flowing with ideas after a class with the wonderful Polymer Clay artist Carol Simmons. So while creating bracelets and earring components from my polymer clay canes I thought "Why not use the canes along with Paperclay in a design?" I ran downstairs to the studio and pulled out my materials and began to create.
Materials:
Creative Paperclay
Art Doll mold (www.bestflexiblemolds.com)
polymer clay canes (polymercreations4u@msn.com)
glass tile
straight blade
parchment paper or deli wrap (plastic wrap or wax paper can be used, but may leave a texture behind)
optional: inks, paints, powders, heat set crystals, beads, odds & ends, PrismaColor markers
I began this project by making a few doll blanks out of Creative Paperclay. Press a bit of clay into the art doll mold.
Slice off excess clay with a straight blade and then remove doll by flexing the mold (she should pop right out). Smooth any wrinkles or crinkles on the surface with your finger, give her a softer curve to the waist, round out any rough edges, then place her on the glass tile. If desired a face can be added to the doll using the same mold. (Note: If the face doesn't want to adhere to the body a bit of water on the back of the face will act as "glue" OR it can be attached later with tacky glue) Repeat process for additional dolls.
Being the impatient crafter that I am, I placed the glass tile in my oven and baked the dolls at 275 degrees for about 10-15 minutes. Let cool. Now the fun begins.
**If you are new to polymer clay, be sure to work on a glass surface, flexible cutting mat, or acrylic surface. DO NOT work directly on your good wood table or the finish will be "eaten"off!**
Polymer clay canes come in many different shapes and patterns. For this lesson I am using a square cane for its ease in matching designs. Polymer clay canes can be found on a variety of online sites....or you can come straight to me :-) You will need a clean straight edge blade for cutting (Note: If this is the blade you used for cutting your Paperclay [as I did] just rinse any excess Paperclay off the blade and dry thoroughly before cutting your polymer clay cane). Cut thin slices (number of slices will depend upon how large your cane is and how much of the art doll is covered).
Once cut, place the slices side by side to form a sheet of patterned clay. Cover with parchment paper and use your finger to rub over the seams, smoothing them together without disturbing the pattern or leaving fingerprints behind. Remove parchment paper and check to see if all the seams have come together. Use straight blade to remove clay from your work surface and place over baked Art Doll.
Smooth the clay around form, pressing any air bubbles out from underneath as you go. Once covered, carefully slice away excess clay (set aside for another use, if desired).
Place Art Doll into the oven and bake at 275 degrees for 20 minutes. Remove from oven and let cool.
I decided that a crown/hair was in order. I went to my stash of odds & ends and found the perfect piece: the flatten top off a Christmas ball! A bit of super glue to hold it in place works perfectly. the face can be left natural or colored with a bit of paint or alcohol ink or PrismaColor marker (Note: For this example I used the PrismaColor marker in Goldenrod).
Looking at the back (compared to the front) it looks very unfinished. I have a couple of easy fixes for this: 1) Trace around the original art doll shape on a piece of scrapbook paper. Cut out the shape and glue in place when the doll is completed. OR 2) cover the back with a thin layer of polymer clay and rebake. If using this choice, cover the back of the art doll with a bit of tacky glue BEFORE adding the clay backing...this will be much less frustrating than trying to affix the clay to bare Paperclay :-)
And you are finished! That is unless you are a possessed artist like me. If you fall into that category drill a couple of holes in the shoulder area and add beaded arms OR drill a hole at the bottom and add multiple fibers OR draw on a face (if you haven't used the face cabochon) OR....as you can see I can get a bit carried away!
Have fun creating! And CLAY ON!!
Materials:
Creative Paperclay
Art Doll mold (www.bestflexiblemolds.com)
polymer clay canes (polymercreations4u@msn.com)
glass tile
straight blade
parchment paper or deli wrap (plastic wrap or wax paper can be used, but may leave a texture behind)
optional: inks, paints, powders, heat set crystals, beads, odds & ends, PrismaColor markers
I began this project by making a few doll blanks out of Creative Paperclay. Press a bit of clay into the art doll mold.
Slice off excess clay with a straight blade and then remove doll by flexing the mold (she should pop right out). Smooth any wrinkles or crinkles on the surface with your finger, give her a softer curve to the waist, round out any rough edges, then place her on the glass tile. If desired a face can be added to the doll using the same mold. (Note: If the face doesn't want to adhere to the body a bit of water on the back of the face will act as "glue" OR it can be attached later with tacky glue) Repeat process for additional dolls.
Being the impatient crafter that I am, I placed the glass tile in my oven and baked the dolls at 275 degrees for about 10-15 minutes. Let cool. Now the fun begins.
**If you are new to polymer clay, be sure to work on a glass surface, flexible cutting mat, or acrylic surface. DO NOT work directly on your good wood table or the finish will be "eaten"off!**
Polymer clay canes come in many different shapes and patterns. For this lesson I am using a square cane for its ease in matching designs. Polymer clay canes can be found on a variety of online sites....or you can come straight to me :-) You will need a clean straight edge blade for cutting (Note: If this is the blade you used for cutting your Paperclay [as I did] just rinse any excess Paperclay off the blade and dry thoroughly before cutting your polymer clay cane). Cut thin slices (number of slices will depend upon how large your cane is and how much of the art doll is covered).
Once cut, place the slices side by side to form a sheet of patterned clay. Cover with parchment paper and use your finger to rub over the seams, smoothing them together without disturbing the pattern or leaving fingerprints behind. Remove parchment paper and check to see if all the seams have come together. Use straight blade to remove clay from your work surface and place over baked Art Doll.
Smooth the clay around form, pressing any air bubbles out from underneath as you go. Once covered, carefully slice away excess clay (set aside for another use, if desired).
Place Art Doll into the oven and bake at 275 degrees for 20 minutes. Remove from oven and let cool.
I decided that a crown/hair was in order. I went to my stash of odds & ends and found the perfect piece: the flatten top off a Christmas ball! A bit of super glue to hold it in place works perfectly. the face can be left natural or colored with a bit of paint or alcohol ink or PrismaColor marker (Note: For this example I used the PrismaColor marker in Goldenrod).
Looking at the back (compared to the front) it looks very unfinished. I have a couple of easy fixes for this: 1) Trace around the original art doll shape on a piece of scrapbook paper. Cut out the shape and glue in place when the doll is completed. OR 2) cover the back with a thin layer of polymer clay and rebake. If using this choice, cover the back of the art doll with a bit of tacky glue BEFORE adding the clay backing...this will be much less frustrating than trying to affix the clay to bare Paperclay :-)
And you are finished! That is unless you are a possessed artist like me. If you fall into that category drill a couple of holes in the shoulder area and add beaded arms OR drill a hole at the bottom and add multiple fibers OR draw on a face (if you haven't used the face cabochon) OR....as you can see I can get a bit carried away!
Have fun creating! And CLAY ON!!
Tuesday, August 6, 2013
Lynda's August Creative PaperClay Project -
This is my older sassy big (LOL) sister...who is 5 years older than I am, and about 6.5" shorter than I am!!! When our mom was pregnant with me, all Allison wanted for her birthday was a "sister baby" and a birthday party! She ended up with both that year! Her birthday is on the 12th (mine on the 2nd)...and after seeing some of the amazing projects here with using stamps, I had to pull out some and play! I wanted to create a one of a kind magnet for her to put on her fridge! I can't wait for her to see it because I love how it turned out!!!
Supplies used:
Creative PaperClay
Xacto knife
Basket stamp by CTMH
Flower and leaf mold
Paint of your choice (I used Radiant Pearls Paint)
Hot glue gun
Heavy cardstock for base (scraps are fine)
To start with - I am not going to give you directions for how to stamp on the clay - there are GREAT projects prior to mine on this blog that you can learn from! This was my first project made out of stamps. With this example, I used the Creative PaperClay product on all of the pieces. Here is the basic directions to complete the magnet.
Directions:
Step one: Roll out enough clay to stamp the basket, making sure to use an xacto knife to take out the pieces needed while the clay is still wet. Allow to dry.
Step two: Mold enough flowers and leaves - for my example, I used 5 flowers and 3 leaves along with the basket. Allow to dry.
Step three: After pieces have dried completely - and using the paint of your choice, paint the pieces and allow to dry.
Step four: Using your hot glue gun, start to place each of the pieces on the creation, using a heavy cardstock as your base.
Step five: Add magnet to the back piece and place on your fridge!
Allison is always the person I make things for first - and if she likes it...then I know the rest will! Easy to make for Christmas presents - and can make in just about any color I want to! Also working on a few other creations - can't wait to show you some of the fun things... Get ready to pull out your basic crafting supplies to create some fun things!!! I will have some fun tips coming up in 2 weeks for you...using those supplies, with the project I am working on for September! I hope you have enjoyed my project today - and can't wait to see what you come up with!
Thanks for stopping by,
Lynda Jeffs
Creative PaperClay Design Team and
Friday, August 2, 2013
Circus Puppy by Rachel Whetzel
It's been a balancing act, that's for sure... creating this piece while getting ready for our family reunion this week, but I'm so tickled with how it came out!! This is a commissioned piece I made, and hope to have published next year. Aside from it's base, it's entirely made of Creative Paperclay® modeling material.
Want to make one yourself?
YOU WILL NEED:
I gave him a pot belly over some puppy dog feet...
Some droopy ears, and a nice fat nose for balancing.
To help him hold up his ball, I screwed a screw into the tip of his nose once he was dry, and then used foil to wrap around the screw, and fill in the center of the ball.
Painting tip: Animals don't generally have whites of the eye showing like we humans do, but to help set apart their eyes, (especially if they are the same color as their fur) a teeny strip of off white helps to define their eye area.
Next, I painted the base white, to get ready for the CIRCUS to come to town!!
Here's the base finished.
Once his ball was made, I painted it, and added some glue to help keep it secure.
Once everything was in place, I stained the piece, and then added a crepe paper circus collar using a needle and thread to sew through the center of the paper, and then folded in 1/2, and bunched together to make the collar.
I would love for you to let me know if you create something of your own inspired by this post! Leave me a comment, and let me know if you do!! I would love for you to visit me at my "house" too!! Thank you so much for reading!! ~rachel
Want to make one yourself?
YOU WILL NEED:
- Creative Paperclay® modeling material
- Water
- Paper towel dowel
- Acrylic Paints (I use Folk Art)
- Screws
- Tin Foil
- Crepe paper
- Needle
- Thread
I gave him a pot belly over some puppy dog feet...
Some droopy ears, and a nice fat nose for balancing.
To help him hold up his ball, I screwed a screw into the tip of his nose once he was dry, and then used foil to wrap around the screw, and fill in the center of the ball.
Painting tip: Animals don't generally have whites of the eye showing like we humans do, but to help set apart their eyes, (especially if they are the same color as their fur) a teeny strip of off white helps to define their eye area.
Next, I painted the base white, to get ready for the CIRCUS to come to town!!
Here's the base finished.
Once his ball was made, I painted it, and added some glue to help keep it secure.
Once everything was in place, I stained the piece, and then added a crepe paper circus collar using a needle and thread to sew through the center of the paper, and then folded in 1/2, and bunched together to make the collar.
I would love for you to let me know if you create something of your own inspired by this post! Leave me a comment, and let me know if you do!! I would love for you to visit me at my "house" too!! Thank you so much for reading!! ~rachel
Thursday, August 1, 2013
Jess B's - Masquerade Mask - Part I
Hi Everyone!
My cousin is getting married this month and their theme is
Masquerade Ball
I helped them with their invitations
now creating Cake Topper and
centerpieces
I've had this mask for quite some time and not sure where I got it to purchase more
Creative Paperclay® to the rescue!!!
MASQUERADE MASK
Let's Get Started!
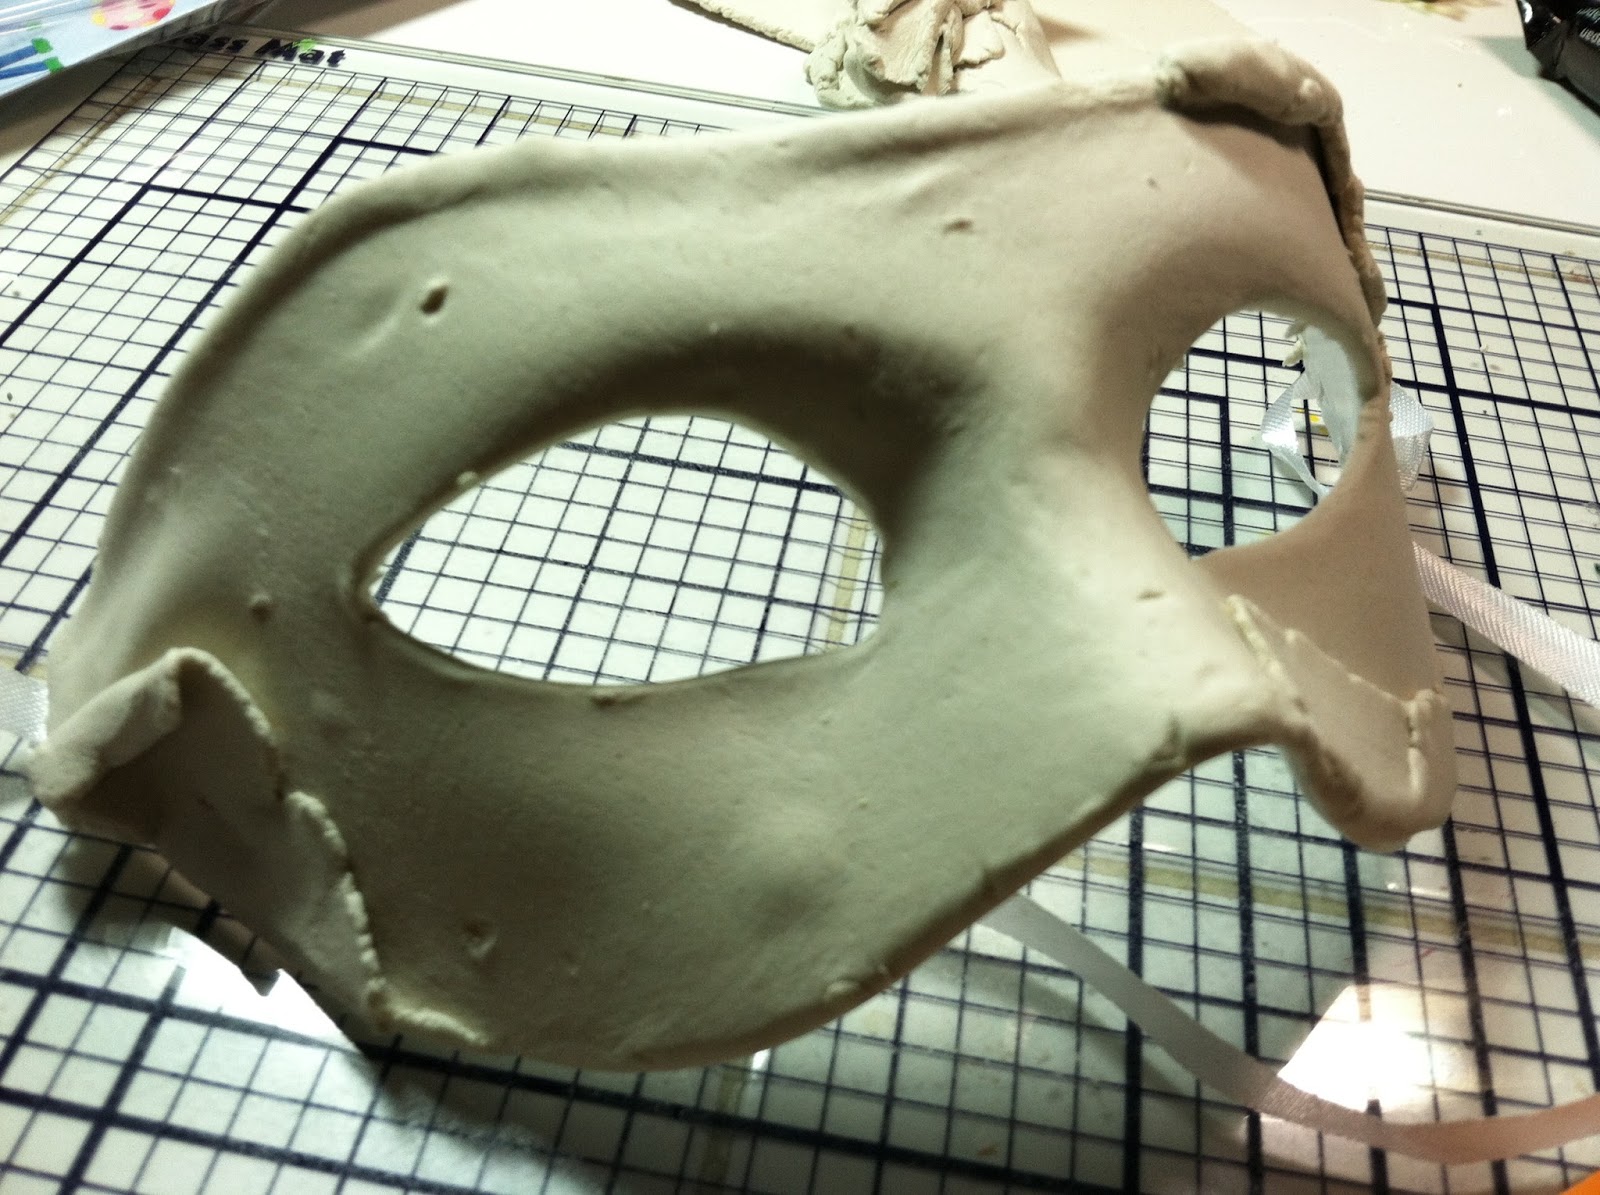
Rolled out a thin layer of Creative Paperclay®
Placed clay across the mask and gave it some texture
I allowed it to air dry to keep its original shape
I will come back to show you how I will transform these masks leading up to the wedding.
Thanks for stopping by
Saturday, July 27, 2013
Hand Stamped Magnets
If it's one thing (besides Jewelry) that I collect a lot of, it's magnets. I love them, don't you?
When working on hand stamped clay projects, I find that the best method for applying color is using pigment ink pads.
See the color on this? There are layers and layers of beautiful color on here, and this is achieved by using various shades of pigment ink, rather than acrylic paint.
When you're finished, you can spray it with a bit of acrylic sealer, though I opted not to. It's so pretty just as is, don't you think?
Diana Gonzalez
When working on hand stamped clay projects, I find that the best method for applying color is using pigment ink pads.
See the color on this? There are layers and layers of beautiful color on here, and this is achieved by using various shades of pigment ink, rather than acrylic paint.
When you're finished, you can spray it with a bit of acrylic sealer, though I opted not to. It's so pretty just as is, don't you think?
Diana Gonzalez
Friday, July 26, 2013
Lynda's Creative PaperClay Tips for July
I absolutely love
being a part of this amazing team of women, where in one way or another
have taught me a lot where it comes to working with this Creative PaperClay! I have so many things I am working on right now - some out of Creative PaperClay,
some out of paper! One of my current projects I am working on is a
magnet made out of the clay, molds, and a rubber stamp! I like
experimenting with different mediums to see what type of "effect" I can
get, while using basic stamping and scrapbooking materials! I can't
wait to start to play with other techniques and products to see what I
can come up with!
Lynda's tips for the month:
- Do NOT be afraid to play with the clay to create things with - and don't be afraid to scrap the project and start over using the same clay too! I have used it for embellishments on frames, cans, cards, cereal boxes... Use your imagination and have fun with it!
- Make sure to clean your stamps and molds with water and a brush. You want your creations to be perfect every time you make something!
- Make sure to clean your surface before you start to work on the clay - especially if you have pets!
- Look at the templates you might have from scrapbooking - to use instead of cookie cutters if you don't have them! Plus you can always cut out a shape out of paper, using it as your template too!
- Dry your creations on a flat surface if you want them to be "flat" on one side. As the clay is drying - you want to turn it over to allow the air to dry the other side.
Until next time,
Lynda Jeffs
Subscribe to:
Posts (Atom)