I've always loved the look of candle lights, especially for winter holidays, and with the advent of LED tea lights just about any material can be used for decorative displays without the worry of them catching fire!
This month I'll be showing you how I created an easy votive candle holder using:
a jar
plastic wrap
tape
scissors
craft knife
thin cardboard
Creative Paperclay® modeling material
transparency film (for printing transparencies on an inkjet printer)
Delta Ceramcoat gloss varnish
Rust-Oleum® "Hammered Gold" spray paint
gesso
paintbrush
sandpaper
paper, pencil, tracing paper

I had a set of small mason jars so I decided to use those, the jars are slightly tapered, and had a decorative textures, so I created a cardboard collar to straighten and smooth the sides.
Next I covered the jar with plastic wrap, including the bottom.
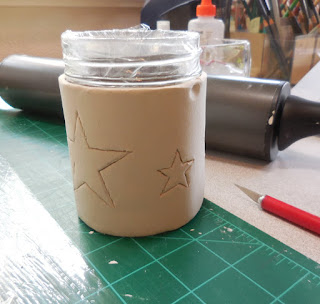
I designed a pattern based on the measurements of my jar, rolled clay out to and even 1/8" thickness and wrapped it around the covered jar, than transferred the pattern.
(for information on transferring patterns click here)
(for information about smoothing seams click here)
Next I cut around the pattern lines, using the knife in an up and down motion. The pieces were left in place so the edges wouldn't curl up during the drying process.
oops ---I accidentally stuck my thumb on the edge when I moved the piece. Thankfully, Creative Paperclay® is so easy to fix I'll just let that dry and then add fresh clay later to repair it, rather than trying to smooth it out now and risk stretching out the clay at the top.
When all the clay was dry, I finished cutting out the design, repaired an dings or dents, and sanded as necessary. I covered the entire piece inside and out with white gesso, and when that was dry, sprayed on two coats of hammered gold spray paint.
While I was waiting for the spray paint to dry, I created a frosted lining for the inside of the light cover. I started by dribbling gloss varnish over the surface a sheet of transparency film.
Next I textured it by using a piece of wadded-up plastic wrap and dabbing gently to spread the varnish. When using this method, the texturing needs to be done fairly quickly before the varnish starts to dry, or dabbing the sheet will result in the varnish sticking to the plastic wrap instead of the transparency film.
When the entire sheet was mottled I set it aside to dry.
Once the sheet was dry I cut strips to the length and width necessary to fit inside my light cover, placed it inside with the shiny/smooth (untextured) side facing inward to reflect more light, then added the LED light - Done!
This project was so quick and fun I decided I needed more lights for a holiday display. Happy Holidays, friends!
I'd love for you to join me for more projects & art adventures on my personal blog


2 comments:
I love the votives and the texture of the frost paper. Thanks for the tip of leaving the inserts still in while drying.
completly love this project
Post a Comment