
 Supply list:
Can - your choice of size... I use an MJB coffee can (empty of course)
Paper of your choice
Delight product
Heart cookie cutters
Glitter glue
Heart punch
Ribbon
Border punch
Die cuts
Directions:
Step one: Using the Delight product, flatten an entire package out to your desired thickness. If you are reusing the Delight product after you have cut shapes out - simply roll in a ball - and flatten back out!


Step two: Start to cut out hearts with your heart cookie cutter. Repeat step one using the leftovers. Set aside to allow to dry.


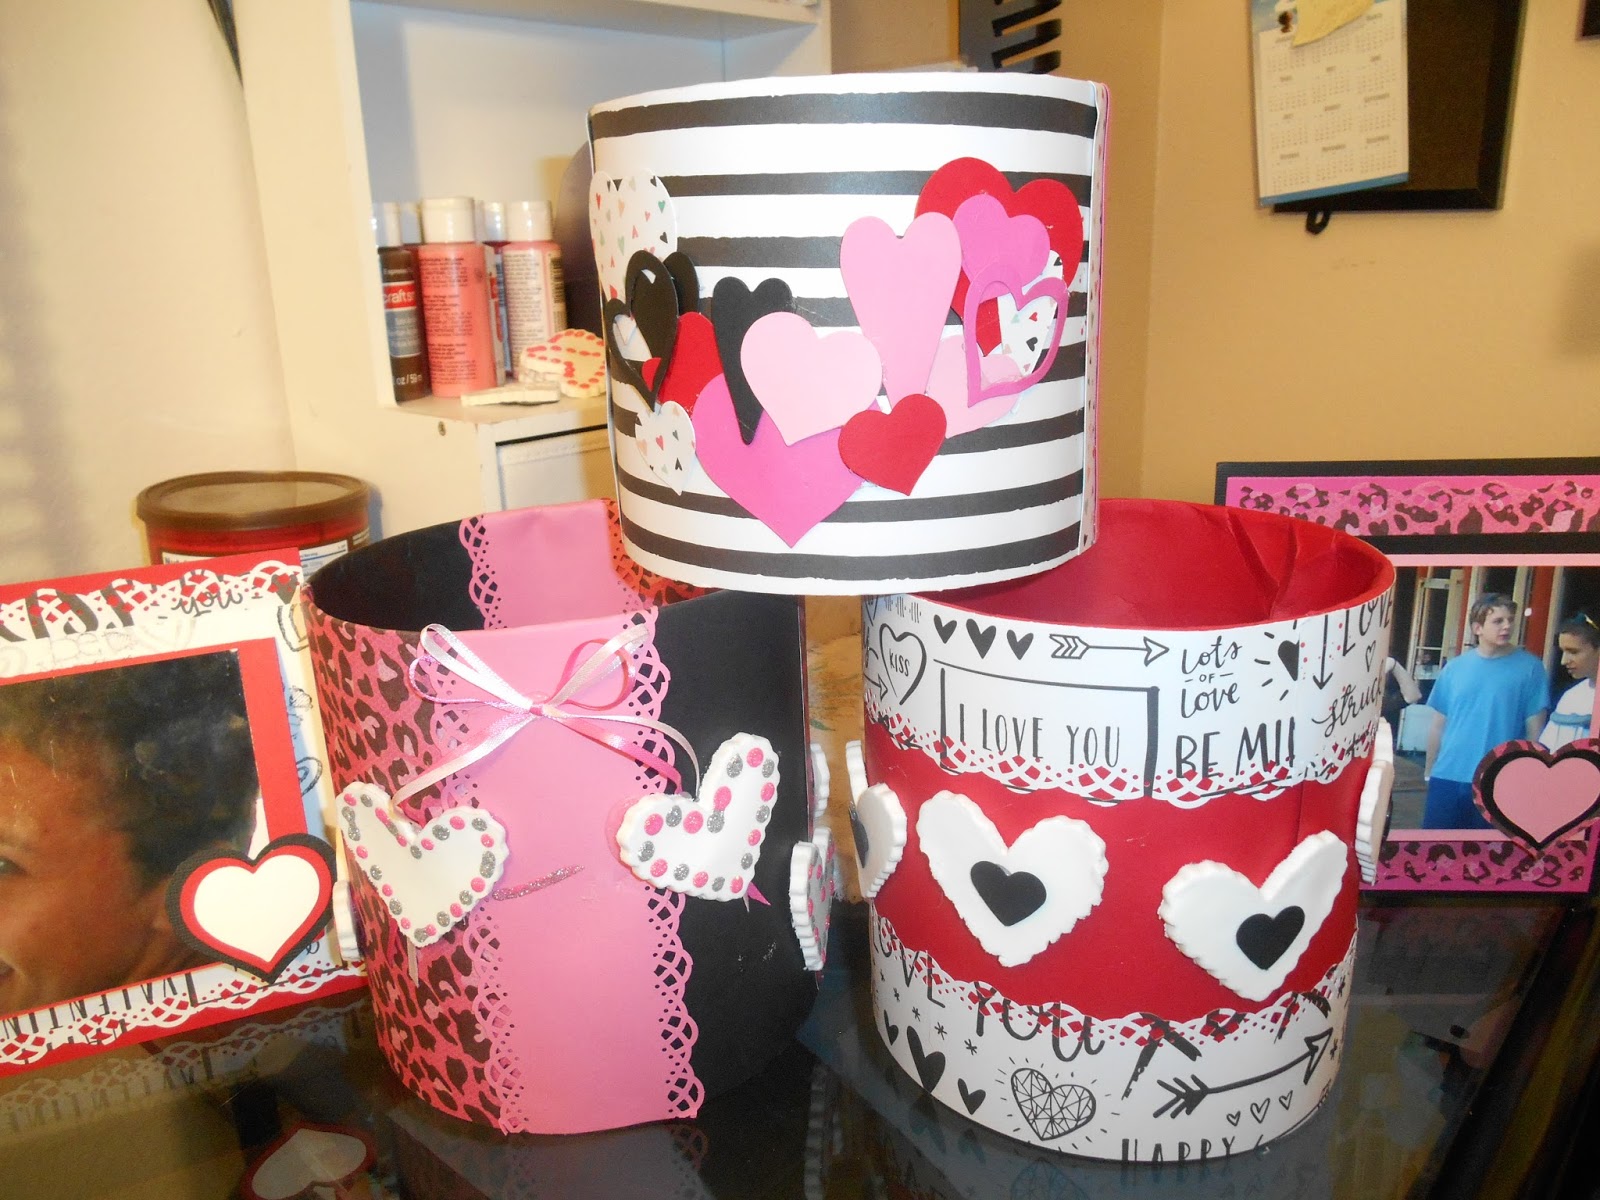
Step three: Take your can and start to cover the outside in an attractive manner. Measure the outside of your can and add about 1-2" extra paper to allow for you to glue the whole thing down.

Step four: Start to add the extra's that will make the can unique, such as a border using the border punch, die cuts or embellishment's that go with the theme you are working on.

Step five: After the Delight hearts are finished drying, decorate them with punches and glitter glue. When glue is completely dry, add to the can. With the pink can, I added a bow, with 2 hearts on the top of the ends of the ribbon. With the red can, I added a black heart on each of the Delight hearts, with 1 heart accented in the glitter glue.


With these can's - you can customize to just about any gift giving event you have, or plain (in a favorite color) for "just because"!!! Each of the cans are different, with tags created (directions on Memories in Tyme blog) to match each one! They are a bit bigger - I wanted something they could frame if they wanted to!
**Tip - watch for cookie cutters at Walmart for .98 cents for about 5 individual cutters! Or - grab a coupon and go to your local craft store and get them! You can even check out the thrift stores too! I spent almost $5.00 at Michael's for 4 cookie cutters, went to Walmart later on - and found them for .98 cents!
Cookie cutters, added with Delight or Creative Paperclay - can create so many different things!!! Accents for your scrapbook albums or cards...magnets...or embellishments for altered items! One package will go a long long way - unless you are making a larger item!!! Delight product will dry quickly - and can be put in the microwave to create a more 3D look. Creative Paperclay will dry hard and non-breakable, ready for acrylic paint!!! So, depending on what you are looking to do - either product will help you get started in creating really fun one of a kind items! I have a video coming up - tips on using molds to create embellishments and other fun things - I hope you will join me in 2 weeks!
Thanks for stopping by,
Lynda Jeffs
Memories in Tyme and
Creative Paperclay Design Team
No comments:
Post a Comment