Paddy O'Malley the Christmas Mouse is ready to make an appearance this Christmas. He loves to help out with the decorations.
SUPPLY LIST:
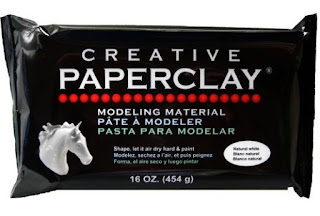
Creative Paperclay®
Paper Mache' box or wood box for drum
Acrylics paints
assorted paint brushes
basic clay tools
tinsel
small ornaments
18 gauge wire
tin foil
masking tape
glue
small wooden skewers
small bowl of water
2" and 4" foam ball
fine grit sandpaper
Follow this link for a video of the sculpting process and well as the still pictures below with text.
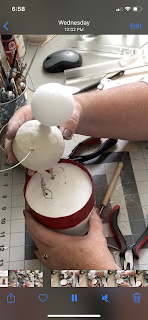
I started by painting the box to look like a drum and decided where I wanted the mouse to stand and poked a couple of holes in the top to secure the legs. The larger ball is the body, with 2 wooded skewers as the legs.
18 gauge wire passed through the body where you would imagine shoulders to be. Another skewer placed where the neck would be and the smaller foam ball placed on top as the head. Adjust to where you like it.
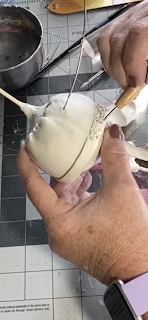
I work on the body and head separately in the beginning. Here I have covered the body in Creative Paperclay® and while it drys I'm working on the eye sockets of the head. just pressing a ball tool in the foam or use your thumbs.
making small loops for ears and pressing them into the foam. Kinda Mickey Mouse ears. Cover with masking tape and then clay.
I cover foam with masking tape because there is less cracking of the clay as it dries. I find the foam absorbs the moisture quickly and causes the clay to have more cracks, thus more repair work to do.
Start adding clay to the bottom of the skewer and add little fun toes.
Roll out some clay and start to construct a santa like coat. I made three separate pieces. One across the back and one for the right and left side of the jacket front. At the bottom I used a straight tool to add texture. Making is look like fur lining.
While the jacket dries I move on the the head. This takes some time and everyone will have a different look. Just have fun with it.
Adding that tin foil to the arm wire. This adds strength and gives the clay something to hang on to. Pose the arms the way you like. I knew I wanted him holding the garland, so I made sure I had the arms arranged in a way that it looked natural.
Cover the arms with clay, add texture and seams.
Finally he will need a nice fur collar. So add a snake of clay to circle the neck area and add the texture.
Add a hat if you want. I created a tin foil hat and covered int he same fashion as the jacket adding the fur around the base.
And you're done! Let him dry before sanding and painting. Spruce up the drum by adding your design.
I hope you enjoyed this tutorial. You can see other things I create by visiting my various social media sites and my Etsy store and website. If you have questions you can always shoot me an email.
Contact: Susiewhc@gmail.com
Facebook and Instagram search @artbysusiek
https://artbysusiek.com Here you can sign up for my Creative
Breakfast Club
www.artbysusiek.etsy.com
https://www.pinterest.com/susiewhc/
]


No comments:
Post a Comment