Showing posts with label gift. Show all posts

Tuesday, May 3, 2016

Make a Sweet May Basket


Traditionally, May baskets are left on doorsteps or hung on door knobs on May first, but this May basket filled with goodies could be a sweet treat for Mother's Day or any time!

To create the basket you will need:

Creative Paperclay® modeling material
plastic snack container
paper bag
plastic wrap
rolling pin
masking tape
scissors
craft knife
acrylic paints
varnish

First create the form for your basket as follows -

Cut a strip of paper bag about 3 inches wide and long enough to go around the snack container with some overlap.  Fold the long edge of the strip down far enough to fill the rim of the space between the top of the snack container and the "lip" that the lid snaps on to.   Continue folding the strip over until it is thick enough to be flush with the lip of the container.  (If it starts to get too wide from folding, use a fan fold for the remainder).  Attach the paper strip to the top of the container with masking tape.


Cut a second strip of paper about 2 1/2 times the height of the container and long enough to go around twice.  Fold the long edge of the strip down about 1" wrap the strip around the container twice, taping the folded edge flush with the edge of the container, over the thin strip you applied in step 1.  Make a cut from the top edge of the strip to about half way down the container, about every inch along the strip as shown.


Fold the outer layer of strips outward, and roll/fold and tuck the inner layer into the space where the edge of the container slants towards the bottom.


After all the inner strips are folded in, fold one of the outer strips towards the center of the container and trim just slightly longer than the length to the center.  Trim the rest of the outer strips to approximately the same length, then fold and tape the strips to the center all the way around, pulling them taught over the inner strips, and overlapping and smoothing the outer strips as you go.  Trim strips if necessary to avoid large bumps or hard edges.


When all of the strips are folded down and taped, add a layer of plastic wrap and set the completed form aside.


Next roll out a layer of clay to 1/8" thickness or less.  Cut the clay into 3/8" strips, then cover the strips with plastic wrap to keep them pliable as you work. You'll need about 20 strips, 10" long.
Place the form upside down on the work surface and wrap the first strip of clay around the bottom.   Trim off the excess and smooth the seam.

Next lay one strip across the the width of the form in the center, and the next strip over top of that one, making a cross in the center of the form.  Lay one strip on each side of the center cross.


Fold back one side of the cross and lay another strip lengthwise, then lay the strip back down over that one to to create the weave pattern.  Lift the other side of the strip and repeat the process.  Continue alternating the pattern (next time you will be lifting the two long strips, etc.).  When you come to the edges of the container, adjust the strips if necessary to insure that you will be able to complete an over/under wrap around the container - you should have an odd number of strips in each direction.  In my case, 5 strips for the long side, and 7 for the short side.  Use the remaining strips to go completely around the container, lifting the strips in an over/under pattern and alternating the pattern for the next row.


Set the basket aside to dry.  When the clay is dry, carefully remove the form, then remove wrapping from the plastic container.  Put this back in the form, use fresh clay to fill in the spaces around the weaving, and add a strip to the top edge, but make sure you leave enough room around the edges to be able to remove the plastic later for cleaning.


Allow the clay to dry again.  Remove plastic insert, then paint and varnish the clay as desired.
Replace the plastic and fill with goodies!!!  Give it to someone you love.


Thanks for joining me here again!

Find me on Facebook, or peruse & ponder pics with me on Pinterest


Monday, April 20, 2015

Alice Inspired Pin Cushion for Mom

 Good Morning!

If you have a Mom who likes to sew then this cute teacup pin cushion gift will be a real winner!


It doesn't matter how old you are, mom will always cherish something handmade by you. She still has a shoebox full of magnificent drawings you created in elementary school .... am I right?


Here is what you will need

Creative Paperclay®
Sandpaper
Sandits®
Styrofoam ball
Poly fiberfill
Fabric
Plastic flowerpot
Baking spray
Sewing pins
Needle and thread
Americana Muti-surface paint®
Mod Podge®
 E6000 glue

Let's get started

Making the cup
1. Lightly spray a plastic flower pot with baking spray so that your paperclay will not stick.
2. Roll out a sheet of paperclay and drape over the flower pot.
3. Trim off excess.
4. Smooth out paperclay using water on your fingertips
5. Cut a strip of paperclay and roll it to form a solid tube. (This will be for your handle)
6. When dry smooth out the cup more (if needed) using a fine grit sandpaper. The handle had a lot of  curves. I found it was easier to finish using Sandits®.
7. Paint your pieces and decorate to your liking.
8. Attach the handle to the cup using E6000 glue.
9. Mod Podge the entire piece to seal.


Making the pin cushion 
1.Cut a square piece of fabric large enough to wrap around your ball.
2.Wrap some fiberfill around the styrofoam ball.
3.Wrap your fabric around the ball to hold the fiberfill on pinning in place.
4. Take a needle and thread and stitch together at the bottom of the ball gathering excess as you go.
5. Remove the pins.
6. Glue the finished fabric covered ball into the cup using E6000 glue.


Top view of the finished pin cushion
Thanks for following along with the creation of my quirky Alice in Wonderland inspired pin cushion.

Happy creating!
Shari


I have been creating art for as long as I can remember. I studied graphic design in Portland, Oregon before moving to Denton, Texas and putting all my focus on creating mixed media art. In addition to being on the Creative Paperclay design team, I am a contributor for the Robin's Nest Design Team, an article writer for Mixed Media Art, and a blogger for DecoArt.
I strongly believe in giving back. I volunteer at Scrap Denton Creative Reuse Center where I teach workshops, art camps, and perform art demos. I am very passionate about mixed media art and enjoy helping and watching others discover their creativity.
Follow more of my creative journey on My Altered Life's blog and My Altered Life on FB

Friday, June 20, 2014

Creative Gift Boxes with Rachel Whetzel


WHAT YOU'LL NEED to make your own gift box:

A box that you can repurpose, or a new box. Either should be made with a paper like finish.
Creative Paperclay®
Paints. I use Folk Art acrylic craft paints.
Stain. I used Valspar antiquing stain, and Ranger Ink Distress Inks (walnut)
Paint brushes
Scissors
Papers (I used an old dictionary page)
Glue. I used Elmer's School Glue for this project. 
Texture Plates, Rubber stamps, and other items for creative texturing. 

Wet the surface of your box, and start pressing clay into it.
When the top is completely covered, start pressing texture into the wet clay. I cut some punchinella, and pressed that onto the top.
To get a lot of my pieces pressed well into the top, I would turn the box top upside down and press into the counter tops.
I kept layering stamps and texture plates until I got the look I liked.
Once the top was dry, I sanded the sides of the box smooth, and glued dictionary pages around the outside. Once the glue was dry, I trimmed the excess paper.
Then I painted the top of my box! Once the paint was dry, I layered in shading by using stain (black paint would work too) and wiping the surface, leaving black in the crevices of the piece, and allowing the blue paint to show through. I used some of my Alumidust BRONZE to add a fun bit of color and shimmer on the US Art Quest stamped area, by using my finger to lightly dust the piece and rub the bronze in.
When I was all finished with my layering, I finished off the look by using Ranger Ink's Distressing Inks to darken up the edges of the box. Then I topped the whole thing off with a pretty white piece of twine.
I also played a bit with the twine placement, so that the lid could be removed without taking off the twine. Now I have a really cool, totally unique gift box to put something pretty in!!
Thanks for reading! If you'd like to keep up with me, and see more of what I'm up to, I'd also love it if you'd visit MY BLOG and Subscribe! You can also find me on FACEBOOK!

Thursday, December 12, 2013

Giving the Gift of Creativity.

Hello there! It’s Susan from TheBoredZombie.com with something a little different for my December project – a challenge! During this holiday season, I challenge you to give the gift of creativity!

If you’re like me, a lot of your friends and family don’t quite understand your obsession with creating. Some may say things like “I don’t have the patience (time, talent, etc) for that.” Some marvel over your creations as if there is no way human hands could create such a thing. Some are generally indifferent. I'll bet there's also at least one or two you can think of that are genuinely interested. They ask questions about how you did it. Want to know what kind of materials you used or compare it to something they tried some time ago. They let you prattle on about books, blogs, tools and supplies actually listening and maybe even remembering a few things. Instead of making them a gift and telling them all about it – why not give them gift of making themselves? 

I’m so excited to be doing just that and challenge you to do the same. Last month, Diane posted a tutorial that I just loved and thought perfect for a beginner with Creative Paperclay® Modeling Material. With Diane’s permission, I’ve printed her instructions and put together a getting started kit for a good friend of mine. 


Included in the kit are all of the supplies she will need to make this project. Remember – this is for a beginner, don’t assume they have supplies on hand! I had to be a little creative, I picked up large gems to use in place of the buttons and bought a craft wood plank since I never could find one to reclaim. I made notes on the printed tutorial where I made substitutions. I picked up the items at Michaels with a coupon and it totals roughly $23. With more creative shopping, you could probably get it right in the $20 range.

As an added bonus - I included this on the second page of the tutorial:
I'm pretty sure you can't get that kind of personal service from a store bought kit! I so hope she loves the gift - I totally do, there's a good chance I'm going to give this tutorial a whirl myself! If you put together a kit, I'd love to hear about it. Drop me a comment here or an email to susandowenby@gmail.com.

On my blog, theboredzombie.com, I'm musing a bit on creatives, busy times of year, and how I was inspired to put together this gift. Stop by and take a peek!

Thank you for visiting the Creative Paperclay® Modeling Material blog. Your support means the world to all of us! Happy Holidays, I'll see you again on December 26th.


Friday, October 25, 2013

Worry Box with Stars

I can't believe that this is my last post as 
a designer for Creative Paperclay ®.  The last two terms have been a time
for me to grow creatively using a new medium. I hope that you have dug out your 40% off coupons, and bought a package of Creative Paperclay ® at your local craft store.  
Whether a novice or professional, this product will add interest to projects from paper crafting, sculptures, to home decor and jewelry!

Today, I'd like to show you a fun project that will be perfect for worry warts...
and yes, I tend to fall into this category from time to time!

Supply List:
Creative Paperclay ®
gesso
tools as needed
Glue Dots ® adhesive
ribbon
papers as needed
brads
cord
acrylic paint
A few months ago, I had a bit of Creative Paperclay ® left over. 
I wasn't going to use it any time soon and I didn't it to dry out.
So, I rolled it out and cut out star shapes...and stored them for some future use.
If you need a more in depth tutorial about rolling, cutting, and sealing, Click to this CPC Blog Post.
Today, I painted my stars with gold acrylic craft paint.  
I painted the bottom and sides first. Then, a nice coat on the top.

A certain Dollar Spot sells these adorable mail boxes, from time to time.
And apparently I buy a few of these from time to time to time to time...but I digress.
I thought it would make a great Worry Box.
What is a Worry Box?
Well, you write down your worry...you stick in the box...
and you just let life move on...without losing energy on silly fretting. 
I have read that it's great for younger kids too.
Parents can sneak in and read their kids' fears...if their child isn't coming forward on their own.
I like the idea of putting the worry into a box...and moving on.
But...on to the project...
I used papers to decorate and embellish the plain white mail box.
Pop Up  Glue Dots ® are strong and make a GREAT adhesive for these star embellishments.
Back View...
Yes, I was tempted to add even more bling...but I refrained,
for now!  lol
Inside, I typed up a quote from Corrie ten Boom, a woman who lived through World War II, and tried to help others as best as she could, despite danger to herself and her loved ones.
 “Worrying is carrying tomorrow's load with today's strength- carrying two days at once. It is moving into tomorrow ahead of time. Worrying doesn't empty tomorrow of its sorrow, it empties today of its strength.” -- Corrie ten Boom
Then, I stamped stars on matted 3 x 4 inch cards, where I can write my worries down. 
But, I have a sister who admires Corrie ten Boom, and probably has enough worries (hehe)
to fill this mail box, I'll be giving it to her at Thanksgiving!
Thanks so much for visiting the Creative Paperclay ® Blog today.
Dawn Mercedes, of Sunnyside Up 
(Where I will continue to create with this fantastic product!  I hope you'll visit me!)

Thursday, December 20, 2012

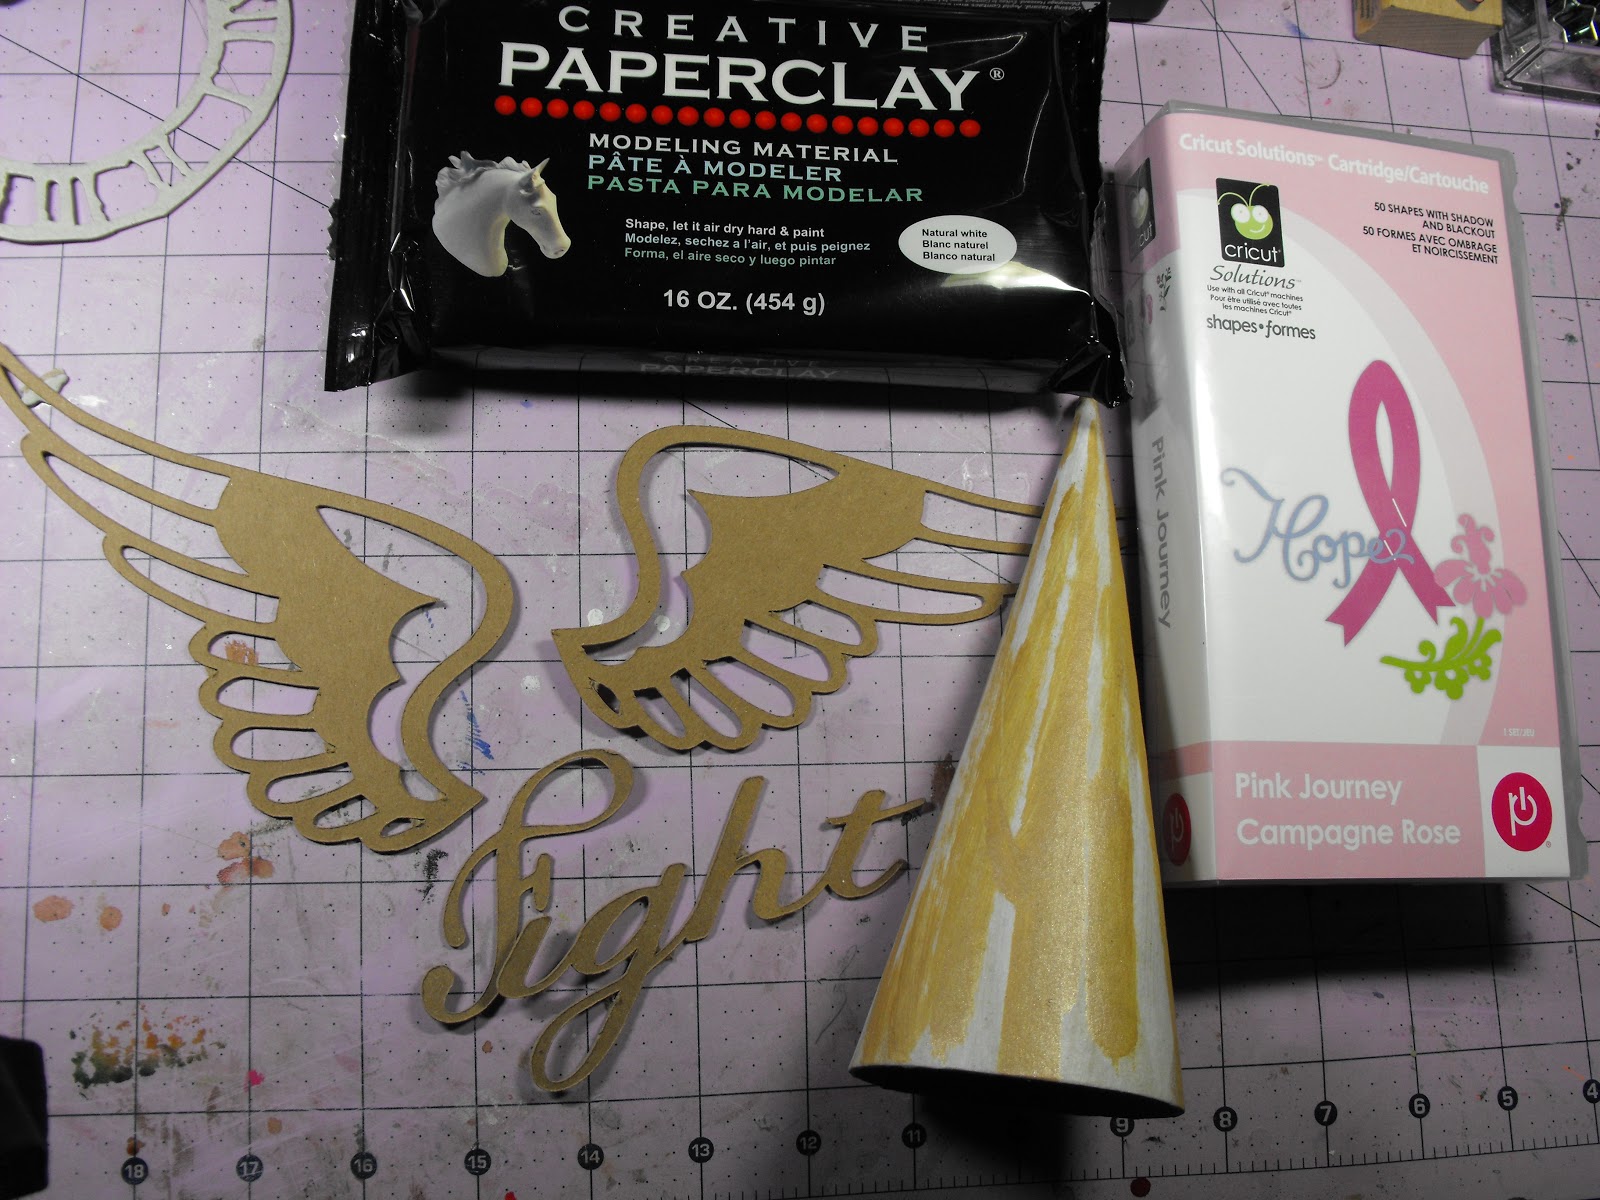
Jess B's - Fight Like a Girl

Welcome
and Happy Holidays to Everyone

Christmas is very near
and within this many many ups and downs
have occurred for many of us
Hold your chin up 2012 is almost over!

I have dedicated and will present this 
project to
Beatriz Reyes
a co-worker who is dear to me
we have been working together for
nearly 7 years
She is dedicated to her job
her family and her health
Always has an upbeat attitude and just
one of those people that you just want to be around

Without going through all the details

She is a fighter in more ways than one
being in remission of breast cancer for 8 years
she has beaten the odds
But this summer she was diagnosed again with the 
ugly bugger and going through chemotherapy once again
so I made her a

Fight like a Girl
Angel


 INGREDIENTS
Creative Paperclay®
Cricut Cartridge - Pink Journey and Indie Art
Terry Sproul Mixer- Ink Sapphire Pearl
Sakura 3D Crystal Lacquer
Delta Paint - Hydrangea  Pink
Deco Art - Glamour Dust - Rose Celebration
Modge Podge - Silver Glitter
Mini Feathered boa
Pearl
lace applique


Thanks for stopping by
A wonderful Christmas and prosperous 
New Year to all


Monday, November 12, 2012

Where We Love Mixed Media Painting

Hey Everybody, It's Edie!
My husband's ship will be returning from an eight month deployment in the next few weeks and we will be having a party the night before homecoming for all of the spouses and family members. There will be snacks and goodies and door prizes. I have donated this painting and it will be given away as one of the door prizes. There *IS* a full video tutorial, but due to an editing NIGHTMARE, let me repeat... NIGHT. MARE, I have been unable to get the video processed in time to share it with you. I AM working on the problem and I will get the video added as soon as possible. Until then, please enjoy this written tutorial :)
Since I am creating a series of these 'HOME' paintings, the process for creating the background will be basically the same for all of them. I layered on torn sections of sheet music, book pages and scrapbook paper, painted the entire canvas with Titan Buff and blotted off the excess. I also aged the entire canvas with a wash of Van Dyke Brown and water.


I applied modeling paste to the corners of the canvas and stamped into it with a key stamp. I then added Antique Copper paint to the same stamp and and added it in random places over the entire canvas. I aged the entire canvas with a wash of Van Dyke Brown and water, then I added some Pure Gold paint to the raised bits of the modeling paste debossed keys.


I printed out my text, aged it with Vintage Photo Distress ink and then painted the edges with Pure Gold acrylic craft paint then glued it on using Matte Medium. I painted a strip of lace with Antique Copper then with Pure Gold and attached it to the canvas with clear tacky glue.

I printed out the ship and deployment information and attached it to chipboard to create a commemorative plaque for the painting. I aged the plaque with Vintage Photo Distress Ink then coated the entire thing with Glossy Accents. I hit it with the heat gun to create a rippled effect in the glue then once it was dry, I attached it to the painting with clear tacky glue.


I created the vintage door handle and plate, as well as the key using Creative Paperclay® and let them dry completely. I then coated all of the pieces with Black paint and with a dry brush I applied Antique Copper paint to the raised areas for definition. Lastly, I attached all of the pieces to the canvas using E6000 glue.
 I am very proud of this piece and I really hope the winner of the drawing likes it as well. If you are interested in purchasing a customized "Home" painting for your homecoming, please email me at ediecournoyerartist@live.com
You can join me every Tuesday for my LIVE SHOW and don't forget to check out my blog.
See you next time!