Showing posts with label Snowman. Show all posts

Wednesday, December 2, 2015

Winter Snowman Picture Frame by Tamara Dozier


Hello everyone! This is Tamara Dozier and I've rejoined the Design team. I'm trying something new ... Videos!  This first one covers the sculpting process to create your own Winter Snowman picture frame. Hope you enjoy!


Supplies for Winter Snowman picture frame

Creative PaperClay®
Dollar store picture frame
Xacto knife
Various sculpting tools
paint brushes
Rolling pin
white glue
Acrylic paints in your choice of colors
Glitter


Friday, November 20, 2015

Altered Altoid Tin with Creative Paperclay® Figures

I'm having great fun altering tins—sardine cans, Altoid tins, etc. Creative Paperclay® is perfect for making the figurines that I include in them.

To begin I used pliers to gently open the hinges so I could remove the lid. Next, I spray painted the outsides of both the lid and bottom of the tin.

While the paint was drying, I created the snowman and tree using Creative Paperclay. The snowman is two small balls of clay with a wire support holding the head and body together.
Beginnings of a snowman
Wire support between head and body
To make the snowman's smile I cut away part of a soda straw, leaving just the right sized curve to press into the damp clay to leave the impression of a smile.

His hat was made in two pieces—a small flat circle and an egg-shaped pieces that I scored for the crease in the top of the hat. Looks a bit like a coffee bean, doesn't it? I attached the hat after is was dry and painted.
.

The tree was made by forming a cone of clay. Then, starting at the top of the cone and working round and round, use the tips of a pair of small, sharp scissors to make a series of snips. Gently lift these "branches" to form the tree.

Cone for tree
Newly formed tree
While the clay pieces were drying, I coated the inside of the lid and bottom of  the tin with Duo Adhesive and mica flakes. On the inside of the lid and outside cover of the tin, I added Christmas prints using double-sided adhesive along with embellishments. I cut the lamppost that is behind the snowman on my Zing electronic cutter.

Cover of the altered tin
Lamppost
Here's a close up of the snowman and tree—already for a Christmas display.


Carole

Friday, December 19, 2014

Photobooth Prop Phrenzy with Rachel Whetzel

Happy HOLIDAYS, Creatives!! Rachel Whetzel here! I've been a busy elf this season, helping with some projects for the Christmas Party at my husband's work. One of the larger projects we're doing, is creating a photobooth area. Employees can get dressed up, and be silly while taking their pictures at the party! We've made a TON of the props, some signs, and fun festive frames, but I wanted to do more than the usual paper cut outs on a stick for a few of them. I got busy making THESE using Creative PaperClay® Modeling Material. After our party, I'll share more of the projects that weren't Creative PaperClay® related on MY BLOG.


This is my last post here on the blog for a while!! I'm taking a break from some design team commitments, and spending HUGE amounts of time at basketball games. Thank you all so much for your support, and for the love you show each of us designers here! I have enjoyed being here so much. Of course, I won't stop creating, farming and generally misbehaving, so if you'd like to keep up with me on my other interweb haunts, I would love that. (links at the end of this post) Now, ON TO BUSINESS! 

WHAT YOU'LL NEED to make your own photobooth props:
  • Creative Paperclay®
  • Paints and Brushes I use Folk Art acrylic craft paints and Krylon Spray paints
  • Foil
  • Empty and clean large can
  • Headbands
  • Various decorations... (holly, berries, hat band ribbon, metal pipe cleaners, bells
  • Sturdy small dowels
  • Drill (I use a hand drill) 
  • Glue (I used E6000) 
Gather your supplies for your creations, and get cracking smooshing and shaping your foil into shapes! I created the core for my carrot nose, rudolph's nose, and Frosty's pipe. 


Wrap and twist your foil around a headband to create the core for your antlers.


Cover your pieces with Creative PaperClay®, and place them in the oven to speed up your drying time. I usually put mine in at about 190 degrees F. 


To add stability to my pieces attached to headbands, I added a layer of Creative PaperClay® to the underside of the headbands. Here they are, complete with paint. 


Once your pieces are dry, sand them, and paint them, and add your decorations! I put some holly, berries and a hat band around the hat:


Some orange spray paint, and shading using stain to bring out the "carrotness" of my carrot nose:


Some red paint and glitter to Rudolf's nose:


And some bells and pipe cleaners wound into coils to his antlers. I also painted the headband red, to imitate his halter. 


Once everything is painted and decorated, add your dowels by drilling a hole into the pieces that will need a dowel, and glue them into place. Now you're READY FOR ACTION!! 


Thanks for reading! I have loved every second of my two years here as a Designer for Creative PaperClay® and I hope to be able to return in the future!! In the mean time, if you'd like to keep up with me, and see more of what I'm up to and keep up with me, I'd also love it if you'd visit MY BLOG and Subscribe! You can also find me on FACEBOOK!

Friday, November 21, 2014

Winter Skeleton Snowball Snowman by Rachel Whetzel

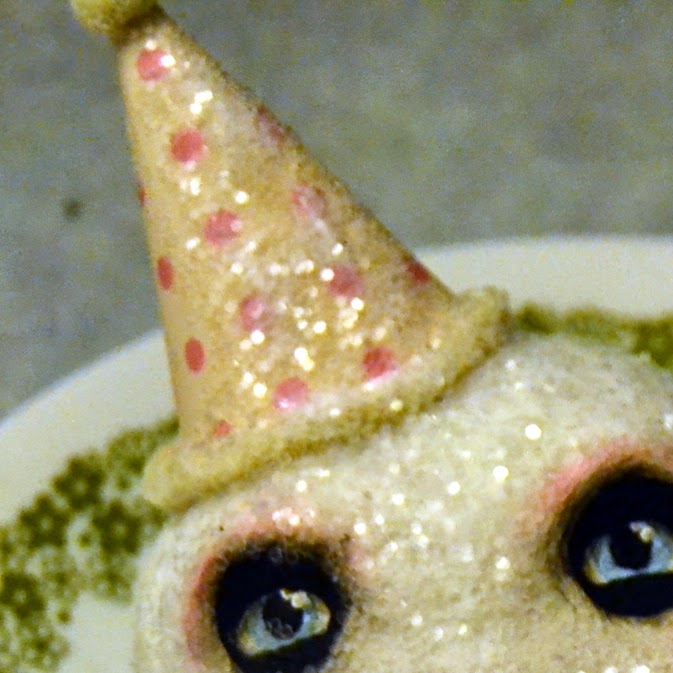
It's been CHILLY out in the world, Creatives!! Rachel Whetzel here! All the snow talk on line is making me feel very Wintery, so today, I'm sharing a little twist on a classic Winter icon, using Creative PaperClay® and a LOT of glitter.
I have made a few Skeletons using Creative Paperclay®, but never (I'm not sure WHY...?) any SNOWMEN... so I got started the other day, with a vague snowman/snowball idea in my head. As I worked, I changed directions a little bit, and ended up creating a Skull snowball. I may be a bit partial, but I really REALLY like how she turned out!


WHAT YOU'LL NEED to make your own Snowball Skeleton:
  • Scrap Paper and Tape (I used some old homework from the boys, and some Washi that isn't my favorite) 
  • Creative Paperclay®
  • Paints and Brushes I use Folk Art acrylic craft paints and Krylon Spray paints
  • Pastels 
  • A 3X3 inch (or so) piece of patterned paper. 
  • Yarn or metal pipe cleaners
  • Glue. I used E600 and Crafter's Pick the Ultimate
  • Glitter. I used an old jar of clear glitter I purchased at the thrift store, but you can get it at any crafting or school supply store.
  • Fake Holly or other collar decorations
To start, I create a core for my snowball. Using a core helps me use less clay, and also speeds up dry time, because innards don't need to dry! To create my core, I used a couple pages of old homework from my boys, and rolled them up into a ball. Then, to keep the shape, I wrapped the papers up in some of my less favorite Washi tape. Not because it needs to be Washi, but because that's what was close, and I was lazy. Any tape will do. Masking is nice too, because it's easy to shape as you tape. 


Once I had a good basic shape, I pressed Creative Paperclay® over the top, and created a more uniform roundness to the snowball.


When my shape was satisfactory, and while my clay was still wet, I layered on some more clay and shaped it into a face. You can add fresh clay to dry also. In both cases, you should use a bit of water on your finger tips and wiped onto the location you're adding new clay. This helps the two surfaces join well. Some rolled clay for the eyebrow bone, a rolled piece for the nose, and balls at the cheek and chin. Blend all the edges, and shape. I used my fingers for the whole process.


I also added a small round of clay at the bottom of the ball, to help the piece sit in one direction when it's resting on a counter or shelf.


I popped my piece into the oven at a VERY low temp (190 degrees) to speed up my drying time. Then I painted it with white gesso, and added the face of my piece. When I was working on the mouth, I originally tried to make an actual skeleton mouth, but I realized the piece would look more like a snowman if I used "coal" dots instead, so that's what I ended up with. For the eyes, the skeleton look is achieved by painting the black for the hollow eye sockets, and then painting eyes in over that. Notice that the nose is also similar to a skelton's. I think that is key to letting people know this isn't your ordinary snowman. Last, use your pastels to add a rosy glow to your skeleton's cheeks, brow bones, "nose" and chin.


Blend the eye socket area where the white meets the black with some shading. You can use your pastels for this area too. 


Now you're ready for your GLITTER!! I used Crafter's Pick, the Ultimate for this part. I kept the glue thin at the front of the face, and made it thicker around the sides and forehead.  I didn't put any glue on the eye area.


Sprinkle your glitter on, and while it's drying, get to work on your HAT! To make my hat, I used a large glass to draw a circle, and cut it out of my patterned paper. Then I folded it in 1/2, and rolled it into a cone. I cut a little of the excess off, and taped the inside seam of my cone to hold the shape. Then I glued the outside seam. I tied some yarn, cut the tip of the cone to create a hole the strings would fit through, and pulled the "pom" into the top of the hat. Then I glued the same yarn around the "bottom" of the hat, on the outside of the paper. Once that was dry enough, I glued the whole thing down onto my snowball snowman's head. I also added some glue and glitter to the top to make the hat look a little frosty! All of this gluing was done using Crafter's Pick. 


To create the "collar" on my snowball, I used some vintage Holly leaves and berries that I had saved from a thrift store find I have had stashed for years. For this part, I used my E6000 glue, because I wanted to make sure the plastic holly leaves and berries stayed in place well. 


Once that glue was also dry, I painted just a bit more glue (Crafter's Pick) onto the leaves and berries, and frosted them with some glitter! 


Here she is again! I feel like she needs a name... IDEAS!? 


Thanks for reading! If you'd like to keep up with me, and see more of what I'm up to, I'd also love it if you'd visit MY BLOG and Subscribe! You can also find me on FACEBOOK!

Friday, November 7, 2014

First Friday Fan Day, November 2014 with Rachel Whetzel

Happy NOVEMBER, Creatives!! Rachel Whetzel here! It's First Friday Fan Day, and we appreciate you sharing all your creations using Creative PaperClay® with us!
I hope you hop over to the links I'm sharing with you today, and let your fellow Creative PaperClay® lovers know you saw what they shared too!


FACEBOOK
Willowing shared what's on her mind these days.
Shauna shared a Day of the Dead bust she made.
Cindy shared this adorable pumpkin.
This totally creepy Frankenstein!! 

PINTEREST
This ADORABLE primative bunny rabbit is for sale!
Make yourself some beautiful ornaments.
This fairy tutorial would make a great elf for Christmas! 
Store your Christmas treats in this chilly container!
I love this WIP
MUST make some of these whimsical snowballs!!

HELP ME FIND YOU!!
Use the hashtag #CreativePaperclay on all your social networks. Be sure, when using Facebook, that you make your posts and images using the Creative PaperClay® hashtag are set to public, otherwise, I won't be able to find them. You can also share your projects to the Creative PaperClay® FACEBOOK PAGE. Each month, I'll browse the interwebs looking for projects from YOU, that I can share here! Be featured next month! START SHARING NOW!!

Thanks for reading! If you'd like to keep up with me, and see more of what I'm up to, I'd also love it if you'd visit MY BLOG and Subscribe! You can also find me on FACEBOOK!

Friday, October 3, 2014

First Friday Fan Day October 3rd with Rachel Whetzel

Hello, once again! Rachel Whetzel here! It's First Friday Fan Day, and we appreciate you sharing all your creations using Creative PaperClay® with us! 
I hope you hop over to the links I'm sharing with you today, and let your fellow Creative PaperClay® lovers know you saw what they shared too!

FACEBOOK
Maria shared her ART DOLL page with us!

PINTEREST 
Holy Toledo!! There were a TON of pins this month! Check them out!! 
THIS little trick or treater is adorable. 
These WEE FOLK feel like FALL to me! 
Get your Winter decorations started early with these SNOW MEN.
Or try your hand at making one of THESE Frosties! 
These CHRISTMAS ORNAMENTS are beautifully intricate.

HELP ME FIND YOU!!
Use the hashtag #CreativePaperclay on all your social networks. Be sure, when using Facebook, that you make your posts and images using the Creative PaperClay® hashtag are set to public, otherwise, I won't be able to find them. You can also share your projects to the Creative PaperClay® FACEBOOK PAGE. Each month, I'll browse the interwebs looking for projects from YOU, that I can share here! Be featured next month! START SHARING NOW!!

In OTHER NEWS!! 


Our Halloween LINK UP is nearly here! Be sure to visit the blog, and add YOUR link to the party! 

Thanks for reading! If you'd like to keep up with me, and see more of what I'm up to, I'd also love it if you'd visit MY BLOG and Subscribe! You can also find me on FACEBOOK!

Tuesday, September 9, 2014

Winter is coming! Snowspook full tutorial by Gloriann Irizarry


It getting colder and colder every day in the beautiful Upstate New York. Winter is coming!
All these cold mornings sure had inspire a new twist to the classic winter icon character.
So let's welcome the Snowspook bygloricom and now it is time for you to see how this project was completed. Now let's grab a bag of Creative Paperclay® and be ready have fun and sculpt.
I


Materials

Creative Paperclay ®
Sakura 3D Crystal Lacquer 
Scissors 
Aluminum foils
White Gesso
Acrylic Paints by Martha Steward (Pearl baby blue, pearl orange, glitter sealer)
Acrylic black pearl by FolkArt
Glitter 
Felt Snowman hat
Strip of fabric for scarf
Fake snow 
11X14 blank canvas
Clear spray sealer 
Aleene's Fast Grab Tacky Glue
 Heavy duty paper towels ( Bounty or Viva works best)
Wood stick for hands from nature. 


For a good 3D wall art you need to begin with the armature. the best way to make it is with aluminum foil. Star sculpting a rough shape of the snowman. It doesn't have to be perfect since this foil will be later remove to make the piece lighter and hollow.


Here is the approx shape and size for the 11X14 canvas of my 3D wall art.


Roll your clay to no less than 1/4 inches thickness. If rolled too thing it will difficult you  to add more clay since the dry clay will be get wet and soft with the adding of each new layer of wet clay .


Roll a big sheet. This will facilitate you the application for the first layer of  the Snowspook.


Cover the aluminum foil core and try to shape it to the rough idea of your Snowspook.


Set aside and let it dry. Trick to faster drying is a NuWave oven to cheat a little. This air blowing oven in a low set temperature will  dry paperclay in half the time. 
Make sure the first layer is completely dried before adding any new layer . You will know when it it crispy to the touch and the color is much much lighter.


If you feel comfortable with your sculpt skills you can remove the aluminum foil now. If you want to have a more solid piece to work the final details feel free to leave it in.


Expose the hollow piece check for any holes or thin patches and add more clay from behind to strengthen the piece. 


Now remember to work the details in layers and always listen to the clay. Yes the clay will tell you when it need to be dried before another layer is added . You will star to notice your piece getting smoochy and too soft to handle . Stop there and let it dry.


I added some of my belly and face details. It doesn't have to be perfect since these enhances and gives character to any Snowspook creation.


 Leave the teeth for last. It will make a lot easier to sculpt them in place and add more details to them.


Just check that the belly are the shape you want and correct any detail you feel it needs a little more clay or remove any excess with your craft knife or sand it off.


Sand it and have in mind the sanding doesn't have to be perfect baby bumb smooth. 
Being rough is what snow is all about. Also acrylic paints have a hard time to adhere to smooth Paperclay surface so give it little roughness to adhere to better


I do like to add a cover base of Gesso . Gesso will seal the Creative Paperclay® and will not need so many layers of the Acrylic paints for the details. Let the Gesso dry completely.


After the Gesso is all dried we can dilute a little of the Martha Stewards acrylic light blue paint and lightly cover the entire Snowspook and let it dry.


Now that is all dry lets add the Martha Stewards acrylic pearls orange paint to the carrot nose.

Dilute some of the Black pearl FolkArt acrylic paint with lots of water and with some wet paper towels wet it in the watery paint mixture and lightly dab here and there to give the old age to the snow. For best result use  Bounty or Viva since they are more resistant under water situations. 


For the eyes use the dry brush technique. Wet the paint brush and remove any excess paint off in a wet paper towel then lightly dab the swirls little by little with the black pearl FolkArt acrylic paint. 
It might need more than one layer depending on the effect you want you Snowspook to have.
Use some of the water black paint to accent the teeth too. Sealed with a coat of the Martha Steward Glitter paint. 


To achieve a more Glassy eye look and wet mouth feel. Use the 3D Crystal Lacquer on the eyes sockets once the base eye job paint has dried.


Now do not worry for the fade look the Sakura 3D Crystal Lacquer will dry crystal clear but this will take some time. In the mean time let it dry completely flat on his or her back.


The canvas doesn't have to be complicated. A simple Aqua blue with splashes of baby blue will do.

Just paint the canvas in a white base and apply big drops of  different tones of blues and once your done with all the dots use a big soft brush and use a one direction stroke every single time until your satisfy with the base. Let it dry.


After the canvas base paint is dry. Spray heavily with the clear sealer until is really wet. You will need the extra sealer to hold the glitter and fake snow in place with out the need to gluing it in place .

Now have fun glittering the canvas and adding has much fake snow you want in it before the clear sealer dries. Now don't be shy have fun with your glitter and feel free to make a mess. 
This is my kids favorite part. 


While the canvas dry we can work with the different wood stick to see which one will look best for hands. Cut trim and measure the lenght you want your Spookman to have. Drilled the size holes and secure the sticks in with the Aleene's Fast Grab Tacky Glue.


Glue the hat at this stagewith Aleene's Fast Grab Tacky Glue so it look best once the Snowspook is glued to the canvas.


Use plenty of Aleene's Fast Grab Tacky Glue. 
Not to worry clean any excess has best you cant but this glues dries clear so it works good.


Add the fabric strip to the Snowspook and with a few drops of Aleene's Fast Grab Tacky Glue position the fabric to give the feeling is moving by the winter breeze freely in the canvas.


Find any accessories you want your Snowspook to hold and place it in. Found this big Glass heart necklace and love to add it. Now it looks like this spook froze your heart . 

Let check the photos of the different angles for you to enjoy the 3D wall art effects and why I always love the result I  get working with blank canvas and Creative Paperclay®


Making Spookman could be the best way to welcome this early winter weather. Feel free to make has many has you want in any shape or size. They easy and fun to make. With just a little practice and determination you will see your dreams become true.


Feel free to leave me any questions in the comments below this post or click here to  email me.

Visit my web page or use to smart scanner to get there on your smart phone devise.
www.byglori.com

Have a very bless day and remember to always have fun while crafting. 
Sincerely,