
To begin the project, we rolled out a ball of Creative Paperclay® to a thickness of 1/8", and a little larger than the leaf we were using. Place the leaf vein-side down on the clay. With one motion, roll the rolling pin over the leaf, using plenty of pressure to capture the veining. I started at the base of the leaf and rolled all the way to the top without stopping.


Lay the clay leaf into the bowl, and gently form the well of the bowl. I let my leaf bowls dry longer than usual before turning them over. I didn't want to risk the bottoms collapsing by flipping them over too soon.

After the pieces were completely dry, I began the gilding process. The first step was to seal the clay surface with matte PPA. Next, was a coat of Duo adhesive. Duo goes on a milky white liquid, but when it dries clear, it provides a very tacky surface for the gilding. I followed the steps in this short video to gild each of the bowls.
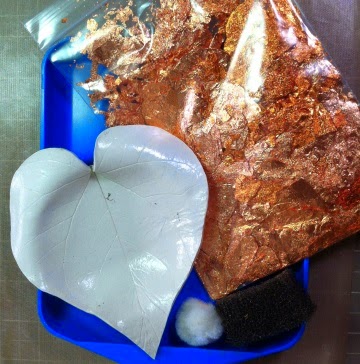
Gilding is a very forgiving process. Here you can see that I missed applying the Duo adhesive to a spot. No problem—I just painted Duo over that area, let it dry, and gilded again. I gilded the top and bottom of the bowls in two step, because you want to avoid touching areas that are coated with Duo.

Hint: Since the Duo is milky white, it's hard to see just where it has been applied when you're gilding white surfaces—like Creative Paperclay®. I found a way to avoid missed spots in the future. Just add the tiniest spec of acrylic paint to the Duo. Now you have tinted Duo, and you can see were you've applied it.

|
|
||||
| Table Cell | Table Cell |


1 comment:
Love this! Great job!
Post a Comment