Showing posts with label Sandee Setliff. Show all posts

Monday, July 4, 2016

Fairy Garden dragonfly


I have really been enjoying making things to add to my fairy gardens, yes, that's plural, I actually have another one called Meadow's garden and she is my little artist fairy. I felt bad that she didn't have a friend like Petal does in her garden, so I decided a dragonfly would be perfect.
Meadow is sporting the U.S. flag in her garden in honor of the 4th of July!

I began by 
1. rolling out my Creative Paperclay® 
2. next I printed out a dragonfly and cut it out, then traced around the image 
 3. Next I used my scissors to cut it out.

I took some Paperclay and built up his body around the wire legs and let him air dry for 48 hours.

One of the most important steps is coating my fairy garden pieces with Paverpol which really hardens the pieces and even though they are on the balcony, under the roof, they are still outside, and get misted with water about every day. They are holding up beautifully too! After the Paverpol dried I then sprayed him with some spray inks and again let dry.

I did give the spray inks a coating of spray varnish, then attached him to a pod thingy ( haven't a clue what that is ) and stuck him in my garden. His legs are wrapped around the stick, no glue needed.
“”The dragonfly spiritually embodies the stripping away of negativity that holds us back, helping us to achieve our dreams and goals. Dragonflies are the keepers of dreams, the energy within that sees all of our true potential and ability. Dragonflies inspire spirituality and creativity, they help us on the path of discovery and enlightenment. They remind us that anything is possible.” – Beauty and the Green

Monday, June 6, 2016

Fairy Garden Accessories part II

Hi everyone! I've been making some more things for my Fairy Garden, and I am hooked with how much fun Creative Paperclay truly is. The more I play with it the more entertaining it becomes!
This week I added a mushroom door and a mushroom welcome sign...have I gone overboard on all the mushrooms? Can you ever have too much cuteness? I don't think so!

The first thing I did was to measure where my door was going to be placed and draw out the design.

Next, I rolled out some of my Creative Paperclay onto a texture plate that I first conditioned with a tiny bit of Pam spray to make sure it released easily. I love the wood grain texture!

I cut out the paper pattern that I drew and traced it directly onto my paper clay so I would get the exact measurement.  I love how you can use scissors to cut out your designs too, so easy!

I addedsome trim around the door by rolling out a "log" and used water on my paint brush to attach it to the door. I moved my piece to my designated baking sheet so it would be ready to go into the oven.

While it was still damp I placed the doorknob into the door but removed it before it baked. It's a brad that I will paint to match the mushrooms...is there such a thing as too much polka dots?

In my excitement I forgot to take a picture of me making the mushroom top or painting it for that matter, honestly, it was all happening so quick and I was having so much fun that I couldn't wait for it to all come together. BUT I did remember to get a photo of the wire I placed in the backside of the mushroom cap, this will help give it stability and I won't have to worry about it being top heavy.

I used anything I had on hand to "bend" the bottom part of the small mushrroms and let them dry a bit before I put them in the oven so they would maintain that shape. And once everything came out of the oven I coated them 3 times with the Paverpol product. 

Here are my little pieces in their Fairy Garden. You might remember it all began with the snail and the crystal ball that I made a couple of weeks ago. ( You can visit that post here ) I do water the garden and mist the moss and so far everything is holding up very well, although please note this is not sutting directly outdoors but is on a covered balcony. 

Thanks for stopping my!

Monday, May 2, 2016

Fairy Garden accessories


I love my Fairy Garden and creating accessories for it is the most fun. I decided that my Fairy needed a friend so I created a darling little snail all dressed up in sparkles and flowers to sit with her in the garden and keep her company.

I began my rolling out a coil of Creative Paperclay with my hands. I found I got a smoother roll by using the palm and heel of my hand versus my fingers. Both of my projects use this method.

Then I simply wound the rope shape into a spiral. ( I should have smooshed it together a bit more, you can see in the above picture a gap between the clay because it didn't make full contact and separated a little when it dried. )  While the clay was still damp I made indents for the eyes and holes for the antenna. I removed everything and let it dry. 

I also made her some flowers using a flower mold for the sides of her shell and a larger one for her hat and brushed on some water to adhere them to her body and left them attached to dry.

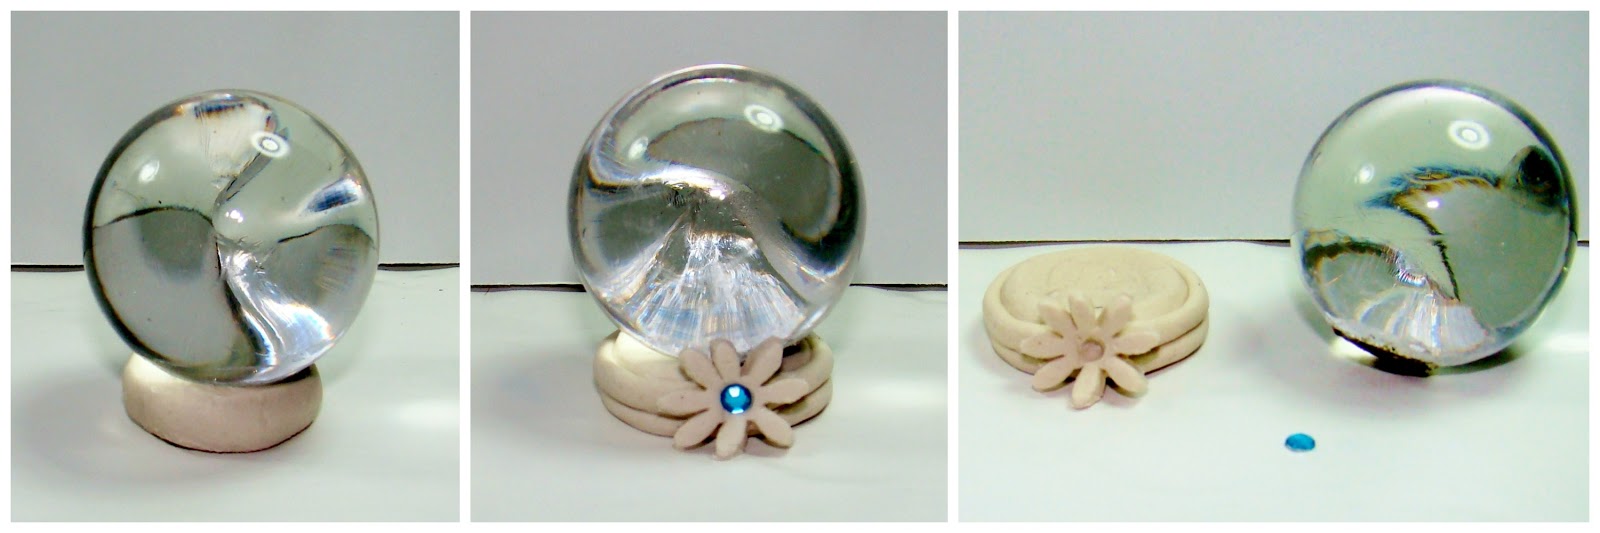
Next, I wanted to make a base for the gazing ball which is really a broken lamp finial. I've had it in the fairy garden but the darn thing kept rolling around and never stayed put, so I thought a base would be the ticket.

First, I made a ball of clay and pressed the globe into it to create the concave surface for it to properly rest upon and then used another rope to wind around the base and added a flower. Removed the crystal to let everything dry.

Once they were dry I coated both pieces with Paverpol to harden them up and even though they would sit outside on my covered balcony they would still need some protection from the elements.

Then the fun part of painting them, which really brings them to life.
 Creative Paperclay takes very well to acrylic paints.

Thank you so much for stopping by and I would love to see you fairy creations on my Facebook page


Monday, April 4, 2016

Creating with accent pieces

Hi everyone! 
My project today is a wall hanging using Creative Paperclay ivy leaves and word tiles glued onto a corrugated substrate.

The first thing I did was to cut out around the grass and butterfly images and remove the top layer of cardboard paper revealing the corrugated ripples underneath. Then I made some ivy leaves from a punch mold, painted them with a mixture of ColourArte Primary Elements and DecoArt's Decou-Page and adhered them to the card board with a dimensional glue.
The dimensional glue really sinks down into the ripples to gives your paperclay accent pieces durability.

Next, I used a metal ruler to slice some layers from a chunk of Creative Paperclay and then cut the layers up into tiles. I used rubber letter stamps to press the words into the Paperclay while it was still moist and set the tiles in my oven to harden. ( I like to set mine in the oven while it is cold, then turn it on to 275, as soon as the preheat buzzer goes off I turn the oven off and leave it in there overnight. )

The next day, after they are hardened I trimmed any ragged edges with my scissors and used an emery board to smooth down any rough edges.

After painting the tiles I adhered them with the same dimensional glue to the corrugation.

I love how the  Creative Paperclay really shows all the small details so well.

Thanks for stopping by!

Monday, March 21, 2016

Sandee's suggestions

Well, it's time for...what have you learned Sandee that another beginner might enjoy?

I have been learning and enjoying how flexible and forgiving Creative Paperclay really is. When I was working on my Book of Life canvas, I used a cookie cutter mold to make the bunny rabbit in ...which is when I ( by accident mind you ) discovered that Paperclay is quite flexible. 

Originally I made 2 rabbits from the mold ( just to make sure I had an extra in case I messed one up ) and when they both looked good enough to use I decided to stack them together to create some dimension and that's when I discovered I had pulled an ear slightly off when removing it from the mold.
 
(The bunny on the left has the "pulled ear" and I drew a line where the other ear goes so I would know where to put my glue, except I decided to stack them differently but you get the idea.)

But joy, joy, it looked great because that gave him a 3-D appearance!
( I love accidents, don't you?)

Next, I noticed that one of the feet had warped a little while it was drying and I love how wet glue just softens up the Paperclay enough so that you can clamp them together and it straightens itself out.

A little sanding and painting and he was ready to hop down the easter trail!

Hope everyone has a "hoppy" Easter!

Monday, March 7, 2016

Book of Life

Spring is getting closer and since it's too early for spring flowers I thought I would create my own by making this mixed media wall hanging using my Creative Paperclay. The first thing I did was cover a small canvas with the Paperclay and once it was dried I painted the background and book edges with some ColourArte Primary Element Arte Pigments that were mixed with a gel medium.
I love that I learn so many things when I am creating with my Creative Paperclay, like patience and what I might be able to use as a tool. Trying to duplicate the paper edges of a book perplexed me at first. Finally, after letting the clay harden for about 2 hours I came back and scraped the surface with an old tootbrush and it worked like a charm!

The flowers were all made from molds and once they dried I layered on some ColourArte Twinkling H20's and then glued a bead into the center of each flower. I love how the look so glossy, almost like clay that had been dried in a kiln!

I also experimented with Paverpol in bronze to make the bookmark. I admit I was intimidated with this product but I was amazed at not only how easy it was to use but how well it worked! Although the ribbon hanging from the bottom didn't have to have an application of it, the top part did or the ribbon would flop over onto the front of the book when it was hanging on the wall. So I made a slice into the side of the book where I wanted it to go...then painted on the Paverpol and laid the ribbon ends into the slot and let it dry. Oh my word, again I admit I was doubtful it was going to be stuck into that small slot, but YES, it is! lol

Another texturizing tool is your handy dandy kitchen plastic wrap, perfect for adding a leather like surface to the spine of the book. It's easier to do this by rolling your clay onto a sheet of plastic wrap which will automatically wrinkle and place those onto your clay. OK, so I admit I discovered this by accident, but hey, it worked out beautifully!

I just love my little book I created by covering a canvas, you can lay it on a surface or display it but hanging it on a wall. It's full of texture and color and just makes me smile.

"Despite the forecast, live like it's spring"
Lily Pulitzer

Monday, February 1, 2016

Sandee's bibliophile magnet

While collecting refrigerator magnets from tourist locales use to be a souvenir enthusiast's hobby of mine; I have turned it into making my own art magnets. Sometimes they are motivational and sometimes they are just for fun. Either way I love having a little fridge art of my own.

I used Creative Paperclay to create a bibliophile magnet; for next to art, reading is a favorite past time for me...and owls, oh I do love owls.


I used ColourArte's Primary Elements mixed together with a gel medium to color the Creative Paperclay leaves. After the first coat which then sealed the Paperclay it was very easy to add layer upon layer of wet color to get the depth I wanted.


The owl was heat embossed which worked fantastically and was also another method of adding color and sealing the Paperclay at the same time.

All the steps to making my magnet are in the slide show...you might be surprised to see what the owl is mounted on.