
Easy trick to Creative Paperclay BJD making by Gloriann Irizarry
by Gloriann Irizarry
Hola to all my wonderful followers, collectors and friends.
Yes it is Gloriann Irizarry once more. Today I am revealing wonderful sculpting secrets.
This is my January Creative Paperclay tip.
I been working on my Paper clay Ball Joint Doll for a while and learn many tricks on the way.
Now for all of those who had tried to create one of these art dolls know these know they have tons of little pieces and yes they all need to fit together perfectly.
Well many trial and fail experiments i came across one I l will like to share with you.
A very neat secret to make joints a little easier.
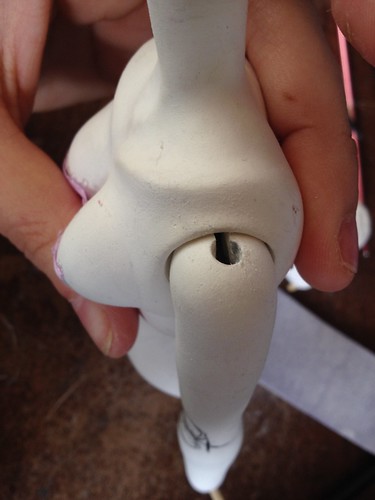
This is what we I'm going to explain. How to make a perfect ball joint in this case I will use the shoulder.
I have a nice set of round drill bits also know has bevelers in different sizes.
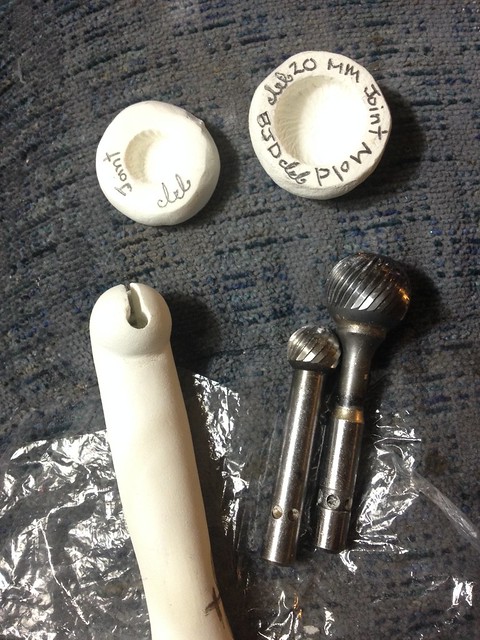
I got mine out of metal but there are some out there that look more like these
Either one will work.
I start by rolling a ball of paper clay and cover it with a small plastic sheet.
Now I press the desired size to create a hard mold.

I use to paper to make sure i can easily remove the drill bit out.
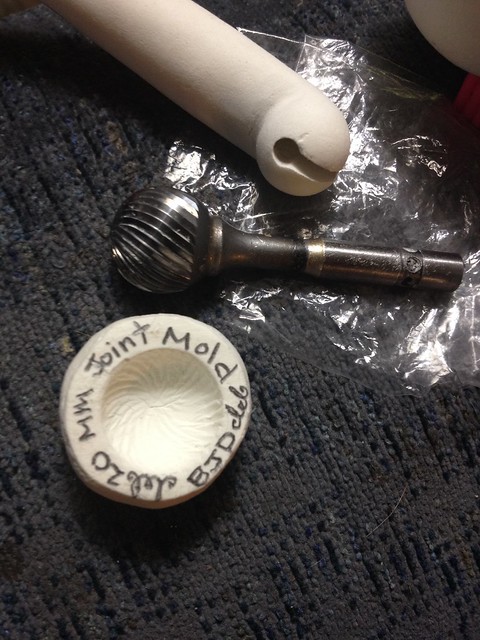
Now let it dry completely before is ready to be use.
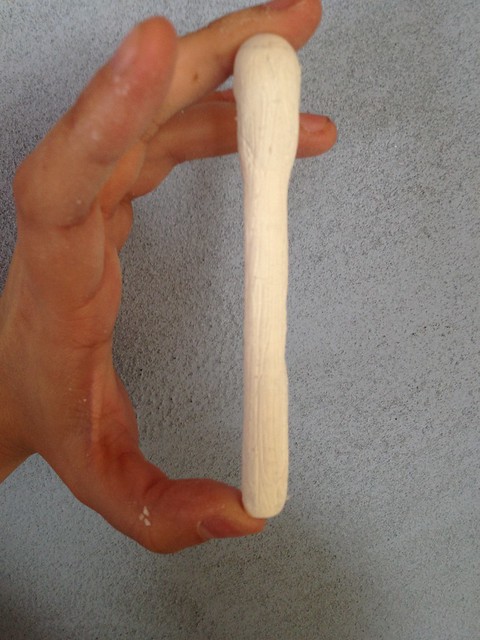
To be able to use the new mold lay a clear sheet of plastic over it.

Grab your hollow arm piece and add clay to the mold and press the arm in while your rotating it to create the perfect size elbow joint.
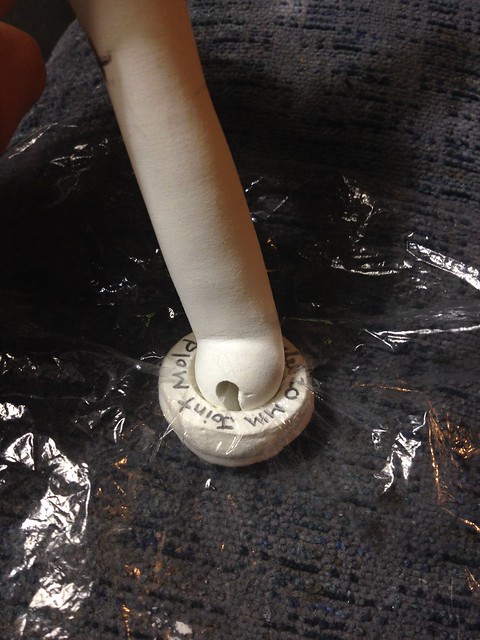
If you need more clay make sure you moist it before adding it to the mold.
Keep moving the arm in circular motions to create the perfect round joint.
Lay it down to dry.

Sand the shoulder smooth. Mark with a pencil the threading and drill the hole from the top to the already hollow arm.
Now use the same size bit and start to drill the shoulder socket to your desired depth.
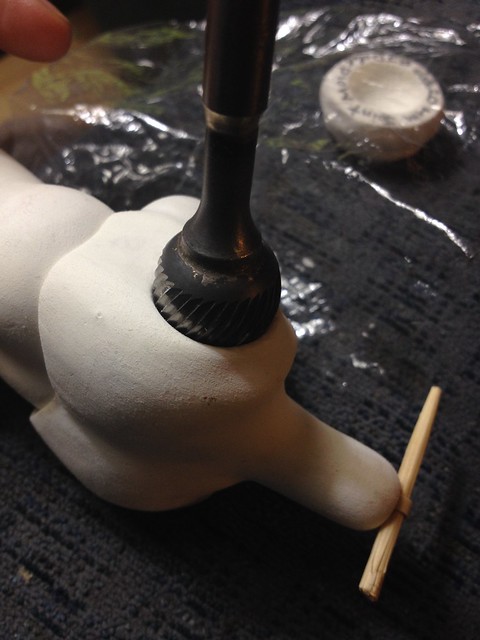
Make sure you check the deepness constantly so you don't over drill the shoulder.
If you do over drill there is no problem you can fill the hole with fresh clay let it dry and start the drilling process once more.
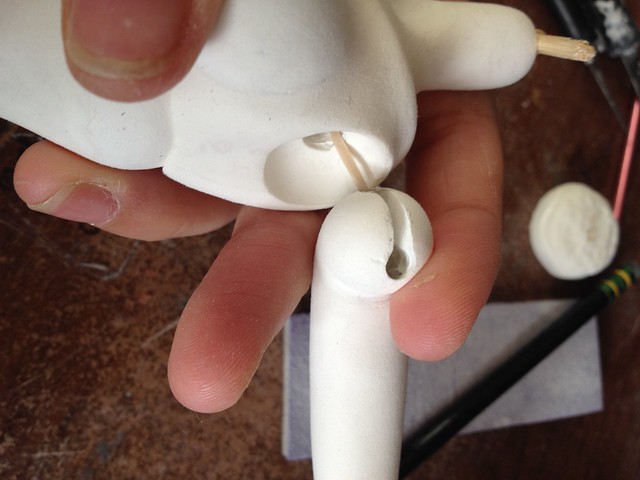
Once you have the desired look and you had drilled the new joint . I use the pencil and mark the drilling points one on the top ans another on the side. I use the hobby knife to cut an open canal between the two holes.
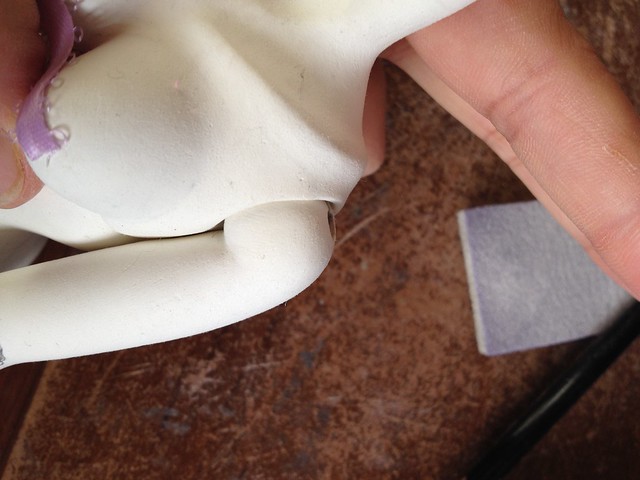
Sand here and there to achieve the look your looking for. Tread with the elastic and try your new joint.
I use this process to create all my dolls joints.

I hope this help. Free free to leave me a comment below or
email me any question at Gloriann@byglori.com
Have a bless day and happy crafting!
Sincerely Gloriann Irizarry


8 comments:
Could You make a doll, without any specific face, but all collected otherwise? I need a head ofcourse, but anpainted.
answer to Irma@noususolmu.fi
This is so neat to see, Gloriann!!
Thank you Rachel. Is so much fun playing with Creative Paperclay and rewarding to see your final piece Thank you Rachel. Is so much fun playing with Creativ Paperclay to see your final piece
Sure can Irma feel free to email me your specifict question i will gladly help you out. Gloriann@byglori.com
Sure can Irma feel free to email me your specifict question i will gladly help you out. Gloriann@byglori.com
amazing post..
Post a Comment