
We started by making the individual pieces that we'd need—two legs and arms, a body, and a head. We used cookie cutters for the body and head. The arms and legs were long snakes of clay. We shaped the hand ends of the arms to form a cone. We flattened one end of the legs to form a foot.

Before our leprechaun was set aside to dry, I pierced five holes on the body piece where the head, arms, and legs would be attached. I also pierced holes through the tops of each arm and leg, and one at the bottom of the head for attaching to the body.
We decided that he needed something more to give him a bit of character, so we made hair and a beard using the clay extruder.

When the pieces were thoroughly dry and before painting, I coated each piece with an acrylic medium to seal them.
Chloe painted the green body, legs, and arms while I did the head, hair, and beard. Painting tip: Don't overwork the paint. Two thin coats are much better than one thick one.
When the paint was dry, we moved on to assembly. Depending on the age of the child you're working with, this could be an adult job, as it was in our case. Chloe handed me pieces and jump rings, but I did the assembly work. Assembly tip: When opening jump rings, use two pair of pliers—one is each hand—to grasp the jump ring on either side of the opening and use a twisting motion to open the ring.
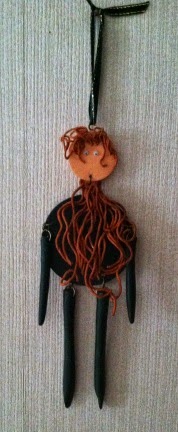
A bit of a haircut and googly eyes completed the face. Here he is!! Hanging in our kitchen.
And here's Chloe admiring her work.

|
|
||||
| Table Cell | Table Cell |


2 comments:
Nice work Chloe!
I just love this..
Post a Comment